


Installing the Twisted Pair PDU
4013399 Rev C
41
3
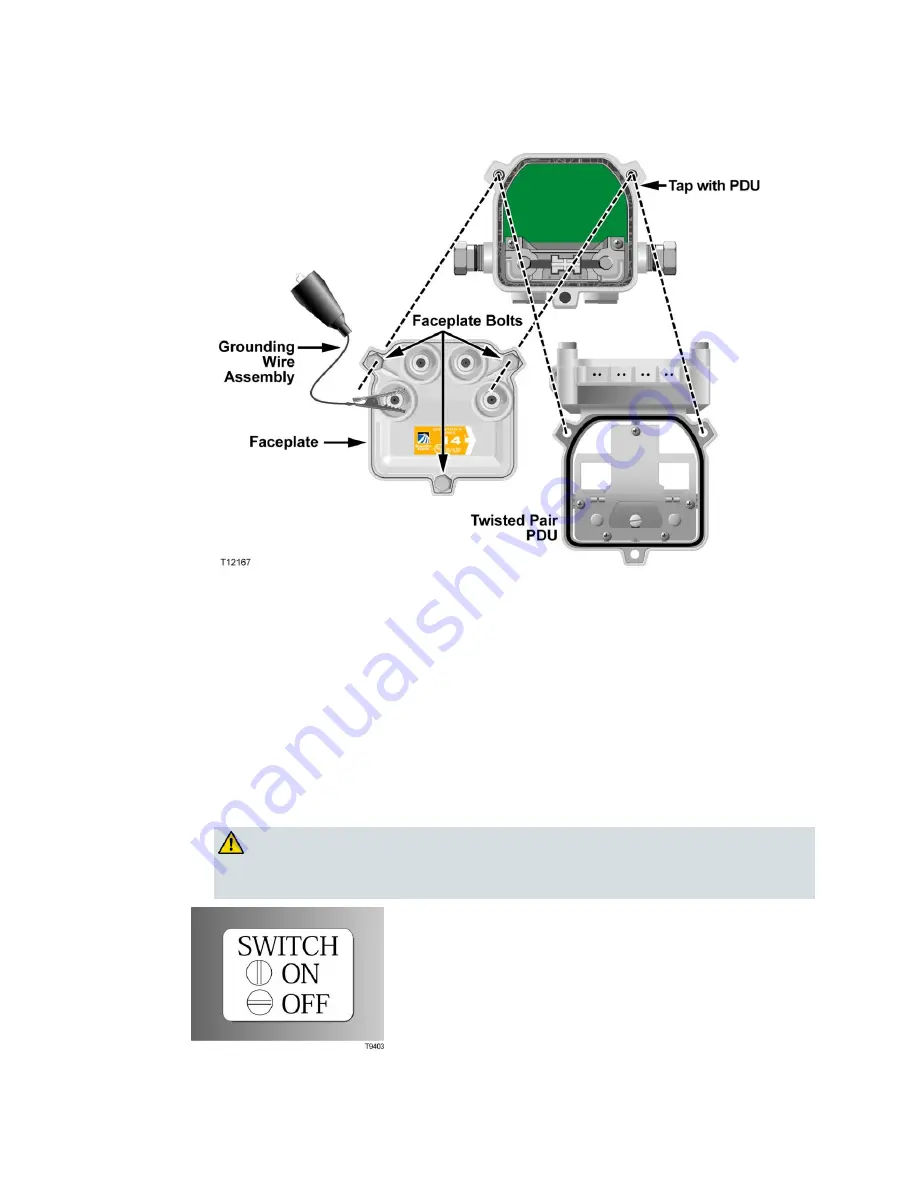
Remove the grounding wire assembly from the PDU access cover bolts and
attach this end to the faceplate drop port F-connector.
4
Proceed to
To Attach the Faceplate to the Housing
(on page 35).
To Attach the Faceplate to the Housing
Follow these steps to install the faceplate to the housing.
1
Carefully install the tap faceplate to the front of the PDU. Using the longer
faceplate bolts, tighten the 3/8-in. faceplate bolts from 50 in-lb to 60 in-lb (5.6 Nm
to 6.8 Nm).
2
Remove the grounding wire assembly.
3
On the desired port, turn the switch from the “OFF” to “ON” position using a
flat-bladed screwdriver. The switches are marked with the port numbers.
WARNING:
Please use extreme caution when turning the switch "ON" and "OFF" to
prevent unwanted AC power transmission on a subscriber loop.
Summary of Contents for Surge-Gap Multimedia Tap
Page 1: ...4013399 Rev C Surge Gap Multimedia Tap Installation and Operation Guide ...
Page 2: ......
Page 33: ...Preparing for Installation 4013399 Rev C 19 ...
Page 60: ......
Page 62: ...Chapter 3 Customer Support Information 48 4013399 Rev C ...
Page 70: ......
Page 73: ......


