background image

Power Up the KVM

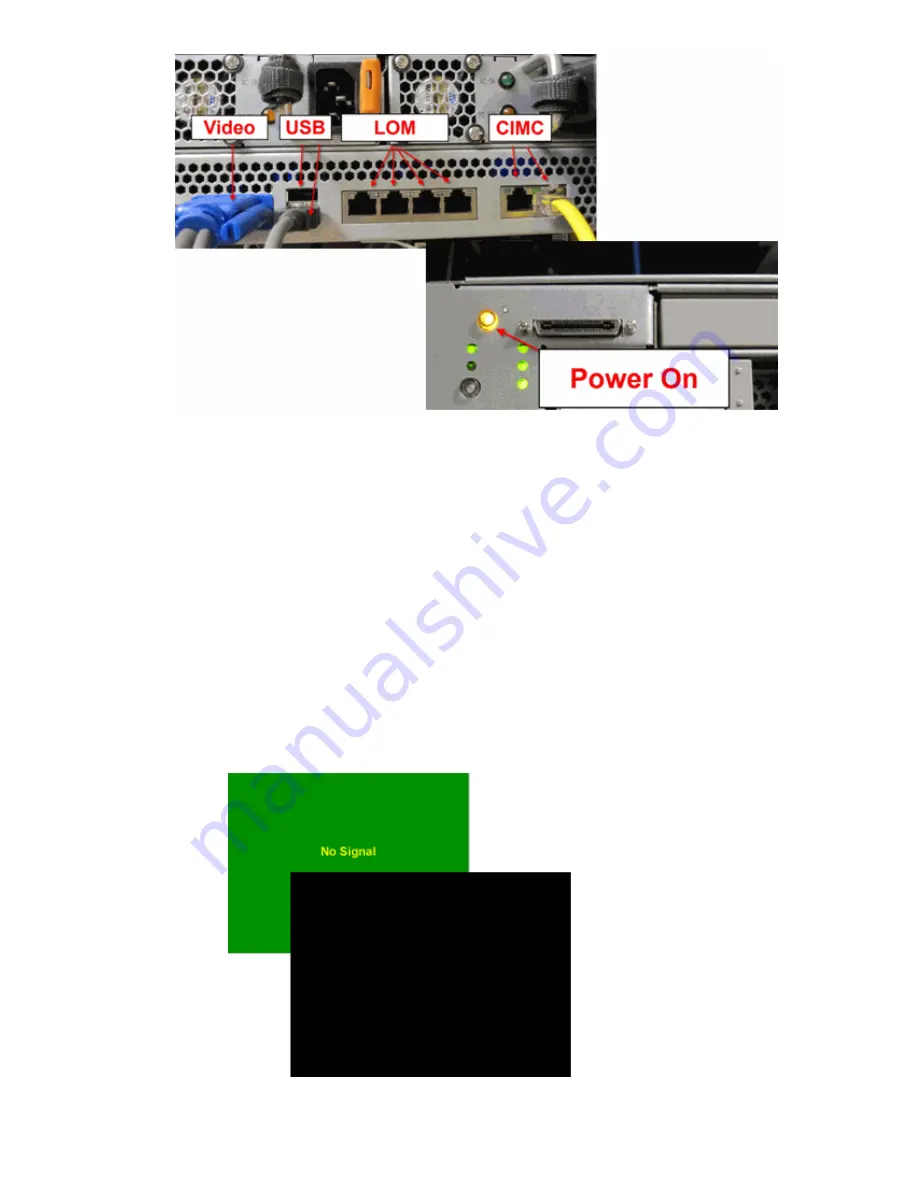
Complete these steps in order to power up the server:

Plug the power cord into the chassis.

Note: 

CIMC initializes system standby (Power Off mode).

♦ 

CIMC is active and can be controlled through GUI or CLI, if you know the IP address.

♦ 

1. 

Depress Front Panel Power:

The Fans begins to spin up.

♦ 

Then POST sequence begins.

♦ 

At this point you can either boot up or begin the installation process.

♦ 

Note that for large memory, models can display a blank screen for several minutes.

♦ 

For C−250If you immediately depress the power switch, you interrupt the CIMC
initialization.

♦ 

2. 

Summary of Contents for UCS 250

Page 1: ...equirements Cisco recommends that you Have a working knowledge of the Cisco UCS C Series Server Blade hardware and software administration Be familiar with UCS C Series Servers Cisco Integrated Management Controller Understand the impact and implications of the different commands described in this document Be familiar with the UCS C Series components and topology Components Used The information in...

Page 2: ...active sessions have full control of the console 2 KVM over IP supports text and graphics modes of the graphics controller and needs no manual setting to view data 3 Graphics modes supported are up to the video chips maximum capabilities of 1600 x 1200 with 16 bit color 4 KVM sessions over Linux may depending on Linux distribution require mouse configuration 5 If KVM responsiveness seems slow many...

Page 3: ...C200 Rear Panel Connection for C200 Server C210 Front Panel C210 Rear Panel Connection for C210 Server 2 ...

Page 4: ...C250 Front Panel C250 Rear Panel Connection for C250 Server 3 ...

Page 5: ...e controlled through GUI or CLI if you know the IP address 1 Depress Front Panel Power The Fans begins to spin up Then POST sequence begins At this point you can either boot up or begin the installation process Note that for large memory models can display a blank screen for several minutes For C 250If you immediately depress the power switch you interrupt the CIMC initialization 2 ...

Page 6: ...s boots press F2 in order to get to this screen Press F6 in order to manually choose the boot device Press F12 for the network boot F8 to configure view CIMC IP While in BIOS you can press F8 for the CIMC IP address configuration and password reset Choose either DHCP or Static config 1 Enter the VLAN tag if needed 2 Enter the CIMC password 3 After you make a change to IP or enable DHCP you can pre...

Page 7: ...HBA CNA if installed Additional NICs LOM Then point a Web browser to the configured CIMC IP address Default username admin Default password password 3 Choose Admin Network Settings and check Settings 4 ...

Page 8: ...In order to revert to DHCP from the Admin tab in the GUI choose Network and in IPv4 properties check the Use DHCP box Reboot the chassis 5 ...

Page 9: ...Monitor your DHCP server to see when the IP is assigned to your MAC Then point to the new IP server Once you logged into the CIMC you can check the network setting 6 ...

Page 10: ...oting information available for this configuration Related Information Technical Support Documentation Cisco Systems Contacts Feedback Help Site Map 2014 2015 Cisco Systems Inc All rights reserved Terms Conditions Privacy Statement Cookie Policy Trademarks of Cisco Systems Inc Updated Jan 08 2010 Document ID 111455 ...

Reviews: