Never remove an I/O module without shutting down and removing power from the server.
Caution
Step 1
Power off the server and then remove the mini-storage module carrier from the server as described in
Replacing a
Mini-Storage Module Carrier, on page 115
.
Step 2
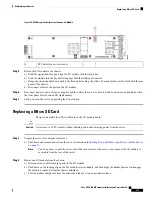
Remove an M.2 SSD:
a) Use a #1 Phillips-head screwdriver to remove the single screw that secures the M.2 SSD to the carrier.
b) Grasp the M.2 SSD and lift up on the end that is opposite its socket on the carrier.
c) Remove the M.2 SSD from its socket on the carrier.
Step 3
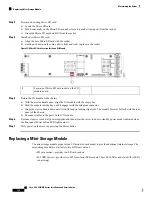
Install a new M.2 SSD:
a) Angle downward and insert the new M.2 SSD connector-end into the socket on the carrier with its label side facing
up.
b) Press the M.2 SSD flat against the carrier.
c) Install the single screw that secures the end of the M.2 SSD to the carrier.
Step 4
Install the mini-storage module carrier back into the server and then power it on as described in
Replacing a Mini-Storage
Module Carrier, on page 115
.
Service DIP Switches
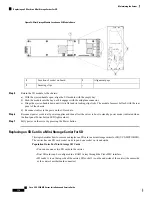
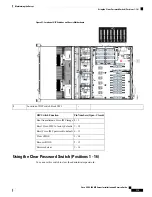
This server includes a block of DIP switches (SW1) that you can use for certain service and Cisco IMC debug
functions. The block is located on the chassis motherboard, as shown in the following figure.
The switches in the following figure are shown in the default, open position (off).
Cisco UCS C480 M5 Server Installation and Service Guide
118
Maintaining the Server
Service DIP Switches


