The supercap provides approximately three years of backup for the disk write-back cache DRAM in the case
of a sudden power loss by offloading the cache to the NAND flash.
There is danger of explosion if the battery is replaced incorrectly. Replace the battery only with the
same or equivalent type recommended by the manufacturer. Dispose of used batteries according to the
manufacturer’s instructions.
Statement 1015
Warning
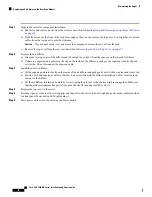
Step 1
Prepare the server for component installation:
a) Shut down and remove power from the server as described in
Shutting Down and Removing Power From the Server,
on page 35
.
b) Slide the server out the front of the rack far enough so that you can remove the top cover. You might have to detach
cables from the rear panel to provide clearance.
If you cannot safely view and access the component, remove the server from the rack.
Caution
c) Remove the top cover from the server as described in
Removing the Server Top Cover, on page 37
.
Step 2
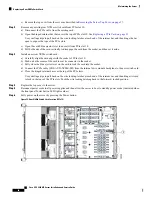
Remove all CPU modules from the chassis to provide clearance:
a) Grasp the two ejector levers on the module and pinch their latches to release the levers.
b) Rotate both levers to the outside at the same time to evenly disengage the module from the midplane connectors.
c) Pull the module straight out from the chassis and then set it on an antistatic surface.
Step 3
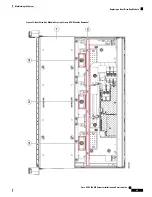
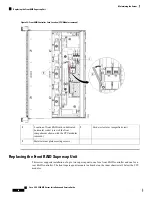
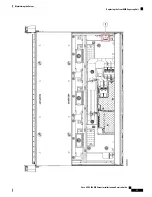
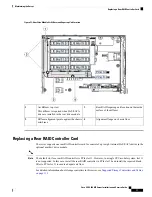
Remove an existing supercap unit:
a) Disconnect the supercap cable from the existing supercap.
b) Lift gently on the top securing tab that holds the supercap unit to its bracket.
c) Lift the supercap unit free of the bracket and set it aside.
Step 4
Install a new supercap unit:
a) Lift gently on the top securing tab on the bracket while you set the supercap unit into the bracket. Relax the tab so
that it closes over the top of the supercap.
b) Connect the supercap cable from the RAID controller card to the connector on the new supercap cable.
Step 5
Reinstall the CPU modules to the chassis:
a) With the two ejector levers open, align the new CPU module with an empty bay.
b) Push the module into the bay until it engages with the midplane connectors and is flush with the chassis front.
c) Rotate both ejector levers toward the center until they lay flat and their latches lock into the front of the module.
Step 6
Replace the top cover to the server.
Step 7
Reconnect power cords to all power supplies and then allow the server to boot to standby power mode (indicated when
the front panel Power button LED lights amber).
Step 8
Fully power on the server by pressing the Power button.
Cisco UCS C480 M5 Server Installation and Service Guide
69
Maintaining the Server
Replacing the Front RAID Supercap Unit


