20
Hardware Installation Guide for Cisco UCS E-Series Servers
OL-26447-03
Installing the E-Series Servers
Caution
To prevent damage to the E-Series Servers, handle the server by the chassis or frame.
This section includes the following topics:
•
Basic Workflow for Installing the E-Series Server, page 20
•
Tools and Equipment Required for E-Series Server Installation, page 20
•
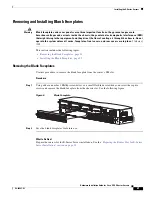
Removing and Installing Blank Faceplates, page 21
•
Preparing the Router Slot for E-Series Server Installation, page 22
•
Installing the E-Series Server into the Router, page 25
•
Verifying E-Series Server Installation, page 27
Basic Workflow for Installing the E-Series Server
1.
Gather the required tools and equipment. See the
“Tools and Equipment Required for E-Series
Server Installation” section on page 20
.
2.
Connect the wrist-strap clip to an unpainted portion of the chassis frame to channel unwanted ESD
voltages to ground.
3.
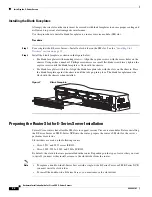
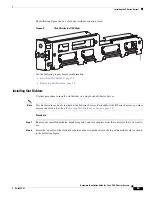
Remove blank faceplates from the slots that you want to use. See the
“Removing the Blank
Faceplates” section on page 21
.
4.
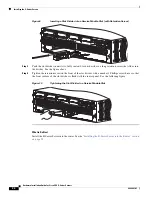
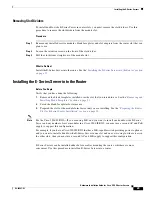
Prepare the router slot for E-Series Server installation. See the
“Preparing the Router Slot for
E-Series Server Installation” section on page 22
.
5.
Install the E-Series Server into the router. See the
“Installing the E-Series Server into the Router”
section on page 25
.
6.
Verify the E-Series Server installation. See the
“Verifying E-Series Server Installation” section on
page 27
.
Tools and Equipment Required for E-Series Server Installation
You will need the following tools and equipment while working with the E-Series Server:
•
Number 1 Phillips screwdriver or a small flat-blade screwdriver
•
ESD-preventive wrist strap
•
For routers using DC power—Tape to secure DC circuit breaker handle


