background image

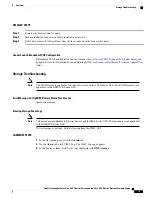
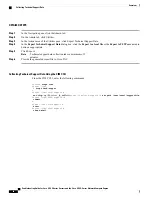
DETAILED STEPS

Step 1

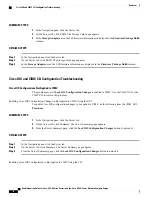
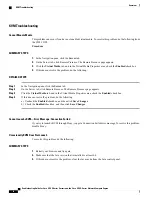
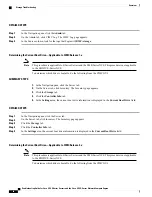
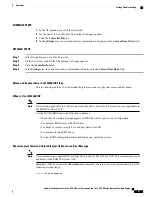
In the Navigation pane, click the Admin tab.

Step 2

On the Admin tab, click Utilities.

Step 3

In the Actions area of the Utilities pane, click Export Technical Support Data.

Step 4

In the

Export Technical Support Data

dialog box, click the

Export to a local file

or the

Export to TFTP server

radio

button as appropriate.

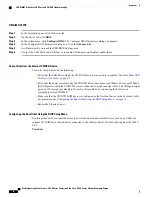
Step 5

Click Export.

Technical support data collection takes a minimum of 3
minutes.

Note

Step 6

Provide the generated report file to Cisco TAC.

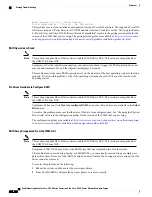
Collecting Technical Support Data Using the CIMC CLI

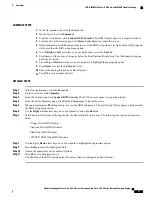
From the CIMC CLI, enter the following commands:

Server#

scope cimc

Server /cimc

#

scope tech-suppor

t
Server /cimc/tech-support #

set tftp-ip

tftp_server_ip_address

Server /cimc/tech-support *#

set path /user/user1/supportfile

Server /cimc/tech-support *#

commit

S
erver /cimc/tech-support #

start

Server /cimc/tech-support #

show detail

   Troubleshooting Guide for Cisco UCS E-Series Servers and the Cisco UCS E-Series Network Compute Engine

26

Overview

Collecting Technical Support Data

Summary of Contents for UCS E Series

Page 1: ...ompute Engine NCE Documentation is sometimes updated after original publication therefore review the documentation on Cisco com for any updates Link to Product Documentation For links to the all Cisco UCS E Series Servers and the Cisco UCS E Series Network Compute Engine documents see Documentation Guide for Cisco UCS E Series Servers Types of E Series Servers and NCEs Troubleshooting Guide for Ci...

Page 2: ...using IPMI does not resolve the problem power cycle the E Series Server Verify that there is an SD card in the SD0 card slot The SD card in the SD0 card slot contains the CIMC software and should always be present The below figure shows the location of the SD0 card slot in a single wide E Series Server Figure 1 Single Wide E Series Server The below figure shows the location of the dual SD card slo...

Page 3: ...ading from Version 2 2 to 3 1 x If you are running CIMC version 2 2 x first upgrade to version 2 3 2 and then upgrade to 3 1 x If you have already upgraded to CIMC version 3 1 x type to get into the recovery shell and then install the image 3 1 x from the recovery shell Cannot Download the Host Image To resolve this problem verify the following The FTP server on which you want to download the host...

Page 4: ...and mode Use the scope bios command 2 Clear the BIOS CMOS memory Use the clear cmos command 3 At the confirmation prompt enter y to confirm DETAILED STEPS Step 1 Enter the BIOS command mode Use the scope bios command Example Server scope bios Step 2 Clear the BIOS CMOS memory Use the clear cmos command Example Server bios clear cmos This operation will clear the BIOS CMOS Note Server should be in ...

Page 5: ...ervers and the Cisco UCS E Series Network Compute Engine Release 2 x Recovering From a Faulty SD Drive See the Troubleshooting E Series Server or NCE Access Issues section in the Firmware Management chapter in the CLI Configuration Guide for Cisco UCS E Series Servers and the Cisco UCS E Series Network Compute Engine Release 2 x Recovering From a Corrupted File System See the Troubleshooting E Ser...

Page 6: ...ist html Microsoft Windows Installation Displays VMware Partitions During the Microsoft Windows installation the Where do you want to install Windows dialog box appears see figure below which displays partitions that were previously created by VMware This dialog box also displays the following warning message Warning Windows Cannot be Installed to Disk x Partition x To resolve this problem clear t...

Page 7: ...he line speed value is correct verify that the Baud rate value is 9 6K and the terminal type is compatible Use the show detail command from bios server management to verify the Baud rate and terminal type Example router ucse 2 session imc CIMC scope bios server management CIMC bios server management show detail Set up parameters Assert NMI on PERR Disabled Assert NMI on SERR Disabled Baud rate 9 6...

Page 8: ...ed guides are available at http www cisco com c en us support servers unified computing ucs e series servers products installation guides list html Note The Cisco 2921 and 2951 series routers support 4 core only To determine the Cisco IOS version use the show version or the show inventory command from the router Router show version Cisco CISCO3945 CHASSIS revision 1 0 with C3900 SPE150 K9 with 104...

Page 9: ...d the Hardware Version fields Determining the Hardware Version of the E Series Server or the NCE from the CIMC CLI Enter the following commands Server scope cimc Server cimc scope firmware Server cimc firmware show detail Firmware Image Information Update Stage NONE Update Progress 0 Current FW Version 2 3 1 20140818121921 FW Image 1 Version 2 3 1 20140818121921 FW Image 1 State RUNNING ACTIVATED ...

Page 10: ...ou can determine the CIM version installed on the E Series Server or the NCE from the CIMC GUI or from the CIMC CLI Determining the CIMC Version Installed on the E Series Server or the NCE from the CIMC GUI To determine the CIMC version of the E Series Server do the following from the CIMC GUI SUMMARY STEPS 1 In the Navigation pane click the Admin tab 2 On the Admin tab click Firmware Management T...

Page 11: ...Inventory The Inventory page appears 3 Click the Storage tab 4 In the Storage Adapters area the LSI firmware information is displayed in the Firmware Package Build column DETAILED STEPS Step 1 In the Navigation pane click the Server tab Step 2 On the Server tab click Inventory The Inventory page appears Step 3 Click the Storage tab Step 4 In the Storage Adapters area the LSI firmware information i...

Page 12: ...olve this problem Enabling Cisco IOS Configuration Changes to Be Applied to CIMC Using the GUI To enable Cisco IOS configuration changes to be applied to CIMC do the following from the CIMC GUI Procedure SUMMARY STEPS 1 In the Navigation pane click the Server tab 2 On the Server tab click Summary The Server Summary page appears 3 From the Server Summary page click the Lock IOS Configuration Change...

Page 13: ...on changes in one scope and then tried to commit those changes from another scope The commit command must be used to commit changes that are made within the same scope If you try to use the commit command to submit changes made in a different scope an error message displays To resolve this problem redo and recommit the changes in the same scope LED DIMM Video Port USB Port and CD DVD Troubleshooti...

Page 14: ...same capacity Do the following In the Navigation pane click the Server tab On the Server tab click Inventory The Inventory page appears Click the Memory tab The Capacity column in the Memory Details area allows you to determine the capacity of the DIMMs and whether the DIMM is installed or not Verify that the value in the Capacity column for the DIMMs is the same If the DIMMs are installed the Cap...

Page 15: ...gation pane click the Server tab Step 2 On the Server tab click Remote Presence Step 3 In the Remote Presence pane click the Virtual KVM tab Step 4 In the vKVM Properties area check the Enable Local Server Video checkbox Front Panel USB Port Does Not Work The light on the device that is connected to the front panel USB port is off This problem occurs if the USB Port in the USB BIOS Settings is not...

Page 16: ...s not exceed 700mA If it exceeds 700mA the USB port to which the CD DVD device is connected to might not stay stable The USB port might go on or off or might get disabled To resolve this problem try connecting the device to an externally powered USB hub Make sure that the CD DVD ROM device is configured as the first boot device in the boot order table For procedure See Configuring the Boot Order U...

Page 17: ...om the Actions area click Launch KVM Console The KVM Console opens in a separate window Step 4 From the Server Summary page click Power Cycle Server to reboot the server Step 5 When prompted press F2 during bootup to access the BIOS setup menu The Aptio Setup Utility appears which provides the BIOS setup menu option Step 6 Use the Right or Left arrow keys on your keyboard to select the Boot tab St...

Page 18: ... tab and in the Virtual Media Properties area check the Enabled check box Step 4 If this does not solve the problem do the following a Uncheck the Enabled checkbox and then click Save Changes b Check the Enabled checkbox and then click Save Changes Cannot Launch vKVM Error Message Connection Failed If you try to launch vKVM through Proxy you get a Connection Failed error message To resolve this pr...

Page 19: ... E Series Servers and the SM E Series NCE The RAID feature is not applicable to the EHWIC E Series NCE Note Error Message LSI OpROM Battery Status Not Present Ignore this message Viewing Storage Event Logs This procedure is applicable to E Series Servers and the SM E Series NCE This procedure is not applicable to the EHWIC E Series NCE Note To view storage event logs do the following from the CIMC...

Page 20: ...ntroller Info tab 5 In the Settings area the current boot drive information is displayed in the Current Boot Drive field DETAILED STEPS Step 1 In the Navigation pane click the Server tab Step 2 On the Server tab click Inventory The Inventory page appears Step 3 Click the Storage tab Step 4 Click the Controller Info tab Step 5 In the Settings area the current boot drive information is displayed in ...

Page 21: ... Series Servers and the SM E Series NCE This section is not applicable to the EHWIC E Series NCE Note Use the LSI WebBIOS under the following conditions When the LSI warning message appears at OPROM which requires drive configuration To configure RAID arrays with SED drives To change or remove security keys and pass phrase for SED To configure foreign SED drives To clear RAID configuration before ...

Page 22: ...pplicable to E Series Servers and the SM E Series NCE This section is not applicable to the EHWIC E Series NCE Note Symptom When you click Create to configure RAID you notice that no drives are available in the Select Drives area To resolve this problem make sure that the state of the drive is unconfigured good See Changing the Physical Drive State section in the configuration guides for the versi...

Page 23: ...se of the BIOS Continue on Error feature the booting process continues but the drives cannot be accessed To resolve this problem do the following 1 Reboot the system and then enter the correct pass phrase 2 From LSI WebBIOS configure the new pass phrase or remove security Cannot Reconfigure Drives This section is applicable to E Series Servers and the SM E Series NCE This section is not applicable...

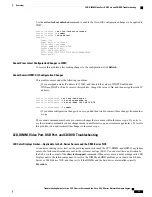
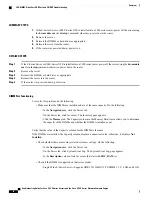
Page 24: ...re SNMP Trap Settings See the Configuring SNMP Trap Settings section in the configuration guides for the version of the CIMC that you are using The configuration guides are available at http www cisco com c en us support servers unified computing ucs e series servers products installation and configuration guides list html DETAILED STEPS Step 1 Make sure you have enabled SNMP See SNMP Does Not Res...

Page 25: ... using The getting started guides are available at http www cisco com c en us support servers unified computing ucs e series servers products installation guides list html Collecting Technical Support Data You can use the CIMC GUI or the CIMC CLI to collect technical support data Perform this task when requested by the Cisco Technical Assistance Center TAC This utility creates a summary report con...
Page 26: ...a minimum of 3 minutes Note Step 6 Provide the generated report file to Cisco TAC Collecting Technical Support Data Using the CIMC CLI From the CIMC CLI enter the following commands Server scope cimc Server cimc scope tech suppor t Server cimc tech support set tftp ip tftp_server_ip_addressServer cimc tech support set path user user1 supportfile Server cimc tech support commit S erver cimc tech su...
Page 27: ... 2017 Cisco Systems Inc All rights reserved ...

Reviews: