E-24
Cisco UCS S3260 Storage Server Chassis Installation and Service Guide
Appendix E Upgrading to Cisco UCS S3260 System With S3260 M5 Server Nodes
Older Migration and Upgrade Procedures
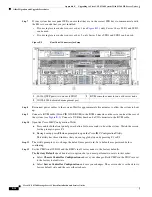
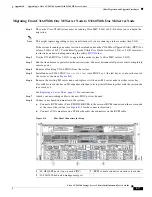
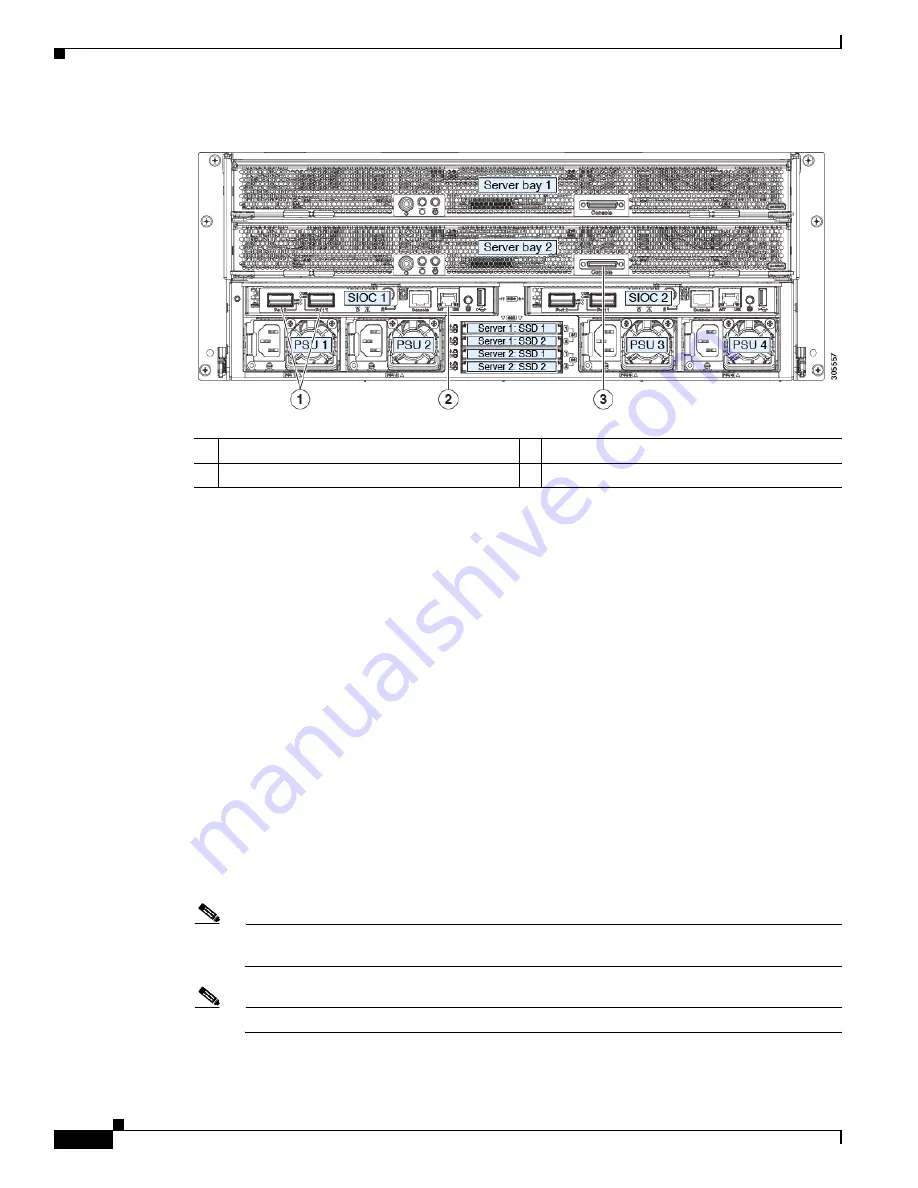
Figure E-3
Rear Panel Connectors for Setup
Step 6
Reconnect power cables to the system. Wait for approximately five minutes to let the server nodes boot
to standby power during the first bootup.
Step 7
Connect a KVM cable (Cisco PID N20-BKVM) to the KVM connector on either server node at the rear
of the system (see
). Connect a USB keyboard and a VGA monitor to the KVM cable.
Step 8
Open the Cisco IMC Configuration Utility:
a.
Press and hold the front panel power button for four seconds to boot the system. Watch the screen
for the prompt to press F8.
b.
During bootup, press
F8
when prompted to open the Cisco IMC Configuration Utility.
This utility has three windows that you can toggle between by pressing F1 or F2.
Step 9
The utility prompts you to change the default user password. Set a default user password before
continuing.
Step 10
Set the CMCs in all SIOCs and the BMCs in all server nodes to the factory defaults.
The
Factory Default
check box has two options but you must perform two resets in this order:
a.
Select
Chassis Controller Configuration
and save your changes. Both CMCs in the SIOCs are set
to the factory default state.
b.
Select
Server Controller Configuration
and save your changes. The server node is set back to its
factory default state and the server/host reboots.
Note
The BMC reboots after resetting to defaults. Watch for the prompt to press F8 when the server
reboots in the next step.
Note
Set the BMC in the second server node to factory defaults also.
Step 11
When prompted, press
F8
to enter the Cisco IMC Configuration Utility again.
1
40-Gb QSFP ports (two on each SIOC)
3
KVM console connector on each server node
2
10/100/1000 dedicated management port


