Step 1
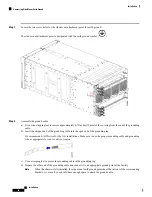
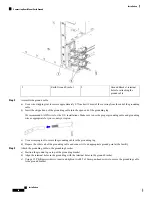
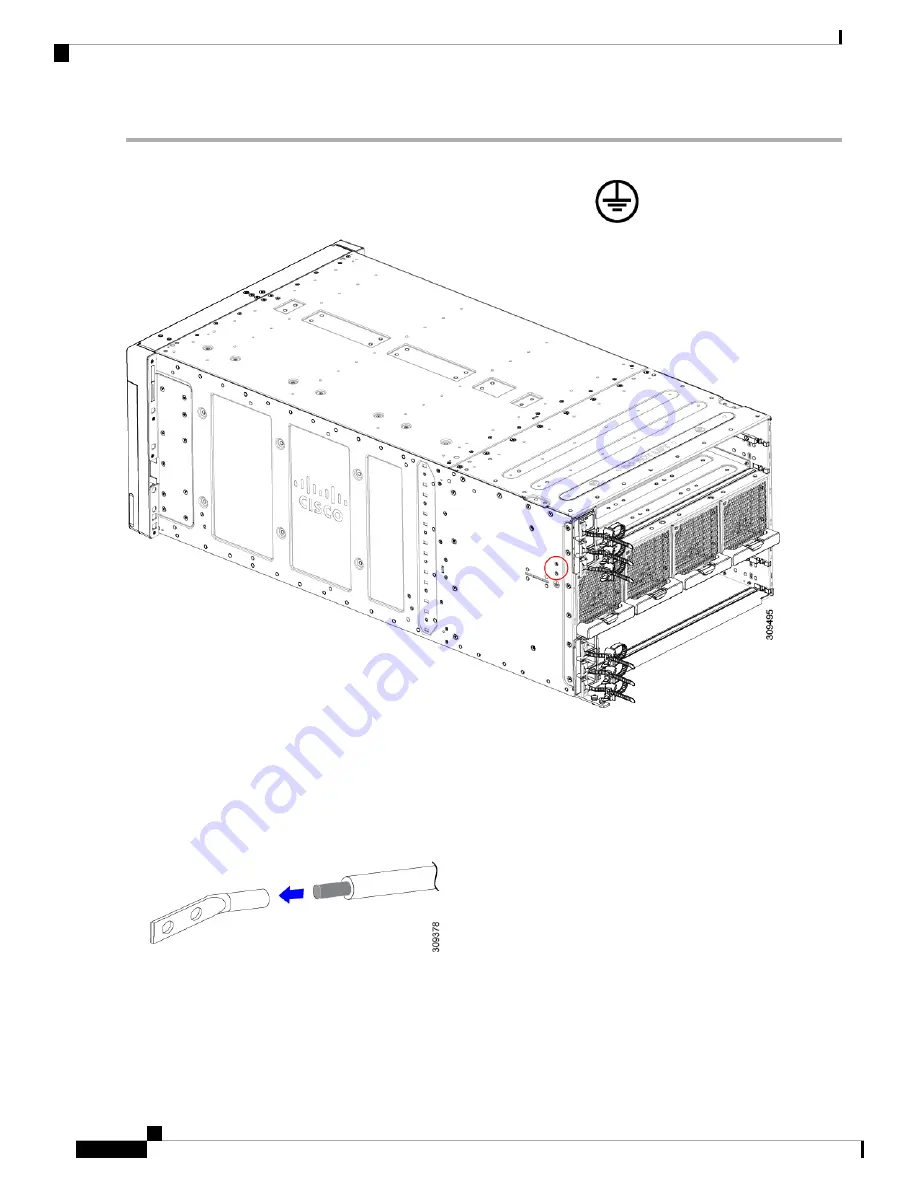
Locate the two screw holes for the side-mount attachment point for earth ground.
The side-mount attachment point is designated with the earth ground symbol (
).
Step 2
Assemble the ground cable.
a) Use a wire-stripping tool to remove approximately 0.75 inches (19 mm) of the covering from the end of the grounding
cable.
b) Insert the stripped end of the grounding cable into the open end of the grounding lug.
We recommend 6-AWG wire for the U.S. installations. Make sure to use the proper grounding cable and grounding
wire as appropriate for your country or region.
c) Use a crimping tool to secure the grounding cable in the grounding lug.
d) Prepare the other end of the grounding cable and connect it to an appropriate ground point at the facility.
When the chassis is fully installed, the side-mount earth ground point should be in front of the rear mounting
brackets. As a result, you should have enough space to attach the ground cable.
Note
Installation
46
Installation
Connecting Side-Mount Earth Ground


