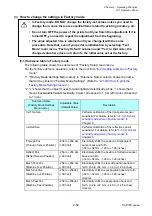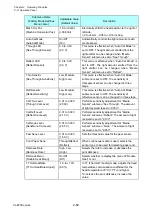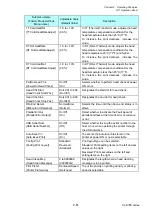
Chapter 2 Operating Principles
2-3.
Operation Panel
CL-E700 series
2-64
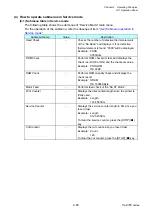
(4-2) Submenu operation in Service mode
The submenu operation procedures in Service mode are explained here. The submenus
other than “Service Counter/Cut Center”, and the “Service Counter/Cut Center” submenu
are separately explained.
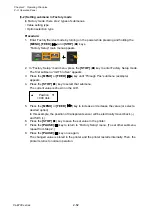
Operation procedure for submenus other than “Service Counter/Cut Center”:
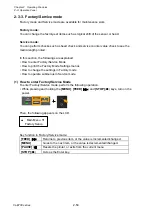
1. Enter Factory/Service mode by turning on the power while pressing and holding the
[MENU]
,
[FEED]
(
) and
[STOP]
(
■
) keys.
“Factory Setup” main menu appears.
2. Press
the
[MENU]
or
[FEED]
(
) key until “Service Mode” main menu appears.
3. Press
the
[STOP]
(
■
) key to enter Service mode.
4. Press
the
[MENU]
or
[FEED]
(
) key until a desired submenu appears.
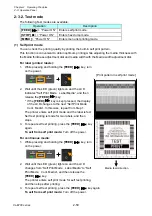
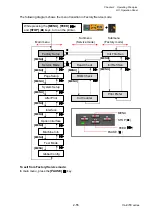
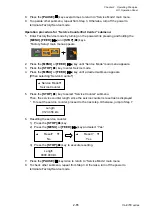
[When selecting “Head Check”]
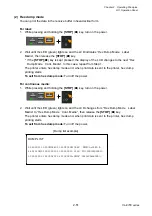
[When selecting “Motor Feed”]
5. Press
the
[STOP]
(
■
) key to enter that submenu.
* For submenus “ROM Check”, “RAM Check”, and “Print Counter”, the result is
displayed and further operation is not necessary.
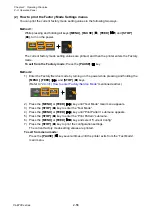
* For submenu “Head Check”, the following screen appears and prompts you whether
to perform the head check or not.
* For submenu “Motor Feed”, the following screen appears and prompts you whether
to feed media forward or backward.
[When selecting “Head Check”]
[When selecting “Motor Feed”]
6. Press
the
[MENU]
or
[FEED]
(
) key and select “Yes” (when “Head Check” is
selected) or “Forward”/”Back” (when “Motor Feed” is selected).
7. Press
the
[STOP]
(
■
) key to execute the selected item.
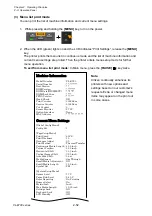
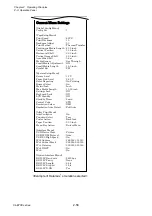
* When “Head Check” is selected, the number of defective dots of the thermal head is
displayed.
* When “Motor Feed” is selected, “Feed Start” is displayed. Press the
[STOP]
(
■
) key
once again. Then, the “SA PF Motor” turns to feed media forward or backward. (The
“SA PF Motor” turns each time you press the
[STOP]
(
■
) key.)
[When selecting “Head Check”]
[When selecting “Motor Feed”]
Feed
Forward
Check
No
Service Mode
Motor Feed
Service Mode
Head Check
PASS
0000dots
Feed
Back
Feed
Start
Summary of Contents for CL-E700 Series
Page 1: ...Technical Manual CL E700 series Thermal Transfer Printer...
Page 5: ...Chapter 1 Specifications 1 1 CL E700 series CHAPTER 1 SPECIFICATIONS...
Page 15: ...Chapter 2 Operating Principles 2 1 CL E700 series CHAPTER 2 OPERATING PRINCIPLES...
Page 87: ...Chapter 3 Disassembly and Maintenance 3 1 CL E700 series CHAPTER 3 DISASSEMBLY AND MAINTENANCE...
Page 151: ...Chapter 4 Troubleshooting 4 1 CL E700 series CHAPTER 4 TROUBLESHOOTING...
Page 167: ...Chapter 5 Parts Lists CL E700 series CHAPTER 5 PARTS LISTS...
Page 172: ...Chapter 5 Parts Lists CL E700 series 5 6 DRAWING NO 1 General Assembly Rev 0...
Page 195: ...Chapter 5 Parts Lists 5 29 CL E700 series DRAWING NO 7 Unit Opepane Rev 0...
Page 203: ...Chapter 5 Parts Lists 5 37 CL E700 series DRAWING NO 9 SA2 Ribbon Unit Fan Rev 0...
Page 206: ...Chapter 5 Parts Lists CL E700 series 5 40 DRAWING NO 10 Accessories Rev 0 3 2 4 1 1 1 2 1 3...
Page 208: ...Chapter 6 Circuit Diagrams 6 1 CL E700 series CHAPTER 6 CIRCUIT DIAGRAMS...
Page 230: ...Appendices AP 1 CL E700 series APPENDICES...
Page 233: ...Appendices A Mounting Diagrams CL E700 series AP 4 2 Solder side...

