background image

17

5  Using the Print Server Home Page

5-1  Checking or Changing Print Server Configuration

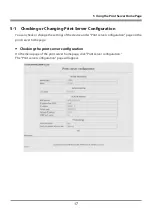
You can check or change the settings of the device under “Print server configuration” page on the 
print server homepage.

  Checking the print server configuration

On the menu page of the print server homepage, click “Print server configuration.”
The “Print server configuration” page will appear.

Summary of Contents for IF1-ET01

Page 1: ...Print Server IF1 ET01 User s Manual ...

Page 2: ... Software 10 3 2 Changing Settings 13 4 Basic Operations of the Print Server 14 4 1 Using the Panel Button 14 4 2 LED Functions 15 5 Using the Print Server Home Page 16 5 1 Checking or Changing Print Server Configuration 17 5 2 Checking Operational Status of Printer 21 5 3 Checking Print Server Version 21 6 Print Server Configuration 22 6 1 Printing Print Server Configuration 22 6 2 Restoring to F...

Page 3: ...sed by improper operation or mishandling of the device by the user or b loss due to operational environment Data etc are basically impermanent long time or permanent storing saving of data by the device is not possible Note that we will not be responsible for any loss or loss of profits owing to loss of data due to breakdown repairs inspections etc Please contact us if there are omissions errors a...

Page 4: ...ot connect a telephone line to the RJ45 connector on the device Be sure to connect the STP cable category 5 or higher Connect the product only to devices that operate on SELV voltage safety extra low voltage Be sure to use the device inserted in the interface board slot of the printer Do not use the device when it is not inserted in the interface board slot CITIZEN is a registered trademark of CIT...

Page 5: ...t or e it in a sa fe p la ce so th at yo u ca n re re ad it w he n ne ce ss ar y C on te nt s of th is m an ua l m ay b e ch an g ed w it ho ut no ti ce Re p ro d uc in g an d o r co p yi ng th e co nt en ts of th is m an ua l b y an y m ea ns w it ho ut p er m is si on is p ro hi b it ed W e w ill no t b e re sp on si b le fo r an y ad ve rs e oc cu rr en ce th at re su lt s fr om th e us e of th...

Page 6: ...network communication speed with steady blinking green light 3 Network status indicator 1 Shows network connection status disconnected receiving data etc with yellow light 4 Device status indicator 1 Shows operational status of the device with combinations of steady and blinking lights red and green 5 Panel button 2 Used to operate the device 1 See 4 2 LED Functions p 15 for indicator content 2 Se...

Page 7: ...erver please contact your Citizen Systems dealer or service person Do not pull the print server out of the printer and re install it This could cause malfunctioning Preparing the printer 1 Turn off the printer back of printer Power connector Cable connector AC adapter AC power cord DC power supply type 2 Remove the power cord from the printer 3 If another interface board is installed in the printe...

Page 8: ...ce to the printer 4 Insert the device into the interface slot of the printer 10 100BASE Interface slot 10 100BASE 5 Connect the device s interface connector to the interface connector inside the printer 10 100BASE 6 Fix the device in place with screws ...

Page 9: ... 01 02 03 04 05 Ethernet Auto DHCP Server 192 168 1 10 Gateway 192 168 1 10 DNS1 0 0 0 0 Ethernet Auto Negotiation 100BaseTX Full IP Address 169 254 1 10 DNS2 0 0 0 0 I F Board Information Configuration Print Server DQ00 01XX Jan 20 2010 14 30 51 3 Turn on the printer After the printer is turned on the device will automatically obtain the IP address from the DHCP server within 60 seconds If the IP...

Page 10: ... for line thermal printers is included in the CD ROM that comes with a line thermal printer or obtained from our website When installing in Windows Vista The following describes the procedure for installing the TCP IP port driver CITIZEN TCP IP Port in the computer in which the printer driver for the line thermal printer CT S801 has been installed 1 Click the CITIZEN TCP IP Port Installer on the m...

Page 11: ...ll start 1 2 3 6 The CITIZEN TCP IP Port screen will appear Enter the Port Name IP address and Communication Timeout 1 Port Name 2 Host Name or IP When you enter the IP address e g 192 168 128 210 in Port Name the same IP address will be automatically entered in Host Name or IP Change the Host Name or IP if necessary 3 Timeout time for communication timeout Change as needed ...

Page 12: ...allation is now complete Installing in other operating systems The software can be installed in Windows 2000 SP4 Windows XP Windows Server 2003 and Windows 7 by using almost the same procedure as installing in Windows Vista Click the CITIZEN TCP IP Port Installer on the menu screen in the CD ROM to start installation To install manually double click the software installer CSPortTcpMonSetup exe to ...

Page 13: ...CP IP Port screen go to the printer properties screen or access it from the start menu 1 On the printer properties screen open the Ports tab and select Configure Port The CITIZEN TCP IP Port screen will appear Alternatively you can go to the start menu and select CITIZEN then Driver Port and then Assign TCP IP port for printer The CITIZEN TCP IP Port screen will appear 2 After changing a setting c...

Page 14: ...ll sound once signaling a switch to the setting mode The setting mode enables confirmation of factory default settings and printing of firmware information If there is no activity for three seconds in the setting mode a buzzer will sound once signaling a return to the normal mode Note that the buzzer will not sound if the printer s buzzer is disabled Restoring to the factory default settings Switc...

Page 15: ...g data Blinking light 3 Device status indicator Display content LED red LED green Description Printer disconnected No light Not connected to printer Printer connected Steady light Connected to printer Network disconnected No light Not connected to network Seeking IP address Blinking light 0 5 second cycle Seeking IP address from DHCP server Network connected Steady light Network setting is complet...

Page 16: ...ice or to check the operational status of the printer Accessing the print server homepage 1 Launch your browser and go to the URL of the print server homepage For the URL enter the IP address assigned to the printer For example if the IP address is 169 254 1 10 enter http 169 254 1 10 2 The menu page of the print server homepage will appear ...

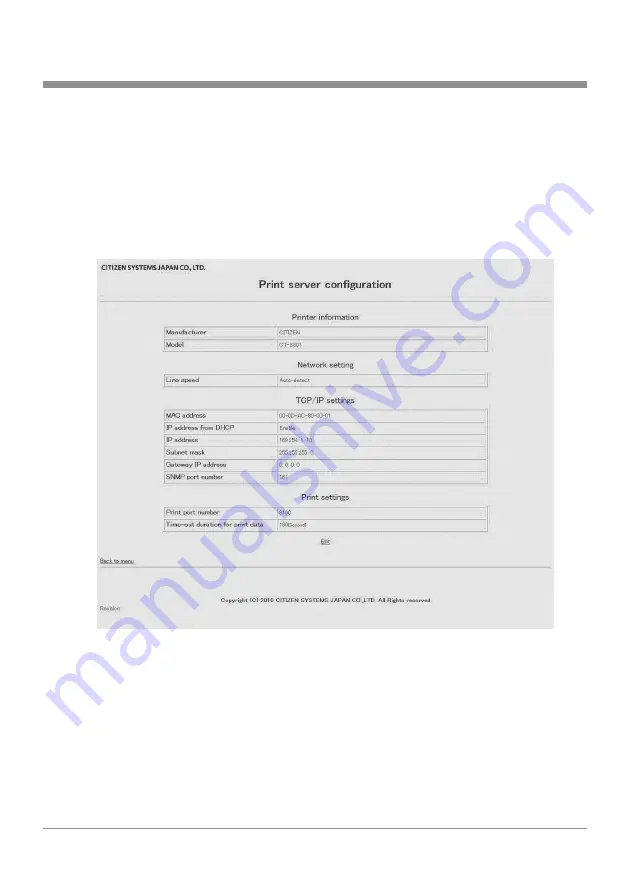
Page 17: ...ion You can check or change the settings of the device under Print server configuration page on the print server homepage Checking the print server configuration On the menu page of the print server homepage click Print server configuration The Print server configuration page will appear ...

Page 18: ... MAC address MAC address NO IP address from DHCP Setting to obtain IP address from DHCP server Enable ON factory default Disable OFF YES IP address Static IP address 169 254 1 10 factory default YES Subnet mask Subnet mask 255 255 255 0 factory default Only when DHCP is disabled Gateway IP address Gateway IP address 0 0 0 0 factory default Only when DHCP is disabled SNMP port number Port number us...

Page 19: ...rver Home Page Changing the print server configuration 1 On the menu page of the print server homepage click Print server configuration The Print server configuration page will appear 2 Click Edit The editing page will appear ...

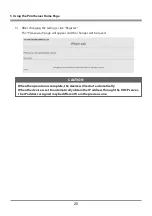
Page 20: ...e Please wait page will appear and the changes will be saved CAUTION When the operation is complete the device will restart automatically When the device is set to automatically obtain the IP address through the DHCP server the IP address assigned may be different from the previous one ...

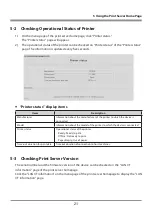
Page 21: ...cturer of the printer to which the device is connected Model Information about the model of the printer to which the device is connected Printer status Operational status of the printer Ready Ready to print Offline Not ready to print Paper Empty Out of paper Time out duration for print data Timeout duration of connection to host machines 5 3 Checking Print Server Version The serial number and the ...

Page 22: ... homepage 4 Network settings such as the IP address currently being used by the device When the network is not connected the IP address will be 0 0 0 0 5 Displayed only when the DHCP server is enabled to obtain the IP address 6 2 Restoring to Factory Default Settings 1 Press and hold the panel button to switch to setting mode 2 When the device has switched to the setting mode press and hold the pa...

Page 23: ...int server configuration page and click Edit 3 Click Disable for IP address from DHCP under TCP IP settings The automatic obtaining of the IP address by the DHCP server will be disabled 4 Enter the IP address in IP address under TCP IP settings 5 Click Register to save the change Setting the IP address automatically 1 Using your Web browser access the print server homepage See 5 Using the Print Se...

Page 24: ...ter Printer Class USB 2 0 FULL SPEED however currently CT S801 side is USB 1 1 IP Version IPv4 Network protocols TCP UDP HTTP ICMP DHCP Port number for printing TCP 9100 initially Configuration changes from the print server homepage YES Interactive communication YES only when CITIZEN TCP IP port driver is used Firmware upgrade YES use print server homepage External dimensions 80mm W 70mm D 25mm H ...

Page 25: ......
Page 26: ...se 11 Park House 643 651 Staines Road D 73728 Esslingen Feltham Middlesex TW14 8PA Germany United Kingdom Tel 49 0 711 3906 420 Tel 44 0 20 8893 1900 Fax 49 0 711 3906 405 Fax 44 0 20 8893 0080 http www citizen europe com 6 1 12 Tanashi cho Nishi Tokyo shi Tokyo 188 8511 Japan Tel 81 0 42 468 4608 Fax 81 0 42 468 4996 http www citizen systems co jp ...

Reviews: