background image

- 18 -

Inserting a Passbook

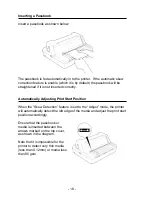
Insert a passbook as shown below:

The passbook is fed automatically in to the printer.  If the automatic skew
correction feature is enable (which it is by default) the passbook will be
straightened if it is not inserted correctly.

Automatically Adjusting Print Start Position

When the “Skew Detection” feature is set to the “Adjust” mode, the printer
will automatically detect the left edge of the media and adjust the print start
position accordingly.

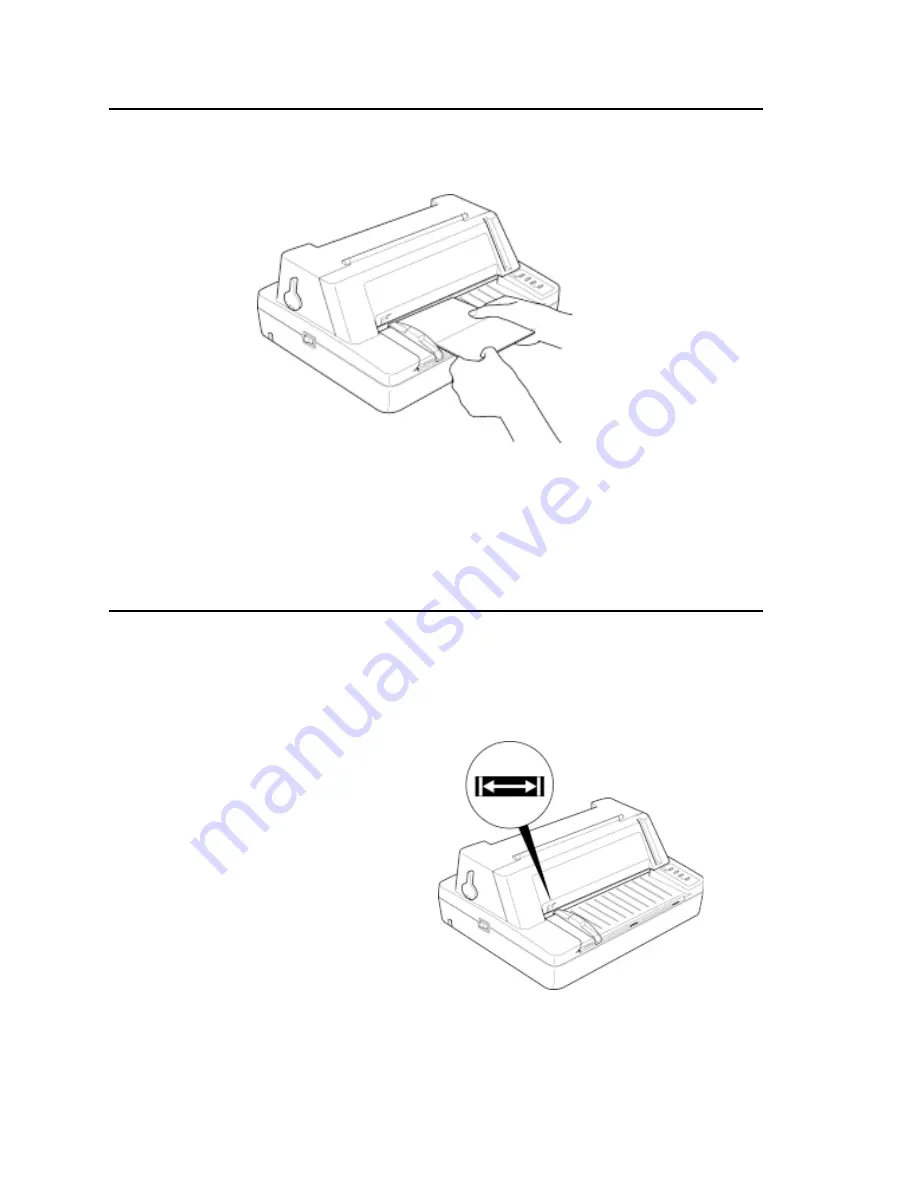
Ensure that the passbook or
media is inserted between the
arrows marked on the top cover,
as shown in the diagram.

Note that it is impossible for the
printer to detect very thin media
(less than 0.12mm) or media less
than 80 gsm.

Summary of Contents for PROdot 350

Page 1: ...1 PROdot 350 User s Manual Addendum...

Page 2: ...lation 8 Unpacking 8 Before Using Your New Printer 9 Printer Location 9 Parts Identification 10 Inserting And Replacing The Ribbon Cassette 11 Chapter 3 13 Loading Media In To The Printer 13 Paper Thi...

Page 3: ...Calculation of PB Length for Passbook2 mode 24 Example program or using Passbook1 mode 25 Example program for using Passbook2 mode 26 Recommend print area for passbooks 27 Inserting the passbooks in t...

Page 4: ...ove addresses Trademark Acknowledgement Citizen PROdot 350 Citizen Systems Europe GmbH Epson Epson LQ Seiko Epson Corporation IBM Proprinter International Business Machines Corporation Important Safet...

Page 5: ...e this product where the cord will be walked on 10 Never push objects of any kind into this product though cabinet slots as they may touch dangerous voltage points or short out parts that could result...

Page 6: ...s are available from the Parts Department indicated in your user instructions 16 If the plug supplied is not suitable for your socket outlet it should be cut off and destroyed A plug with bared flexib...

Page 7: ...e of the book being used Automatic Media Straightening If media is miss inserted in to the front of the printer at an incorrect angle the Prodot 350 will automatically correct the angle of the media t...

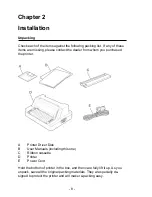
Page 8: ...e dealer from whom you purchased the printer A Printer Driver Disk B User Manuals including this one C Ribbon cassette D Printer E Power Cord Hold the bottom of printer in the box and then care fully...

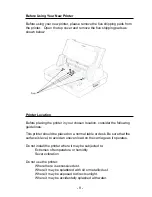
Page 9: ...owing guide lines This printer should be placed on a normal table or desk Be sure that the surface is level to avoid an uneven load on the carriage as it operates Do not install the printer where it m...

Page 10: ...Cover B Control Panel C Parallel Interface D Serial Interface E Front Rollers F Ribbon Cassette Cartridge G Printhead H Left Adjustable Media Guide I Front Table For Media J Paper Feed Knob K Gap Sens...

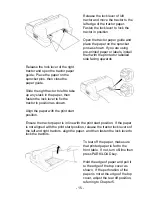
Page 11: ...witch D Paper Select Lever Inserting And Replacing The Ribbon Cassette 1 Turn on the printer power switch and then set the printer off line by pressing the on line key 2 Open the top cover and then pu...

Page 12: ...a small piece of black plastic on the thin metal sheet of the ribbon guide Make sure that the ribbon goes under the piece of plastic 7 Position the ribbon cartridge with the tabs on its case over the...

Page 13: ...the configuration settings can be found in Chapter 5 of this manual and in the Prodot 300 manual Loading Single Cut Sheets Turn the printer on Then press the PARK LOAD key to set the paper select leve...

Page 14: ...scribed in Chapter 5 Using Tractor Paper This printer feeds tractor paper from the rear of the printer to the front Set the power cord into the groove at the back of the lower case of printer to avoid...

Page 15: ...o take up any slack in the paper then fasten the lock lever to fix the tractor in position as shown Align the paper with the print start position Ensure the tractor paper is in line with the print sta...

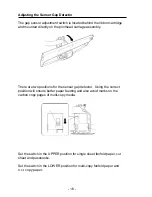
Page 16: ...mbly There are two positions for the sensor gap detector Using the correct position will ensure better paper feeding and also avoid marks on the carbon copy pages of multi copy media Set the switch in...

Page 17: ...paper being used Before inserting the passbook in to the printer flatten it as shown in the figure below If the binding stitch area is projecting outward when the passbook is opened flatten it using...

Page 18: ...ctly Automatically Adjusting Print Start Position When the Skew Detection feature is set to the Adjust mode the printer will automatically detect the left edge of the media and adjust the print start...

Page 19: ...within your software select the driver for this printer from the following list Citizen PROdot 350 Citizen PROdot 300 Citizen Swift 240 Epson LQ 670 Epson LQ 860 Epson LQ 850 IBM X24E IBM X24 The hig...

Page 20: ...icable to the Prodot 350 This manual simply describes the additional features only present in the Prodot 350 printer Basic Control Panel Operations You can use the four switches on the control panel t...

Page 21: ...t 3 seconds enters automatic passbook length measuring mode LF FF In the off line mode pressing the LF FF key advances tractor paper and cut sheets by one line Pressing and hold this switch feeds trac...

Page 22: ...22...

Page 23: ...determined by the Gap Pos value Passbook1 is used for measuring the length of the passbook automatically Passbook2 is used for presetting the length of the passbook using the PB Length value Gap Pos T...

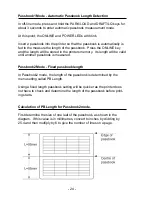
Page 24: ...rinters memory Its length will be valid until another passbook is measured Passbook2 Mode Fixed passbook length In Passbook2 mode the length of the passbook is determined by the menu setting called PB...

Page 25: ...he passbook page but also shows examples of selecting Passbook1 mode of printing using the special unique programming commands CLS WIDTH LPRINT 255 LPRINT CHR H1B A LPRINT CHR H1B 81 CHR 2 LPRINT CHR...

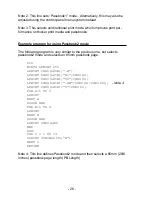
Page 26: ...ogram is very similar to the previous one but selects passbook2 mode and selects an 85mm passbook page CLS WIDTH LPRINT 255 LPRINT CHR H1B A LPRINT CHR H1B 81 CHR 2 LPRINT CHR H1B 00 CHR 0 LPRINT CHR...

Page 27: ...from bending or the ribbon from catching or becoming damaged Note2 Avoid printing in this area to prevent miss feeding Inserting the passbooks in to the printer Please refer to Chapter 3 for details h...

Page 28: ...10 6 Power consumption Voltage 230 V Operation 62 0 W Operation max 147 0 W Stand by 14 4 W 15 mins after Stand by 11 3 W Weight unpacked 6 3 Kgs 13 9 lbs Paper types Cut sheet tractor paper label che...

Page 29: ...i 1B 7E 69 27 126 105 Select skip mode ESC j 1B 7E 6A 27 126 106 Select Printhead Impact Force Format ESC FS B n 1B 1C 42 n Selects the copy capability and impact force specified by the parameter n n...

Page 30: ...s the head gap size and is in the range from 0 to 34 m 3 Activates Passbook1 mode The length of passbook measured using the automatic passbook measuring mode is used for passbook printing In this case...

Page 31: ...aper is fed over blank space In this case blank space is an area without printing The gap changes according to the values of n and m n 0 or 48 The gap remains unchanged when the carriage moves n 1 or...

Page 32: ...32 Copyright C Citizen Systems Europe GmbH 2001 www citizen europe com...

Reviews: