background image

 On-line owner's handbook  

  Referring to the owner's handbook on-line also gives you 

access to the latest information available, easily identi

fi

 ed by 

the bookmarks, associated with this pictogram:  

  If the heading "MyCitroën" is not available on the public website for 

your country, you can 

fi

 nd your handbook at the following address: 

 http://service.citroen.com  

  Select: 

  You can 

fi

 nd your handbook on the CITROËN website, under the 

heading "MyCitroën".    

   This personal space provides you with information on your products 

and services, a direct and special contact with CITROËN and 

becomes a space tailored for you.   

 the link in "Private customer access", 
 the language, 
 the model, 
 the edition date appropriate for the date of registration of your vehicle. 

 You will 

fi

 nd your handbook, presented in the same way as the paper 

version.   

Summary of Contents for 2012 C-ELYSEE

Page 1: ......

Page 2: ...t the following address http service citroen com Select You can find your handbook on the CITRO N website under the heading MyCitro n This personal space provides you with information on your products...

Page 3: ...t recommended by CITRO N may result in a failure of your vehicle s electronic system Please note this specific warning and contact a CITRO N dealer to be shown the recommended equipment and accessorie...

Page 4: ...57 Mirrors 58 Steering wheel adjustment 60 Ventilation 61 Heating 63 Manual air conditioning without display screen 63 Electronic air conditioning with screen 65 Front demist defrost 68 Rear screen d...

Page 5: ...economy mode 147 Changing a wiper blade 148 Towing the vehicle 149 Towing a trailer 151 Very cold climate screen s 153 Advice on care and maintenance 154 Accessories 154 Mats 156 Roof bars 157 Practic...

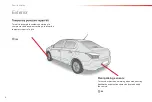
Page 6: ...ystem consisting of a compressor and a sealant cartridge to allow the temporary repair of a tyre 120 Exterior Rear parking sensors This system provides a warning when manoeuvring backwards by detectin...

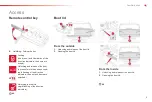
Page 7: ...de 1 Unlocking and release of the boot lid 2 Opening the boot lid 42 Boot lid Locking one press fixed illumination of the direction indicators the doors are locked Unlocking and release of the boot a...

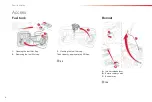
Page 8: ...l tank 1 Opening the fuel filler flap 2 Removing the fuel filler cap 52 Access Bonnet 159 A Interior release lever B Exterior safety catch C Bonnet stay 3 Hooking the fuel filler cap Tank capacity app...

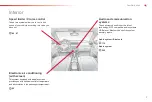
Page 9: ...n in the passenger compartment Speed limiter Cruise control These two systems allow you to control the speed of your vehicle according to a value you have set Audio and communication systems These sys...

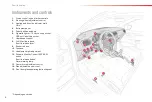
Page 10: ...igarette lighter 12 V accessory socket USB port auxiliary socket 7 Heated seat control 8 Fuel filler flap release Boot lid release lever 9 Bonnet release 10 Fusebox 11 Headlamp height adjustment 12 Dy...

Page 11: ...n storage or Monochrome screen C Audio system Bluetooth 5 Adjustable centre air vents 6 Windscreen demisting defrosting vent 7 Passenger s airbag 8 Glove box Passenger s airbag deactivation switch 9 H...

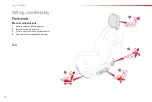
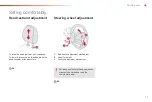
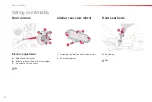
Page 12: ...0 Familiarisation Sitting comfortably Manual adjustments 1 Head restraint height adjustment 2 Backrest angle adjustment 3 Driver s seat cushion height adjustment 4 Seat forwards backwards adjustment 5...

Page 13: ...anism 2 Adjust for height 3 Lock the adjustment mechanism Steering wheel adjustment 60 For reasons of safety these operations must only be carried out with the vehicle stationary To raise the head res...

Page 14: ...ors Electric adjustment A Selection of the mirror B Adjusting the position of the mirror glass C De selection of the mirror 58 Interior rear view mirror 1 Selecting the day position of the mirror 2 Mi...

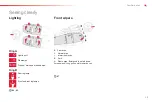
Page 15: ...Ring B Front wipers 92 93 2 Fast wipe 1 Normal wipe I Intermittent wipe 0 Park Single wipe Brief push the stalk down Screenwash Long pull on stalk towards you 97 Lighting off Sidelamps Dipped main bea...

Page 16: ...sation I require Heating or Manual air conditioning Air distribution Air flow Air recirculation Intake of exterior air Temperature Manual AC HOT COLD DEMISTING DEFROSTING Ventilation Recommended inter...

Page 17: ...l With the ignition on the orange and red warning lamps come on With the engine running these warning lamps should go off If a warning lamp remains on refer to the page concerned Warning lamps 23 31 2...

Page 18: ...h rear facing child seat 4 Remove the key keeping the switch in the new position Front passenger s airbag 107 Passenger safety A Driver s seat belt not fastened or unfastened front passenger s seat be...

Page 19: ...or the driving mode selected appears in the instrument panel screen N Neutral R Reverse 1 to 5 Gears engaged AUTO Automated mode Moving off Select position N Press firmly on the brake pedal Start the...

Page 20: ...gear engaged or the driving mode selected appears in the instrument panel screen P Park R Reverse N Neutral D Drive automatic forward drive S Sport programme 7 Snow programme 1 to 4 Gears engaged Inva...

Page 21: ...programmed value 4 Cruise control On Off Cruise control CRUISE 87 The cruise control or speed limiter mode appears in the instrument panel when selected Display in the instrument panel Cruise control...

Page 22: ...ffic is flowing well Control the use of your electrical equipment Before moving off if the passenger compartment is too warm ventilate it by opening the windows and air vents before using the air cond...

Page 23: ...eck the tyre pressures regularly when cold referring to the label in the door aperture driver s side Carry out this check in particular before a long journey at each change of season after a long peri...

Page 24: ...ge km or Trip distance recorder D Fuel gauge E Service indicator km then total distance recorder These two functions are displayed successively when switching on the ignition F Speed limiter or cruise...

Page 25: ...hen the vehicle s ignition is switched on When the engine is started these same warning lamps should go off If they remain on before moving off refer to the information on the warning lamp concerned A...

Page 26: ...ting stalk is pushed up Dipped beam headlamps fixed The lighting stalk is in the Dipped beam headlamps position Main beam headlamps fixed The lighting stalk is pulled towards you Pull the stalk to ret...

Page 27: ...king brake to switch off the warning lamp keeping your foot on the brake pedal Observe the safety recommendations For further information on the parking brake refer to the Driving section Foot on the...

Page 28: ...is deactivated In this case you can install a rear facing child seat Set the control to the ON position to activate the passenger s front airbag In this case do not fit a child seat in the rear facin...

Page 29: ...is associated with the engine oil pressure or the engine coolant temperature Stop as soon as it is safe to do so Park switch off the ignition and call a CITRO N dealer or qualified workshop Service on...

Page 30: ...alified workshop fixed associated with the ABS warning lamp The electronic brake force distribution EBFD system has a fault You must stop as soon as it is safe to do so Have it checked by a CITRO N de...

Page 31: ...o off contact a CITRO N dealer or qualified workshop without delay flashing The engine management system has a fault Risk of destruction of the catalytic converter Have it checked by a CITRO N dealer...

Page 32: ...qualified workshop Door s open Electric opening boot lid open fixed if the speed is below 6 mph 10 km h A door or the electric opening boot is still open Close the door or boot fixed and accompanied...

Page 33: ...oner systems has a fault Have it checked by a CITRO N dealer or a qualified workshop Power steering fixed The power steering has a fault Drive carefully at reduced speed Have it checked by a CITRO N d...

Page 34: ...mbolising the service operations comes on The distance recorder display line indicates the distance remaining before the next service is due Example 1 700 miles 2 800 km remain before the next service...

Page 35: ...least five minutes for the zero reset to be taken into account Service indicator zero reset After each service the service indicator must be reset to zero The procedure for resetting to zero is as fo...

Page 36: ...ion is switched off when the driver s door is opened and when the vehicle is locked or unlocked Total distance recorder System which measures a distance travelled during a day or other period since it...

Page 37: ...complete the adjustments After approximately 30 seconds without any action the screen returns to the normal display Audio system Bluetooth Use the audio system buttons to carry out the operations in...

Page 38: ...ge fuel consumption Trip computer Screen in instrument panel Monochrome screen C Information displays Press the button located at the end of the wiper stalk to display the various items of trip comput...

Page 39: ...lometres which can be covered with the fuel remaining in the tank Related to the average fuel consumption over the last few kilometres travelled When the range falls below 30 km dashes are displayed A...

Page 40: ...Audio system Bluetooth control panel you can press the MENU button to gain access to the main menu the MODE button to select the display of information in Full screen or New window mode the or button...

Page 41: ...functions displaying them in succession in the multifunction screen Press the MENU button to gain access to the general menu Press the double arrows then the centre button to select the Trip computer...

Page 42: ...etooth connection application refer to the Audio system Bluetooth part of the Audio and Telematics section Once this menu has been selected you can gain access to the following functions Define the ve...

Page 43: ...done when stationary Choice of language Once this menu has been selected you can change the language used by the display from a defined list Display configuration Once this menu has been selected you...

Page 44: ...ing the key Turn the key in the driver s door lock towards the front of the vehicle to unlock Unlocking using the remote control Press the open padlock to unlock the vehicle Unlocking is confirmed by...

Page 45: ...vehicle must be locked Locating your vehicle Anti theft protection Electronic engine immobiliser The key contains an electronic chip which has a special code When the ignition is switched on this code...

Page 46: ...ote control you can no longer unlock lock or locate your vehicle First of all use the key in the lock to unlock or lock your vehicle Then reinitialise the remote control Fault with the remote control...

Page 47: ...nition is switched off except for reinitialisation Locking the vehicle Driving with the doors locked may make access to the passenger compartment by the emergency services more difficult in an emergen...

Page 48: ...t out of service or damaged Locking the vehicle with alarm Activation Switch off the ignition and get out of the vehicle Press the locking button on the remote control The perimeter protection is acti...

Page 49: ...Faults This is indicated by sounding of the siren and flashing of the direction indicators for thirty seconds When the ignition is switched on fixed illumination of the indicator lamp indicates a faul...

Page 50: ...nied by an audible signal and a message in the multifunction screen for a few seconds Closing When a door is not closed correctly Secondary control For mechanically locking and unlocking the doors in...

Page 51: ...n accompanied by a message in the multifunction screen for a few seconds when the vehicle is moving speed above 6 mph 10 km h this warning lamp comes on accompanied by an audible signal and a message...

Page 52: ...e switch does not operate To unlock the vehicle pull the interior door lever If one of the doors is open the doors are not locked Driving with the doors locked may make access to the passenger compart...

Page 53: ...preventing correct closing of the windows The driver must ensure that the passengers use the electric windows correctly Be aware of children when operating the windows 1 Left hand front electric wind...

Page 54: ...ions of fuel must be of at least 5 litres to be registered by the fuel gauge Refuelling Open the filler cap by turning it a 1 4 turn to the left Remove the filler cap and hang it on its carrier on the...

Page 55: ...fuel can to fill the tank In order to ensure a good flow of fuel do not place the nozzle of the fuel can in direct contact with the flap of the misfuel prevention device and pour slowly Travelling ab...

Page 56: ...sia only the use of RON 92 unleaded petrol is possible Quality of the fuel used for Diesel engines The Diesel engines are perfectly compatible with biofuels which conform to current and future Europea...

Page 57: ...the control upwards to raise or push it downwards to lower as many times as required to obtain the position required Push the control rearwards Forwards backwards Height driver only Seat backrest angl...

Page 58: ...head restraint at the same time The head restraint is fitted with a frame with notches which prevents it from lowering this is a safety device in case of impact The adjustment is correct when the uppe...

Page 59: ...to trap the seat belts Ensure that the backrest has latched properly into place Pull the strap 1 to release the seat backrest 2 Fold the seat backrest 2 on to the cushion Folding the backrest Dependi...

Page 60: ...from behind Demisting Defrosting Adjustment Adjustment Manual model Folding When parked fold the mirror manually to protect it Unfolding Before moving off unfold the mirror Electric model Move the lev...

Page 61: ...e mirror glass and reduces the nuisance to the driver caused by the sun headlamps from other vehicles Rear view mirror Manual day night model Adjustment Adjust the mirror so that the glass is directed...

Page 62: ...er y to release the steering wheel adjustment mechanism Adjust the height to suit your driving position Pull the control lever to lock the steering wheel adjustment mechanism As a safety precaution th...

Page 63: ...ystem are grouped together on control panel A on the centre console 1 Windscreen demisting defrosting vents 2 Front side window demisting defrosting vents 3 Side adjustable air vents 4 Central adjusta...

Page 64: ...hecked regularly as recommended in the servicing booklet If the system does not produce cold air switch it off and contact a CITRO N dealer or a qualified workshop When towing the maximum load on a st...

Page 65: ...djustment Turn the control knob from position 1 to position 4 to obtain a comfortable air flow If you put the air flow control in position 0 system off the temperature is no longer controlled However...

Page 66: ...Press the button 5 the associated indicator lamp comes on Switching off Press the button 5 again the associated indicator lamp goes off Switching off may affect comfort levels humidity condensation T...

Page 67: ...tons to adjust the temperature to your requirements The temperature bars come on or go off progressively in the air conditioning screen Return to exterior air intake as soon as possible to prevent det...

Page 68: ...again the symbol in the air conditioning screen goes off Switching off may lead to unpleasant conditions humidity misting Switching on Switching off Press the A C MAX button again the symbol in the a...

Page 69: ...tion deactivates all functions of the air conditioning system The temperature level is no longer controlled A slight flow of air can still be felt however resulting from the forward movement of the ve...

Page 70: ...ontrol to the Exterior air intake position manual control moved to the right Put the air distribution control to the Windscreen position Press this button The lamp in the button comes on Press this bu...

Page 71: ...sive consumption of current It is possible to stop the demisting defrosting operation before it is switched off automatically by pressing the button again The indicator lamp associated with the button...

Page 72: ...tails on a following page 3 Door pockets 4 Open storage compartment 5 Ashtray Cup holder 6 USB port Jack socket Cigarette lighter 12 V accessory socket see details on a following page 7 Central armres...

Page 73: ...nger s sun visor is fitted with a courtesy mirror with concealing flap and a ticket holder It can b e used to hold a water bottle the vehicle s handbook pack Depending on version it may have a lid In...

Page 74: ...s automatically Front armrest Comfort and storage system for the driver and front passenger Storage For access to the closed storage box lift the lever to open the lid For access to the open storage b...

Page 75: ...73 4 Fittings Boot fittings 1 Boot lamp 2 Storage box see details on a following page...

Page 76: ...box Raise the boot carpet for access to the storage box This has areas for the storage of a box of spare bulbs a first aid kit two warning triangles It also contains the vehicle tools the temporary p...

Page 77: ...t in the Ignition on position On opening the driver s door an alert message is displayed accompanied by an audible signal to remind you that the key is still in the ignition switch at position 1 Stop...

Page 78: ...en lower the lever fully When parking on a slope direct your wheels against the kerb apply the parking brake engage a gear and switch off the ignition When the vehicle is being driven if this warning...

Page 79: ...vehicle is stationary with the engine at idle As a safety precaution and to facilitate starting of the engine always select neutral press the clutch pedal Manual gearbox Push the gear lever fully to...

Page 80: ...lect this mode M Manual mode with sequential gear changing Move the lever backwards then to the left to select this mode then push forwards to change up a gear or push backwards to change down a gear...

Page 81: ...foot off the brake pedal Moving off Select position N Press the brake pedal fully Start the engine Do not press the brake and clutch pedals simultaneously This can cause rapid clutch wear The creep f...

Page 82: ...wing down the gearbox changes down automatically so that the vehicle picks up in the right gear Under full acceleration the change up will not take place unless the driver operates the gear lever unle...

Page 83: ...tances the gearbox may need an automatic reinitialisation starting and gear changing are no longer possible AUTO and appear in the instrument panel For all parking situations you must apply the parkin...

Page 84: ...ake on or off Starting the engine R Reverse Reversing manoeuvres vehicle stationary engine at idle N Neutral Immobilisation of the vehicle parking brake on Starting the engine D Automatic operation M...

Page 85: ...hen operates in auto adaptive mode without any intervention on the part of the driver It continuously selects the most suitable gear according to the style of driving the profile of the road and the l...

Page 86: ...l a substantial knock when changing from P to R and from N to R This will not cause any damage to the gearbox Do not exceed 60 mph 100 km h local speed restrictions permitting Contact a CITRO N dealer...

Page 87: ...speed below the programmed speed The speed limiter cannot in any circumstances replace the need to respect speed limits nor can it replace the need for vigilance and responsibility on the part of the...

Page 88: ...dealer or a qualified workshop Operating fault Set the speed value by pressing button 2 or 3 e g 55 mph 90 km h You can then change the programmed speed using buttons 2 and 3 by or 1 mph km h short p...

Page 89: ...programmed speed temporarily by pressing the accelerator pedal To return to the programmed speed simply release the accelerator pedal Switching off the ignition cancels any programmed speed value The...

Page 90: ...oned correctly never fit one mat on top of another In the event of a cruise control malfunction the speed is cleared resulting in flashing of the dashes Have it checked by a CITRO N dealer or a qualif...

Page 91: ...e signal The system is switched off when you come out of reverse gear Audible assistance The proximity information is given by an intermittent audible signal the frequency of which increases as the ve...

Page 92: ...age appears in the screen accompanied by an audible signal short beep Contact a CITRO N dealer or a qualified workshop Operating fault The function will be deactivated automatically if a trailer is be...

Page 93: ...s sidelamps to be seen dipped beam headlamps to see without dazzling other drivers main beam headlamps to see clearly when the road is clear Additional lighting Other lamps are installed to fulfil the...

Page 94: ...amps Dipping the headlamps Pull the stalk to switch the lighting between dipped main beam headlamps In the lighting off and sidelamps modes the driver can switch on the main beam headlamps temporarily...

Page 95: ...n the ring rearwards to switch off the foglamps the sidelamps will then switch off Rotate and release the ring forwards a first time to switch on the front foglamps forwards a second time to switch on...

Page 96: ...r foglamp when they are no longer necessary Switching on the lamps after the ignition is switched off To reactivate the lighting control rotate the ring to the 0 position lamps off then to the desired...

Page 97: ...ng the lighting stalk A further headlamp flash switches the function off Switching off The manual guide me home lighting switches off automatically after a set time Daytime running lamps On starting t...

Page 98: ...on 0 0 1 or 2 people in the front seats 5 people 1 5 people maximum authorised load in the boot Driver maximum authorised load in the boot 2 Not used Not used 3 Not used Under the bonnet Raise the bon...

Page 99: ...matic conditions Windscreen wipers Wiping speed fast heavy rain normal moderate rain intermittent proportional to the speed of the vehicle park single wipe press down and release Windscreen wash Pull...

Page 100: ...n To maintain the effectiveness of the flat blade type of wiper blades it is advisable to handle them with care clean them regularly using soapy water avoid using them to retain cardboard on the winds...

Page 101: ...ehicle is locked when the ignition is switched on 30 seconds after the last door is closed Permanently off Permanent lighting With the ignition on press the corresponding switch A Courtesy lamps B Map...

Page 102: ...lamps come on automatically They switch off automatically the first time you accelerate You can also switch them off by pressing the button Press this button the direction indicators flash They can o...

Page 103: ...mly without releasing the pressure When braking in an emergency press very firmly without releasing the pressure When replacing wheels tyres and rims ensure that they conform to the manufacturer s rec...

Page 104: ...llumination of the warning lamp accompanid by a message in the screen indicates a malfunction of these systems Reactivation These systems are reactivated automatically every time the ignition is switc...

Page 105: ...the occupants The pretensioning seat belts are active when the ignition is on The force limiter reduces the pressure of the seat belt on the chest of the occupant so improving their protection When t...

Page 106: ...he centre rear seat is fitted with a seat belt with or without reel and has three or two point anchorages Fastening Pull the strap then insert the tongue in the buckle Check that the seat belt is fast...

Page 107: ...ow a child to travel on your lap In order to be effective a seat belt must be tightened as close to the body as possible be pulled in front of you with a smooth movement checking that it does not twis...

Page 108: ...airbag s is accompanied by a slight emission of smoke and a noise due to the activation of the pyrotechnic cartridge incorporated in the system This smoke is not harmful but sensitive individuals may...

Page 109: ...ing lamp comes on in the instrument panel accompanied by an audible warning and a message in the screen contact a CITRO N dealer or a qualified workshop to have the system checked The airbags may no l...

Page 110: ...of a serious side impact in order to limit the risk of injury to the chest between the hip and the shoulder Each lateral airbag is fitted in the seat backrest frame door side Impact detection zones A...

Page 111: ...ngs provided for this purpose Lateral airbags Use only approved covers on the seats compatible with the deployment the lateral airbags For information on the range of seat covers suitable for your veh...

Page 112: ...he safest seats in your vehicle for carrying children are the rear seats a child weighing less than 9 kg must travel in the rearwards facing position both in the front and in the rear CITRO N recommen...

Page 113: ...ag is deactivated Otherwise the child would risk being seriously injured or killed if the airbag were to inflate Forwards facing When a forwards facing child seat is installed on the front passenger s...

Page 114: ...s sun visor To assure the safety of your child you must deactivate the passenger s front airbag when you install a child seat in the rearwards facing position on the front passenger s seat Otherwise t...

Page 115: ...o The impact shield must be used for carrying young children from 9 to 18 kg Groups 2 and 3 from 15 to 36 kg L4 KLIPPAN Optima From the age of 6 years approximately 22 kg the booster is used on its ow...

Page 116: ...22 to 36 kg group 3 6 to 10 years approx Front passenger seat without height adjuster c c U U U U Outer rear seats U U U U Centre rear seat X X X X a Universal child seat child seat that can be insta...

Page 117: ...ution do not leave a child or children alone and unsupervised in a vehicle a child or an animal in a vehicle which is exposed to the sun with the windows closed the keys within reach of children insid...

Page 118: ...eat in place first move the centre rear seat belt towards the middle of the vehicle so as to not interfere with the operation of the seat belt Some seats also have an upper strap which is attached to...

Page 119: ...ation guide R MER BabySafe Plus ISOFIX size category E Group 0 up to 13 kg It is installed in the rearward facing position using an ISOFIX base which attaches to the rings A The stay for the ISOFIX ba...

Page 120: ...ox Type of ISOFIX child seat Infant car seat rear facing rear facing forward facing ISOFIX size category F G C D E C D A B B1 Universal and semi universal ISOFIX child seats which can be installed on...

Page 121: ...rear door to the left on the right hand rear door Unlocking With the ignition key turn the red control one quarter of a turn to the left on the left hand rear door to the right on the right hand rear...

Page 122: ...es which could affect the tyre located on the tyre tread or shoulder Temporary puncture repair kit Access to the kit List of tools All of these tools are specific to your vehicle and can vary accordin...

Page 123: ...flation adaptors for accessories such as balls bicycle tyres Description of the kit F Sealant cartridge G White pipe with cap for repair H Black pipe for inflation I Speed limit sticker The speed limi...

Page 124: ...r s electric plug to the vehicle s 12 V socket Start the vehicle and leave the engine running Take care this product is harmful e g ethylene glycol colophony if swallowed and causes irritation to the...

Page 125: ...alve during this operation risk of splashing Remove the kit and screw the cap back on the white pipe Take care to avoid staining your vehicle with traces of fluid Keep the kit to hand Drive immediatel...

Page 126: ...icates that the puncture has not been fully plugged contact a CITRO N dealer or qualified workshop for assistance Remove and stow the kit Drive at reduced speed 50 mph 80 km h max limiting the distanc...

Page 127: ...from a qualified workshop Checking tyre pressures inflating accessories You can also use the compressor without injecting any product to check or adjust the pressure of your tyres inflate other access...

Page 128: ...changing a faulty wheel for the spare wheel using the tools provided with the vehicle All of these tools are specific to your vehicle and can vary according to the level of equipment Do not use them f...

Page 129: ...edge with the palm of your hand The spare wheel is installed in the boot under the floor depending on version To gain access to it refer to the paragraph Access to the tools on the previous page Acces...

Page 130: ...he centre of the wheel and clip it in place Put the wheel back in its housing Unscrew the yellow central bolt by a few turns then put it in place in the centre of the wheel Tighten fully until the cen...

Page 131: ...and wait where they are safe Ensure that the jack is correctly positioned at one of the vehicle s jacking points Incorrect use of the jack could cause the vehicle to drop Never go underneath a vehicl...

Page 132: ...e changed Remove the bolts and store them in a clean place Remove the wheel Extend the jack 2 until its base plate is in contact with the ground Ensure that the centreline of the jack base plate is di...

Page 133: ...ace of each bolt After changing a wheel To store the punctured wheel in the boot correctly first remove the central cover Have the tightening of the bolts and the pressure of the spare wheel checked b...

Page 134: ...ical information Lower the vehicle fully Fold the jack 2 and detach it Tighten the bolts using the wheelbrace 1 only Refit the bolt covers on each of the bolts according to equipment Store the tools i...

Page 135: ...h pressure washer on persistent marks do not keep the lance directed towards the lamps or their edges for too long so as not to damage their protective coating and seals do not touch the bulb directly...

Page 136: ...ght or left indicates the failure of a bulb on that side Changing direction indicator bulbs Turn the bulb holder an eighth of a turn anti clockwise and extract it Remove the bulb and change it To reas...

Page 137: ...connect the bulb connector by lifting it off Pull the bulb out and change it To refit carry out these operations in reverse order Changing daytime running lamp sidelamp bulbs Pull the bulb holder pres...

Page 138: ...ations in reverse order If you experience any difficulty in replacing bulbs contact your CITRO N dealer or a qualified workshop Changing direction indicator side repeaters Insert a screwdriver towards...

Page 139: ...it pulling in line towards the outside remove the four screws and lift off the bulb holder turn the failed bulb a quarter of a turn and change it To refit carry out these operations in reverse order...

Page 140: ...s in reverse order Ensure that the housing cover is correctly positioned on its support before clipping it into place To change these bulbs it is necessary to remove the housing from the rear shelf wo...

Page 141: ...nging a fuse The extraction tweezer is fitted to the back of the dashboard fusebox cover unclip the cover by pulling at the top right then left disengage the cover completely and turn it over Access t...

Page 142: ...ealer or a qualified workshop Before changing a fuse the cause of the failure must be identified and rectified all electrical consumers must be switched off the vehicle must be immobilised with the ig...

Page 143: ...r conditioning panel F09 5 A Alarm alarm accessory F11 5 A Additional heating F13 5 A Parking sensors parking sensors accessory F14 10 A Air conditioning panel F16 15 A Cigarette lighter 12 V socket F...

Page 144: ...Rating Functions F29 25 A Heated rear window F30 10 A Heated door mirrors F31 Not used F32 Not used F33 30 A Front electric windows F34 30 A Rear electric windows F35 30 A Heated front seats F36 Not...

Page 145: ...F19 10 A Left hand main beam headlamp F29 40 A Front wiper motor F30 80 A Pre heater plugs Diesel Access to the fuses Unclip the cover Change the fuse see corresponding paragraph When you have finishe...

Page 146: ...he positioning lug and then lowering the tab 2 Do not force the tab as locking will not be possible if the clip is not positioned correctly start the procedure again Procedure for charging your batter...

Page 147: ...cable to the earth point C on your vehicle engine mounting Operate the starter let the engine run Wait until the engine returns to idle and disconnect the cables Charging the battery using a battery c...

Page 148: ...batteries to a special collection point Protect your eyes and face before handling the battery All operations on the battery must be carried out in a well ventilated area and away from naked flames a...

Page 149: ...conomy mode Once this time has elapsed a message appears in the screen indicating that the vehicle has switched to economy mode and the active functions are put on standby If a telephone call is being...

Page 150: ...tion the wiper blades vertically on the windscreen Removing Raise the corresponding wiper arm Unclip the wiper blade and remove it Fitting Put the corresponding new wiper blade in place and clip it Fo...

Page 151: ...s prohibited when towing When towing a vehicle with all four wheels on the ground always use an approved towing bar rope and straps are prohibited When towing a vehicle with the engine off there is no...

Page 152: ...c or automatic gearbox Failure to follow this instruction may cause damage to some components braking transmission and the absence of braking assistance when the engine is restarted Unlock the steerin...

Page 153: ...towbar is not fitted by a CITRO N dealer it is imperative that it is fitted in accordance with the vehicle manufacturer s instructions Towbar suitable for the attachment of a trailer or installation o...

Page 154: ...ower the engine speed reduce your speed The maximum towed load on a long incline depends on the gradient and the ambient temperature In all cases keep a check on the coolant temperature If the warning...

Page 155: ...g Offer up the corresponding screen to the lower or upper section of the front bumper Press around its edge to engage its fixing clips one by one Removal Use a screwdriver as a lever to release each o...

Page 156: ...olutions towbars towbar harnesses canoe carrier roof bars bicycle carrier on towbar bicycle carrier on roof bars ski carrier roof boxes carrier for roof bars Styling gear lever knob spoiler parking br...

Page 157: ...communication transmitter you can contact a CITRO N dealer for the specification of transmitters which can be fitted frequency maximum power aerial position specific installation requirements in line...

Page 158: ...are suited to the fixings already present in the vehicle these fixings must be used never fit one mat on top of another The use of mats not approved by CITRO N may interfere with access to the pedals...

Page 159: ...bar fixings include a stud to be fitted to the hole at each fixing point Observe the fitting instructions and the conditions of use in the guide supplied with the bars Maximum authorised weight on the...

Page 160: ...158 Checks TOTAL CITRO N...

Page 161: ...its housing Fix the stay in the notch to hold the bonnet open Do not open the bonnet when there is a very strong wind When the engine is hot handle the exterior safety catch and the stay with care ri...

Page 162: ...oir 2 Coolant header tank 3 Air filter 4 Brake fluid reservoir 5 Battery 6 Fusebox 7 Engine oil dipstick 8 Engine oil filler cap To avoid damaging the electrical units the use of a high pressure washe...

Page 163: ...161 10 Checks Diesel engine 1 Screenwash fluid reservoir 2 Coolant header tank 3 Air filter 4 Brake fluid reservoir 5 Battery 6 Fusebox 7 Engine oil dipstick 8 Engine oil filler cap 9 Priming pump...

Page 164: ...rst time don t keep trying Start the procedure again from the beginning Fill the fuel tank with at least five litres of diesel Open the bonnet Squeeze and release the priming pump repeatedly until res...

Page 165: ...e extremely hot risk of burns and the cooling fan could start at any time even with the ignition off If a level drops significantly have the corresponding system checked by a CITRO N dealer or a quali...

Page 166: ...ged Fluid specification The coolant must conform to the manufacturer s recommendations When the engine is warm the temperature of the coolant is regulated by the fan The cooling fan may start after sw...

Page 167: ...very corrosive Do not discard used oil or fluids into sewers or onto the ground Take used oil to a CITRO N dealer or a qualified workshop France or to an authorised waste disposal site Used products...

Page 168: ...aust on acceleration This does not affect the behaviour of the vehicle or the environment Unless otherwise indicated check these components in accordance with the servicing booklet and according to yo...

Page 169: ...ed in town over short distances It may be necessary to have the condition of the brakes checked even between vehicle services Brake pads For information on checking brake disc wear contact a CITRO N d...

Page 170: ...city cc 1 199 1 587 Bore x stroke mm 75 x 90 5 78 5 x 82 Max power EU standard kW 53 85 Max power engine speed rpm 5 500 6 050 Max torque EU standard Nm 110 150 Max torque engine speed rpm 3 000 4 000...

Page 171: ...eight driver 75 kg The weight of the braked trailer can be increased within the GTW limit if the GVW of the towing vehicle is reduced by an equal amount warning towing using a lightly loaded towing ve...

Page 172: ...1 560 Bore x stroke mm 75 x 88 Max power EU standard kW 68 Max power engine speed rpm 4 000 Max torque EU standard Nm 230 Max torque engine speed rpm 1 750 Fuel Diesel Catalytic converter yes Particle...

Page 173: ...owed load The kerb weight is equal to the unladen weight driver 75 kg The weight of the braked trailer can be increased within the GTW limit if the GVW of the towing vehicle is reduced by an equal amo...

Page 174: ...172 Technical data Dimensions in mm...

Page 175: ...ehicle identification number on the dashboard This number is indicated on a self adhesive label which is visible through the windscreen C Manufacturer s label The VIN is indicated on a self destroying...

Page 176: ...174 Technical data...

Page 177: ...ion while the vehicle is stationary When the engine is switched off and to prevent discharging of the battery the audio system may switch off after a few minutes CONTENTS 02 Steering mounted controls...

Page 178: ...A Traffic Announcement function On Off Long press access to type of information Confirmation or display of contextual menu Automatic search up down for radio frequencies Select previous next CD USB st...

Page 179: ...conds telephone main menu Radio automatic search for a lower frequency CD MP3 USB selection of the previous track CD USB continuous press fast reverse Move in the list Radio automatic search for a hig...

Page 180: ...nagement Telephone management Hang up Personalisation configuration Define the vehicle parameters Choice of language Display configuration Choice of units Date and time adjustment For a detailed globa...

Page 181: ...lect the desired radio station by turning the control knob and confirm by pressing SELECTING A STATION A long press on LIST builds or updates the list of stations audio reception is cut momentarily Th...

Page 182: ...nouncement function gives priority to TA alert messages To operate this function needs good reception of a radio station transmitting this type of message When a traffic report is transmitted the curr...

Page 183: ...d by the radio station related to the current programme or song With the radio displayed on the screen press the control knob to display the contextual menu Turn the control knob to select RADIO TEXT...

Page 184: ...lity of the original player Without pressing the EJECT button insert a CD in the player play begins automatically To play a disc which has already been inserted press the SRC TEL button several times...

Page 185: ...ding standard is always used for an individual disc with as low a speed as possible 4x maximum for optimum sound quality In the particular case of a multi session CD the Joliet standard is recommended...

Page 186: ...automatically after a period which depends on the capacity of the USB memory stick At a first connection the order suggested is by folder When connecting again the order previously chosen is retained...

Page 187: ...ve the modifications By folders all folders containing audio files recognised on the peripheral device in alphabetical order without following the folder structure By artists all of the artist names d...

Page 188: ...ough the vehicle s speakers by connecting it to the USB port cable not supplied If the portable player is not recognised by the USB port connect it to the auxiliary Jack socket The Apple player must b...

Page 189: ...a portable non mass storage device or an Apple player if not recognised by the USB port Connect the portable device to the auxiliary Jack socket using a suitable cable not supplied Press the SRC TEL...

Page 190: ...be initiated from the telephone The audio quality depends on the quality of the transmission from the telephone PLAYBACK MODE The play modes available are Normal the tracks are played in order depend...

Page 191: ...ser guide Press MENU A window is displayed Search in progress Select the telephone to be connected from the list Only one telephone can be connected at a time Select Search for a device For safety rea...

Page 192: ...luetooth devices Accept the connection to the telephone If pairing fails try again the number of attempts is not limited The directory and the calls list can be accessed after the synchronisation peri...

Page 193: ...ephone and confirm Select Telephone management and confirm Select Telephone status and confirm TELEPHONE STATUS The screen displays the name of the telephone the name of the network network signal str...

Page 194: ...ons management and confirm The list of paired telephones is displayed Select a telephone and confirm Indicates connection of the hands free profile Then select and confirm Connect telephone Disconnect...

Page 195: ...elect Telephone and confirm Select Call and confirm Press the control knob to confirm to start the call Select Calls list and confirm MAKING A CALL DIALLING Select numbers one at a time using the and...

Page 196: ...imposed display in the multifunction screen Mobile depending on the information available in the contact records of the telephone connected YES to accept the call is selected by default Press the cont...

Page 197: ...FF to switch the microphone on In certain cases the combined mode has to activated from the telephone If the contact has been cut off when you reconnect on returning to the vehicle the Bluetooth conne...

Page 198: ...xtual menu select DTMF tones and confirm to use the digital keypad to navigate in the interactive voice response menu From the contextual menu select Switch and confirm to return to a call left on hol...

Page 199: ...io system directory are saved in a permanent directory visible to all whatever the telephone connected To modify the contacts saved in the system press MENU then select Telephone and confirm Select Di...

Page 200: ...for each sound source On board Audio Arkamys Sound Staging With Sound Staging the driver and passengers are immersed in an audio scene recreating the natural atmosphere of an auditorium truly a part...

Page 201: ...nagement Consult an entry Delete an entry Delete all entries Telephone management Telephone status Hang up Bluetooth connection Normal Random Random all Repeat By folders By artists By genres By playl...

Page 202: ...icle parameters Driving assistance Parking assistance Vehicle lighting Daytime lights Interior lighting Follow me home headlamps Choice of language Display configuration Choice of units Date and time...

Page 203: ...eft Right Balance to the middle position select the musical ambience None and set the loudness correction to the Active position in CD mode or to the Inactive position in radio mode When changing the...

Page 204: ...not indicate a failure of the audio equipment The aerial is absent or has been damaged for example when going through a car wash or into an underground car park Have the aerial checked by a CITRO N de...

Page 205: ...d CD consult the advice in the Audio section The audio equipment s CD player does not play DVDs Due to their quality level certain writeable CDs will not be played by the audio system The CD player so...

Page 206: ...m When streaming the sound cuts momentarily Some telephones prioritise connection of the hands free profile Delete the hands free connection profile to improve streaming In Random all play not all of...

Page 207: ...tion while the vehicle is stationary When the engine is switched off and to prevent discharging of the battery the system switches off after activation of economy mode CONTENTS 02 Steering mounted con...

Page 208: ...cy Select the previous next CD track Navigation in a list Press and hold fast forward or backward Eject CD Select a preset radio station Radio long press preset a radio station Open the main menu Manu...

Page 209: ...n RADIO automatic search for previous frequency CD MP3 select the previous track CD press and hold fast backward RADIO automatic search for next frequency CD MP3 select the next track CD press and hol...

Page 210: ...e list of stations the sound is interrupted temporarily The external environment hills buildings tunnels basement car parks may block reception including in RDS mode This is a normal effect of the way...

Page 211: ...by an RDS station may not be assured throughout the country as radio stations do not cover 100 of the territory This explains the loss of reception of the station during a journey AUDIO RDS Press MEN...

Page 212: ...station transmitting this type of message When a traffic report is transmitted the current audio source Radio CD is interrupted automatically to play the TA message Normal playback of the audio sourc...

Page 213: ...reflection on the quality of the original player Without pressing the EJECT button insert a CD in the player play begins automatically To play a disc which has already been inserted press the SRC BAND...

Page 214: ...er format it may not be played correctly It is recommended that the same recording standard is always used for a given disc with as low a speed as possible 4x maximum for optimum sound quality In the...

Page 215: ...few seconds to several minutes To play a disc already inserted press SRC BAND several times in succession until CD is displayed Press one of the buttons to select the previous or next track Press one...

Page 216: ...ack selected AUDIO Go back to the first level to select the track classification By Folders all folders containing audio files recognised on the peripheral in alphabetical order ignoring the folder st...

Page 217: ...sing a suitable cable not supplied The auxiliary Jack socket permits the connection of a portable device Press the SRC BAND button successively and select AUX First adjust the volume on your portable...

Page 218: ...les Random the tracks in an album or folder are played in a random order Random all all of the tracks saved in the media ar played in random order Repeat the tracks played are only those from the curr...

Page 219: ...ettings available are AMBIANCE BASS TREBLE LOUDNESS BALANCE AUTO VOLUME The AMBIANCE TREBLE and BASS settings are different and independent for each sound source Select the settings to adjust Adjust t...

Page 220: ...A1 Option A2 OPTION A OPTION B Radio Traffic TA RDS Radio Text Media Play Normal Random Displaying Scroll text 1 2 2 2 1 2 3 3 1 2 1 2 2 1 Random all Repeat 3 3 Unit Celsius Farhenheit 1 2 2 SCREEN M...

Page 221: ...Treble Front Rear Fader Left Right Balance to the middle position select the musical ambience None and set the loudness correction to the Active position in CD mode or to the Inactive position in rad...

Page 222: ...indicate a failure of the audio equipment The aerial is absent or has been damaged for example when going through a car wash or into an underground car park Have the aerial checked by a CITRO N dealer...

Page 223: ...y CDs and store them in suitable conditions The audio settings bass treble ambiance are unsuitable Set the treble or bass level to 0 without selecting an ambiance In Random all play not all of the tra...

Page 224: ...s foglamp Fuel tank misfuel prevention 52 54 Accessories 154 157 ESP ASR 102 Tyre pressures 173 Changing a wheel 126 132 tools removing refitting Lighting controls 91 95 Daytime running lamps 95 Headl...

Page 225: ...56 Child seats 110 115 ISOFIX child seats 116 118 Manual child lock 119 Airbags 106 109 Interior fittings 70 72 sun visor glove box front armrest USB port Auxiliary socket 12 V accessory socket cigar...

Page 226: ...Heating ventilation 61 63 Manual air conditioning without screen 63 64 Electronic air conditioning with screen 65 67 Front demist defrost 68 Rear screen demist defrost 69 Heated lower windscreen 69 Au...

Page 227: ...nt panels 22 Warning lamps 23 31 Service indicator 32 33 Distance recorders 34 Lighting controls 91 95 Direction indicators 100 Horn depending on version 100 Horn depending on version 100 Instruments...

Page 228: ...l 161 Petrol engines 168 Diesel engines 170 12V battery 144 146 Load reduction economy mode 146 147 Engine compartment fuses 139 140 143 Checking levels 163 165 oil brake fluid coolant screenwash flui...

Page 229: ...26 132 Changing a wiper blade 98 148 Changing the date 35 Changing the remote control battery 44 Changing the time 35 Checking levels 163 165 Checking the engine oil level 163 Checking tyre pressures...

Page 230: ...t 133 Lamps warning and indicator r 23 31 Level brake fluid 164 Levels and checks 160 165 Lighting 91 Lighting guide me home 95 Lighting interior r 99 Lighting bulbs replacement 133 138 Lighting contr...

Page 231: ...the air filter r 166 Replacing the oil filter r 166 Replacing the passenger compartment filter r 166 Replacing wiper blades 98 148 Resetting the service indicator r 33 Resetting the trip recorder r 34...

Page 232: ...recorder r 34 Towbar r 151 Towed loads 169 171 Towing another vehicle 149 Traction control ASR 102 Traffic information TA 180 Trailer r 151 Trip computer r 36 38 Trip distance recorder r 34 Tyre pres...

Page 233: ......

Page 234: ......

Page 235: ...integral part of your vehicle It should be passed on to the new user in the event of sale or transfer Automobiles CITRO N declares by application of the provisions of the European regulation Directive...

Page 236: ...CR ATIVE TECHNOLOGIE 2012 DOCUMENTATION DE BORD 4Dconcept Diadeis Edipro 12ELY 0040 Anglais...

Reviews: