background image

11

Practical information

165

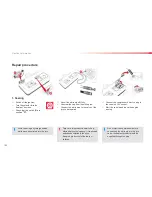
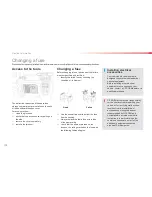
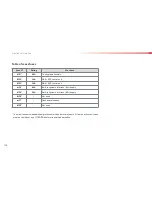
Changing main beam headlamp

bulbs

)

Remove the protective plastic cover by
pulling on the tab.

)

Disconnect the bulb connector. 

)

Move the springs to release the bulb.

)

Remove the bulb and change it.

 To refit, carry out these operations in reverse
order.  

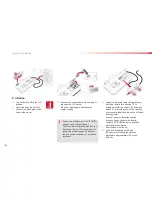
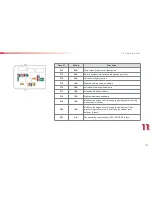
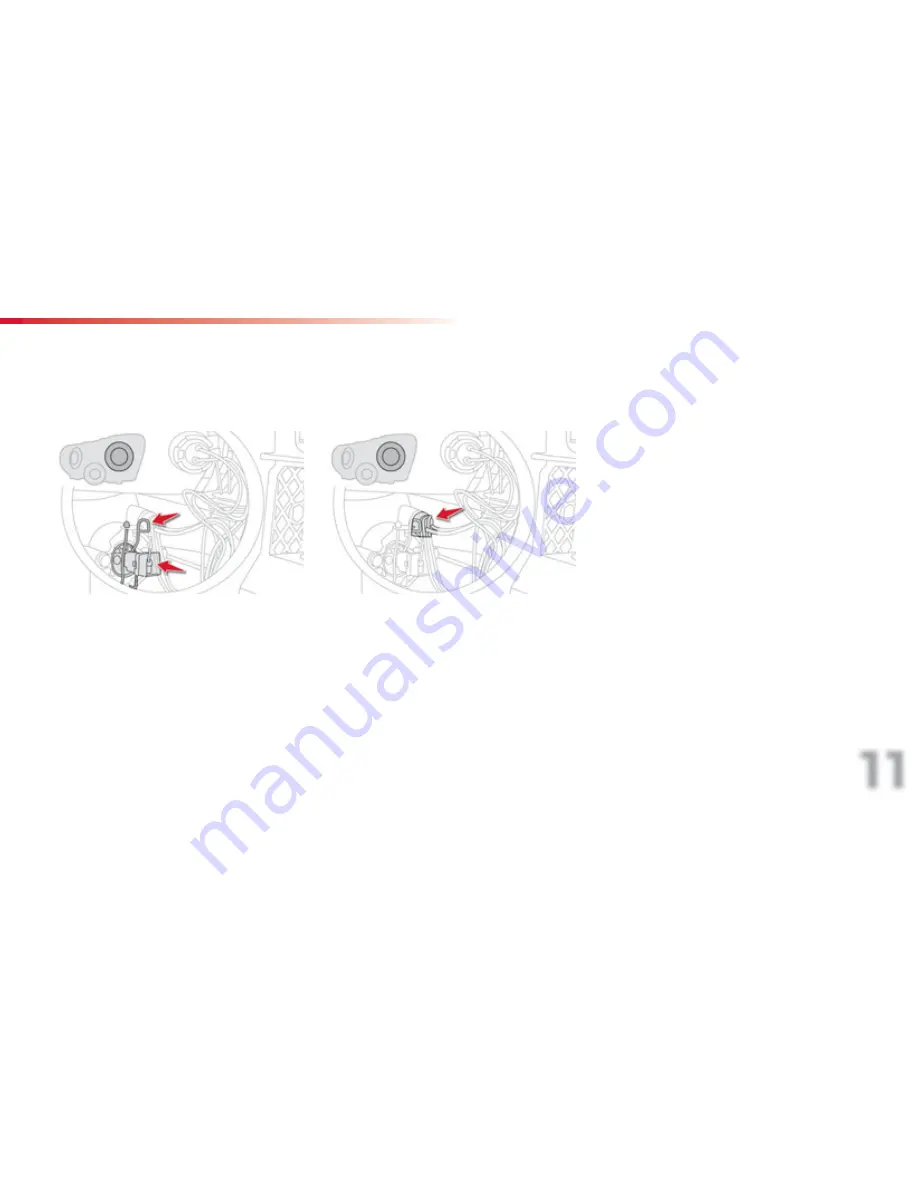
Changing sidelamp bulbs 

)

   Remove the protective plastic cover by 

pulling on the tab. 

)

   Pull the bulb-holder.

)

   Remove the bulb and replace it.  

To refit, carry out these operations in reverse 
order.

Summary of Contents for C3 PICASSO 2012

Page 1: ......

Page 2: ...ddress http service citroen com Select You can find your handbook on the CITRO N website under the heading MyCitro n This personal and customisable space allows you to establish direct and special con...

Page 3: ...the recommended equipment and accessories CITRO N has a presence on every continent a complete product range bringing together technology and a permanent spirit of innovation for a modern and creativ...

Page 4: ...Heating 51 Manual air conditioning 51 Dual zone digital air conditioning 53 Scented air freshener 56 Front seats 57 Rear seats 60 Mirrors 62 Steering wheel adjustment 63 Comfort Remote control key 64...

Page 5: ...ncy or assistance 199 eMyWay 201 Audio system 255 Audio and telematics Alphabetical index Bonnet 143 Running out of fuel Diesel 144 Petrol engines 145 Diesel engines 146 Checking levels 147 Checks 149...

Page 6: ...f provides incomparable visibility and light in the passenger compartment Rear parking sensors reversing camera These two systems warn you if an obstacle is detected behind the vehicle when reversing...

Page 7: ...in which it is stored when released Deadlocking press twice in succession fixed lighting of the direction indicators Unlocking the vehicle rapid flashing of the direction indicators 64 75 Fuel tank 76...

Page 8: ...maximised the boot to be partitioned storing of the rear parcel shelf the floor to be levelled from the boot opening to the front seats when the rear bench seat is in folded and fully back 1 Unlocking...

Page 9: ...omfort for the driver and front passenger It then controls this level automatically relative to the ambient conditions Cruise control Speed limiter These two functions control the speed of the vehicle...

Page 10: ...strument panel 5 Driver s airbag Horn 6 Gear lever 7 Open storage compartment 8 Door mirror controls Electric window controls Rear electric windows and doors deactivation control 9 Passenger s airbag...

Page 11: ...nger s airbag 8 Side adjustable air vent 9 Glove box Fusebox 10 Bonnet release 11 Dynamic stability control ESP ASR switch Parking sensors switch Central locking switch Hazard warning lamps switch Ele...

Page 12: ...Familiarisation 10 Driver s seat adjustment Forwards backwards 57 Backrest angle Height Sitting comfortably...

Page 13: ...djustment 1 Release the adjustment mechanism 2 Adjust for height and reach 3 Lock the adjustment mechanism Front seat additional adjustments Head restraint height Armrest A Release the armrest B Adjus...

Page 14: ...isting defrosting of the mirrors is linked with that of the rear screen Interior rear view mirror Manual day night model 1 Selection of the day position of the mirror 2 Mirror adjustment Front seat be...

Page 15: ...ic illumination of headlamps Sidelamps Dipped main beam headlamps Rear foglamp or Front and rear foglamps Park Intermittent wipe Wash wipe Stalk A windscreen wipers Wipers Switching off AUTO Push the...

Page 16: ...sing the AUTO button after selecting the desired level of comfort Recommended interior settings Ventilation I require Heating or Manual Air Conditioning Air distribution Air flow Air recirculation Int...

Page 17: ...mp indicates the status of the corresponding function A Deactivation of the ESP ASR system With the ignition on the orange and red warning lamps come on With the engine running these warning lamps sho...

Page 18: ...e indicator lamp A indicates that the electric child lock is on A Front and or rear seat belts not fastened unfastened warning lamp B Front left seat belt warning lamp C Front right seat belt warning...

Page 19: ...in the instrument panel screen N Neutral R Reverse 1 to 6 Gears engaged AUTO Automated mode Select position N and press the brake pedal firmly while starting the engine Select automated mode position...

Page 20: ...Going into engine START mode The ECO warning lamp goes off and the engine restarts automatically with a 6 speed electronic gearbox system In some circumstances STOP mode may not be available the ECO w...

Page 21: ...l when it is selected 1 Cruise control mode Selection Off 2 Programming a speed Decreasing the programmed value 3 Programming a speed Increasing the programmed value 4 Cruise control Off Resume Cruise...

Page 22: ...the passenger compartment is too warm ventilate it by opening the windows and air vents before using the air conditioning Above 30 mph 50 km h close the windows and leave the air vents open Remember...

Page 23: ...tyre pressures regularly when cold referring to the label in the door aperture driver s side Carry out this check in particular before a long journey at each change of season after a long period out o...

Page 24: ...ng and information messages Multifunction screen Indicator lamps display zone This zone groups together the vehicle operation indicator lamps Display zero reset button This permits resetting of the fu...

Page 25: ...p concerned Certain warning lamps may come on in one of two different modes Only by relating the type of illumination to the operating status of the vehicle can it be ascertained whether the situation...

Page 26: ...eping your foot on the brake pedal Observe the safety recommendations For further information on the parking brake refer to the Parking brake section Engine coolant temperature fixed blue On starting...

Page 27: ...at Turn the control switch to the OFF position to deactivate the front passenger s airbag In this case you can install a rear facing child seat Warning lamp is on Cause Action Observations Electric ch...

Page 28: ...nt airbag is deactivated In this case you can install a rear facing child seat Set the control switch to the ON position to activate the passenger s front airbag In this case do not fit a child seat i...

Page 29: ...s for example engine oil level screenwash level remote control battery state of the bulbs saturation of the particle emission filter on Diesel vehicles see Checks Particle Emissions Filter For any oth...

Page 30: ...ing The engine management system has a fault Risk of destruction of the catalytic converter Have it checked by a CITRO N dealer or a qualified workshop fixed The emission control system has a fault Th...

Page 31: ...p is on Cause Action Observations Maximum coolant temperature fixed red The temperature of the cooling system is too high Stop as soon as it is safe to do so Wait until the engine has cooled down befo...

Page 32: ...accompanied by an increasing audible signal The driver and or the front passenger has not fastened or has unfastened their seat belt Pull the strap then insert the tongue in the buckle Rear seat belt...

Page 33: ...km remain before the next service is due For a few seconds after the ignition is switched on the spanner symbolising the service operations comes on The distance recorder display line indicates the di...

Page 34: ...at any time Press the trip distance recorder zero reset button The service information is displayed for a few seconds then disappears The distance remaining may be weighted by the time factor dependin...

Page 35: ...pstick the level must be topped up to prevent damage to the engine This is indicated by the flashing of OIL Contact a CITRO N dealer or a qualified workshop Refer to the Checks section to locate the d...

Page 36: ...s and controls when the level of brightness required is reached release the button Deactivation When the lighting is off or in day mode on vehicles fitted with daytime running lamps pressing the butto...

Page 37: ...ions display settings language units Press the OK button to select the menu required From the audio equipment control panel you can press the MENU button for access to the main menu press the or butto...

Page 38: ...e for the Month Day Hours and Minutes functions Once you have selected a setting press the or buttons to change its value Press the or buttons to switch respectively to the previous or next setting Pr...

Page 39: ...For safety reasons configuration of the multifunction screen by the driver must only be done when stationary Once the fuel consumption unit has been changed to l 100 km or km l the information relatin...

Page 40: ...information messages may appear temporarily These can be cleared by pressing the Back button Controls There are three display control buttons Back to abandon the operation in progress MENU to scroll t...

Page 41: ...mption l 100 km mpg or km l The chosen language will also be used in the eMyWay satellite navigation colour screen For safety reasons configuration of the multifunction screen by the driver must only...

Page 42: ...s menu allows certain systems to be activated or deactivated This displays the following information time date audio functions navigation system information SETUP menu Press the SETUP button to access...

Page 43: ...or buttons to change a setting value press the OK button to confirm or press the Back button to abandon the operation in progress Main menu Press the MENU button to gain access to the main menu audio...

Page 44: ...ty section daytime lighting refer to the Visibility section guide me home lighting Personalisation Configuration menu Once this menu has been selected you can gain access to the following functions de...

Page 45: ...ne Press the or buttons to set the value required 15 30 or 60 seconds then press the OK button to confirm Press the or buttons then the OK button to select the OK box and confirm or press the Return b...

Page 46: ...the Audio system on with this menu selected you can configure your Bluetooth hands free kit pairing view the various telephone directories call log services and manage your calls call hang up double c...

Page 47: ...hat gives you information on the journey in progress range fuel consumption Monochrome screen A Information displays range current fuel consumption Stop Start time counter distance travelled average f...

Page 48: ...tab with the distance travelled the average fuel consumption the average speed for the first trip the trip 2 tab with the distance travelled the average fuel consumption the average speed for the seco...

Page 49: ...h Calculated since the last trip computer reset Distance remaining to destination miles or km This is the distance remaining to be travelled to the final destination It is either calculated instantly...

Page 50: ...rculating in the passenger compartment is filtered and originates either from the outside via the grille located at the base of the windscreen or from the inside in air recirculation mode Control pane...

Page 51: ...it in good working order Ensure that the passenger compartment filter is in good condition and have the filter elements replaced regularly refer to the Checks section We recommend the use of a combine...

Page 52: ...lamp associated with the button comes on Switching off The demist defrost switches off automatically to prevent an excessive consumption of current It is possible to stop the demist defrost operation...

Page 53: ...o red hot to adjust the temperature to your requirements Windscreen and side windows 1 Temperature adjustment The heating ventilation or air conditioning systems can only operate with the engine runni...

Page 54: ...he indicator lamp switches off to confirm this 5 Air conditioning On Off It enables you to lower the temperature in summer increase the effectiveness of the demisting in winter above 3 C Switching off...

Page 55: ...nger compartment temperature air flow air distribution and air recirculation in accordance with the comfort value that you have chosen This system is designed to operate effectively in all seasons wit...

Page 56: ...distribution of the ventilation to the windscreen and side windows If you wish you can make a different choice from that offered by the system by changing a setting The other functions will still be c...

Page 57: ...ndows demisting or defrosting the windscreen the side windows and the vents the windscreen the side windows the vents and the footwells the vents and the footwells the vents the footwells the windscre...

Page 58: ...Remove the cartridge Refit its sealing case As a safety precaution do not carry out any action on the cartridge while driving Do not dismantle the cartridges Do not attempt to refill the fragrance dif...

Page 59: ...for ease of driving and comfort Driver s seat height adjustment Seat back angle adjustment Forwards backwards adjustment Raise the control bar and slide the seat forwards or backwards Pull the contro...

Page 60: ...ss the lug A and pull the head restraint upwards A To put the head restraint back in place engage the head restraint stems in the openings keeping them in line with the seat back To lower the head res...

Page 61: ...ush the control upwards and guide the seat back forwards to fold it onto the seat cushion To put it back in place lift up the seat back and guide it rearwards until it locks in Do not forget to fold t...

Page 62: ...ned position To adjust the seat back Pull the control lever forwards Adjusting the head restraints The 1 3 2 3 rear seat is fitted with head restraints They have a high position for comfort and safety...

Page 63: ...the low position Pull control A to release the seat back which folds easily onto the seat cushion The seat fits into the floor providing a continuous level floor To put the seat back in position Pull...

Page 64: ...with the ignition on pull the control A in the central position rearwards Adjustment Move control A to the right or to the left to select the corresponding mirror Move control B in all four direction...

Page 65: ...eel adjustment When stationary pull the control lever to y release the adjustment mechanism Adjust the height and reach to suit your driving position Push the control lever to lock the adjustment mech...

Page 66: ...s unfold at the same time Unlocking using the remote control Locking the vehicle Press the closed padlock to lock the vehicle Locking using the key Turn the key to the left in the driver s door lock t...

Page 67: ...ck to lock the vehicle Press the closed padlock again within five seconds to deadlock the vehicle Deadlocking is confirmed by fixed lighting of the direction indicators for approximately two seconds A...

Page 68: ...ho does not have the key Anti theft protection In the event of a fault you are informed by illumination of this warning lamp an audible signal and a message in the screen Folding the key First press t...

Page 69: ...and remove the key from the ignition switch The remote control is fully operational again If the battery is flat you are informed by illumination of this warning lamp an audible signal and a message i...

Page 70: ...of a serious impact causing airbag deployment As a safety precaution never leave children alone in the vehicle except for a very short period In all cases it is essential to remove the key from the ig...

Page 71: ...itch The window stops as soon as the switch is released One touch electric windows There are two methods of operation manual mode Press or pull the switch gently The window stops as soon as the switch...

Page 72: ...passengers use the electric windows correctly Be aware of children when operating the windows Safety anti pinch The one touch electric windows are fitted with a safety anti pinch function When the wi...

Page 73: ...r door control to open the door this unlocks only the door opened Closing when the engine is running this warning lamp comes on accompanied by a message in the multifunction screen for a few seconds O...

Page 74: ...cally If the vehicle is locked from the outside the red indicator lamp flashes and button A is inactive In this case use the remote control or the key to unlock the vehicle If one of the doors is open...

Page 75: ...k located on the edge of the door then turn it one eighth of a turn Locking the driver s door Insert the key in the lock then turn it to the left Unlocking the driver s door Insert the key in the lock...

Page 76: ...o gain access to the lock from inside the boot Insert a small screwdriver into hole A of the lock to unlock the tailgate Closing If the tailgate is not closed correctly Opening when the vehicle is mov...

Page 77: ...nger compartment It is fitted with 2 independent manual blinds to help maintain a comfortable temperature Closing Rear blind Pull the blind forwards until it locks in Front blind Pull the blind rearwa...

Page 78: ...en you have filled the tank put the cap back in place turn the key to the right then remove it from the cap close the flap Additions of fuel must be of at least 5 litres to be registered by the fuel g...

Page 79: ...ssia only the use of RON 92 unleaded petrol is possible Quality of the fuel used for Diesel engines The Diesel engines are perfectly compatible with biofuels which conform to current and future Europe...

Page 80: ...h the flap of the misfuel prevention device and pour slowly Travelling abroad As Diesel fuel pump nozzles may be different in other countries the presence of the misfuel prevention device may make ref...

Page 81: ...are also available according to the following options guide me home lighting automatic illumination of headlamps Model without AUTO lighting Model with AUTO lighting Automatic illumination of headlamp...

Page 82: ...first time to switch off the rear foglamp rearwards a second time to switch of the front fog lamps C Foglamp selection ring The foglamps operate with the dipped and main beam headlamps When the lighti...

Page 83: ...ter a set time Lighting on audible warning When the ignition is switched off all of the lamps switch off automatically unless guide me home lighting is activated If the lighting is switched on manuall...

Page 84: ...TRO N dealer or a qualified workshop In fog or snow the sunshine sensor may detect sufficient light Therefore the lamps will not come on automatically Do not cover the sunshine sensor linked with the...

Page 85: ...guration menu In countries where daytime lamps are a legal requirement this function is activated by default it cannot be deactivated in daylight the sidelamps and number plate lamps also come on If t...

Page 86: ...h urban driving winding road intersections parking manouevres with cornering lighting without cornering lighting Switching on This function starts when the corresponding direction indicator is switche...

Page 87: ...1 or 2 people in the front seats Less than 5 people 1 5 people 5 people maximum authorised load 2 3 Driver maximum authorised load The initial setting is position 0 Travelling abroad If using your veh...

Page 88: ...ction Off Single wipe press down and release Programming Various automatic wiper control modes are also available according to the following options automatic rain sensitive windscreen wipers rear wip...

Page 89: ...wiper will operate if the windscreen wipers are operating Programming The function is activated or deactivated via the multifunction screen configuration menu This function is activated by default Re...

Page 90: ...oving the stalk upwards then returning it to position 0 Operating fault If an automatic wiping malfunction occurs the wipers will operate in intermittent mode Have it checked by a CITRO N dealer or a...

Page 91: ...gradually when the vehicle is locked when the ignition is switched on 30 seconds after the last door is closed when the vehicle is unlocked when the key is removed from the ignition when a door is op...

Page 92: ...manual or automatic of the sidelamps or dipped or main beam Switching off The courtesy lamp LED goes off when the sidelamps or dipped or main beam are switched off manually lighting control stalk in...

Page 93: ...torch back in place in its location starting with the rear If you have forgotten to switch off the torch this switches it off automatically It the torch is not engaged correctly it may not charge and...

Page 94: ...ld surveillance mirror 3 Grab handle with coat hook 4 Upper storage box Scented air freshener adjustment 5 Storage compartments 6 Glove box Fusebox 7 Storage pockets 8 Ticket holder 9 12 volt socket 1...

Page 95: ...holder Glove box This permits access to the fuse box To open the glove box pull the grip towards you A child surveillance mirror is installed above the interior rear view mirror This allows you to mo...

Page 96: ...located under the front passenger seat 12 V accessory socket To use the 12 V socket max power 100 Watts lift the cap and connect the accessory Opening Raise the front of the drawer and pull it Do not...

Page 97: ...Removal To remove the mat on the driver s side move the seat as far back as possible unclip the fixings remove the mat Ticket holder To avoid any risk of jamming of the pedals only use mats which are...

Page 98: ...ted on the back of the front seats Two boxes are available located under the rear passenger footwells To open them lift the lid using the cut out There is a cup holder located at the rear of the centr...

Page 99: ...ly accessible if the table is unfolded Press the button to switch the lamp on or off Individual reading lamps Side blinds Blinds are available for the side windows Pull the side blind longways by the...

Page 100: ...the adjustable boot floor is in the high position Load the objects from inside the boot Ski flap Device for storing and transporting long objects When unfolded this provides a storage area split into...

Page 101: ...ngs 99 Boot fittings 1 Storage net on right hand boot trim 2 Open storage compartments 3 Torch 4 Adjustable boot floor 5 Carrier bag hook 6 Securing rings 7 Storage area under boot carpet 8 Rear parce...

Page 102: ...ling on the strap Move the adjustable boot floor rearwards and then down following the guides on the sides Placing the adjustable boot floor in the high position Lift the adjustable boot floor by pull...

Page 103: ...boot unhook the two cords pull the shelf towards you to unclip it lift the shelf to remove it Refitting the shelf From the boot position the shelf so that the two notches are directly above the fixing...

Page 104: ...Removing the shelf From the boot unhook the two cords gently lift up the shelf to unclip it remove the shelf Refitting the shelf From the boot position the shelf so that the two notches are directly...

Page 105: ...under the age of 12 or less than one and a half metres tall must travel in approved child seats suited to their weight on seats fitted with a seat belt or ISOFIX mountings statistically the safest sea...

Page 106: ...position with the seat back upright and leave the passenger airbag activated Rearwards facing When a rearwards facing child seat is installed on the front passenger seat the passenger airbag must be...

Page 107: ...e passenger s sun visor To assure the safety of your child you must deactivate the passenger s front airbag when you install a child seat in the rearwards facing position on the front passenger s seat...

Page 108: ...ng young children from 9 to 18 kg Groups 2 and 3 from 15 to 36 kg L4 KLIPPAN Optima From the age of 6 years approximately 22 kg the booster is used on its own L5 R MER KIDFIX Can be fitted to the vehi...

Page 109: ...in force in your country before installing your child on this seat U Seat suitable for the installation of a child seat secured using a seat belt and universally approved rearwards facing and or forw...

Page 110: ...avel in the forwards facing position on the front passenger seat unless the rear seats are already occupied by other children cannot be used or are absent Deactivate the passenger airbag when a rearwa...

Page 111: ...tether belt which can be attached to ring B To attach this belt raise the head restraint of the seat then pass the buckle between the rods Then fix the buckle on ring B then tension the top tether be...

Page 112: ...t body angles sitting reclining lying Adjust the front seat of the vehicle so that the child s feet do not touch the back of the seat Can be installed forwards facing by attaching it to the seat using...

Page 113: ...seat either rearwards facing fitted with a top belt or a stay forwards facing fitted with a stay a shell seat fitted with an upper strap or a stay For advice on securing the top tether belt refer to t...

Page 114: ...lamp indicates a fault with the electric child lock Have it checked by a CITRO N dealer or a qualified workshop This system is independent and in no circumstances does it take the place of the central...

Page 115: ...function Move the stalk briefly upwards or downwards without going beyond the point of resistance the corresponding direction indicators will flash 3 times A visual warning by means of the direction i...

Page 116: ...elf felt by slight vibration of the brake pedal Emergency or assistance call This system allows you to make an emergency or assistance call to the emergency services or to the dedicated CITRO N servic...

Page 117: ...t in loss of control of the vehicle when braking Emergency braking assistance System which in an emergency enables you to obtain the optimum braking pressure more quickly thus reducing the stopping di...

Page 118: ...action to prevent skidding of the wheels by acting on the brakes of the driving wheels and on the engine The electronic stability programme acts on the brake of one or more wheels and on the engine to...

Page 119: ...button on the buckle Guide the seat belt as it rolls up Seat belts Front seat belts The front seat belts are fitted with a pretensioning and force limiting system This system improves safety in the fr...

Page 120: ...insert the tongue in the buckle Check that the seat belt is fastened correctly by pulling the strap Unfastening Press the red button on the buckle Guide the seat belt as it rolls up The corresponding...

Page 121: ...ening of each buckle by pulling the strap The seat belt for the rear centre seat of the 2nd row is incorporated at the rear left of the roof Seat belt unfastened warning lamp display When the ignition...

Page 122: ...oning device may be deployed before and independently of the airbags Deployment of the pretensioners is accompanied by a slight discharge of harmless smoke and a noise due to the activation of the pyr...

Page 123: ...lts with the exception of the rear centre passenger If a collision occurs the electronic detectors record and analyse the front and side impacts sustained in the impact detection zones in the case of...

Page 124: ...nel or on the seat belt and passenger s front airbag warning lamp display when the ignition is on and until the airbag is reactivated If this warning lamp flashes contact a CITRO N dealer or a qualifi...

Page 125: ...of a serious side impact applied to all or part of the side impact zone B perpendicular to the longitudinal centreline of the vehicle on a horizontal plane and directed from the outside towards the in...

Page 126: ...not fix or attach anything to the roof This could cause injury to the head if the curtain airbag is deployed If fitted on your vehicle do not remove the grab handles installed on the roof they play a...

Page 127: ...brake lever gently press the release button then lower the lever fully 6 speed manual gearbox Engaging 5th or 6th gear Move the lever fully to the right to engage 5th or 6th gear Engaging reverse gear...

Page 128: ...not to follow the advice given by the system This function cannot be deactivated Example You are in third gear The information appears in the instrument panel in the form of an arrow accompanied by th...

Page 129: ...rake move the gear lever forwards to select this position N Neutral With your foot on the brake select this position to start A Automated mode Move the lever backwards to select this mode M Manual mod...

Page 130: ...in the instrument panel screen The gearbox operates in auto active mode without any action on the part of the driver It continuously selects the most suitable gear for optimisation of fuel consumption...

Page 131: ...ions such as overtaking a vehicle or the approach to a corner After a few moments without any action on the control paddles the gearbox resumes automatic control of the gears The gears engaged appear...

Page 132: ...when parking you must apply the parking brake to immobilise the vehicle When immobilising the vehicle with the engine running you must place the gear lever in neutral N Before carrying out any work in...

Page 133: ...vehicle is held momentarily when you release the brake pedal provided you are in automated mode position A or in manual mode position A M on an electronic gearbox On a descending slope with the vehicl...

Page 134: ...y It rests itself to zero every time the ignition is switched on with the key Special cases STOP mode not available STOP mode is not invoked when the driver s door is open the driver s seat belt is no...

Page 135: ...lly when you open the driver s door you unfasten the driver s seat belt the speed of the vehicle exceeds 7 mph 11 km h with the electronic gearbox system some special conditions battery charge engine...

Page 136: ...rence numbers available from a CITRO N dealer or a qualified workshop Fitting a battery not listed by CITRO N introduces the risk of malfunction of the system Before doing anything under the bonnet de...

Page 137: ...at least 20 mph 30 km h The speed limiter is switched off by manual f operation of the control The programmed speed can be exceeded temporarily by pressing the accelerator firmly To return to the prog...

Page 138: ...ected The display returns to the distance recorder Operating fault In the event of a speed limiter fault the speed is cleared resulting in flashing of the dashes Have it checked by a CITRO N dealer or...

Page 139: ...the brake or clutch pedal or on triggering of the ESP system for safety reasons It is possible to exceed the programmed speed temporarily by pressing the accelerator pedal To return to the programmed...

Page 140: ...shop Set the programmed speed by accelerating to the required speed then press button 2 or 3 e g 70 mph 110 km h Switch off the cruise control by pressing button 4 this is confirmed in the screen PAUS...

Page 141: ...n screen with blocks which become increasingly closer to the vehicle depending on version Detection zone When the distance between the rear of the vehicle and the obstacle is less than thirty centimet...

Page 142: ...rrier is fitted vehicle fitted with a towbar or bicycle carrier recommended by CITRO N In bad or wintry weather ensure that the sensors are not covered with mud frost or snow Press button A again to r...

Page 143: ...resent the general direction of the vehicle The red lines represent a distance of about 30 cm beyond the edge of your vehicle s rear bumper The audible signal becomes continuous from this limit The gr...

Page 144: ...Checks 142 TOTAL CITRO N...

Page 145: ...is secured correctly Open the front left door Pull the interior bonnet release lever A located at the bottom of the door aperture Opening Before doing anything under the bonnet switch off the Stop Sta...

Page 146: ...el appears in the transparent pipe with the green connector Operate the starter until the engine starts Depending on version put the cover back in position and clip it in place Close the bonnet If the...

Page 147: ...rvoir 2 Coolant header tank 3 Air filter 4 Brake fluid reservoir 5 Battery 6 Fusebox 7 Engine oil dipstick 8 Engine oil filler cap To avoid damaging the electrical units the use of a high pressure was...

Page 148: ...ks 146 Diesel engines Screenwash fluid reservoir 2 Coolant header tank 3 Air filter 4 Brake fluid reservoir 5 Battery 6 Fusebox 7 Engine oil dipstick 8 Engine oil filler cap 9 Priming pump on fuel fil...

Page 149: ...form to the manufacturer s recommendations and meet the DOT3 or DOT4 standard If a level drops significantly have the corresponding system checked by a CITRO N dealer or a qualified workshop Check all...

Page 150: ...ised wait at least one hour after switching off the engine before carrying out any work To avoid any risk of scalding unscrew the cap by two turns to allow the pressure to drop When the pressure has d...

Page 151: ...tails of the replacement interval for this component Unless otherwise indicated check these components in accordance with the servicing booklet and according to your engine Otherwise have them checked...

Page 152: ...in town over short distances It may be necessary to have the condition of the brakes checked even between vehicle services Brake pads The gearbox does not require any maintenance no oil change Refer...

Page 153: ...inflation I Speed limit sticker Access to the kit This kit is installed in the storage box under the boot floor The speed limit sticker I must be affixed to the vehicle s steering wheel to remind you...

Page 154: ...gine running Take care this product is harmful e g ethylene glycol colophony if swallowed and causes irritation to the eyes Keep this product out of the reach of children Avoid removing any foreign bo...

Page 155: ...rew the cap back on the white pipe Take care to avoid staining your vehicle with traces of fluid Keep the kit to hand Drive immediately for approximately three miles five kilometres at reduced speed b...

Page 156: ...on C in accordance with the vehicle s tyre pressure label located on the left hand door aperture A loss of pressure indicates that the puncture has not been fully plugged contact a CITRO N dealer or q...

Page 157: ...t first Connect the compressor s electrical connector to the vehicle s 12 V socket Start the vehicle and let the engine run Adjust the pressure using the compressor to inflate switch B in position I t...

Page 158: ...Procedure for changing a faulty wheel for the spare wheel using the tools provided with the vehicle List of tools All of these tools are specific to your vehicle Do not use them for other purposes 1...

Page 159: ...l The spare wheel is installed in the boot under the floor According to country the spare wheel may be steel or of the space saver type For access to it refer to the paragraph Access to tools on the p...

Page 160: ...from the rear Take the wheel out of the boot Putting the wheel back in place Put the wheel back in its housing Refit the yellow central bolt in the centre of the wheel Tighten fully until the central...

Page 161: ...g the wheelbrace 1 only Parking the vehicle Immobilise the vehicle where it does not block traffic the ground must be level stable and non slippery Apply the parking brake switch off the ignition and...

Page 162: ...e changed Extend the jack 2 until its base plate is in contact with the ground Ensure that the centreline of the jack base plate is directly below the location A or B used Raise the vehicle until ther...

Page 163: ...other bolts using the wheelbrace 1 only Refitting a wheel After changing a wheel To store the punctured wheel in the boot correctly first remove the central cover When using the space saver type spar...

Page 164: ...e has them using the wheelbrace 1 fitted with the security socket 4 Tighten the other bolts using the wheelbrace 1 only Refit the bolt covers on each of the bolts with alloy wheels only Store the tool...

Page 165: ...lvent product use a sponge and soapy water or a pH neutral product when using a high pressure washer on persistent marks do not keep the lance directed towards the lamps or their edges for too long so...

Page 166: ...over by pulling on the tab Turn the bulb holder by a quarter turn Remove the bulb and change it To refit carry out these operations in reverse order If either of the direction indicator warning lamps...

Page 167: ...ct the bulb connector Move the springs to release the bulb Remove the bulb and change it To refit carry out these operations in reverse order Changing sidelamp bulbs Remove the protective plastic cove...

Page 168: ...n replacing bulbs contact your CITRO N dealer or a qualified workshop Through the cover remove the lamp finisher by pulling it towards you Unscrew the two fixing screws of the module and remove it fro...

Page 169: ...ce any difficulty in replacing these lamps you can contact a CITRO N dealer or a qualified workshop While removing the module take care not to damage your vehicle s paintwork with the screwdriver do n...

Page 170: ...left hand side P21W 3 Direction indicators P21W Changing brake lamp sidelamp and direction indicator bulbs turn the bulb holder a quarter turn remove the failed bulb and replace it To refit carry out...

Page 171: ...bs open the boot remove the two plugs located on the boot inner panel press on the body of the lamp with 2 screwdrivers to remove it from its housing turn the corresponding bulb holder a quarter turn...

Page 172: ...ty bulb Map reading lamps 2 W5W Detach the cover of the interior lamp To access the faulty bulb detach the partition for the reading lamp 2 concerned as necessary Footwell lamps W5W Unclip the cover u...

Page 173: ...with a flat screwdriver in the hole under the tab and recover the bulb unit Open the bulb unit fully to change the bulb Door mirror lamps W5W Unclip the cover using a thin screwdriver to access the f...

Page 174: ...e rating Check that the number marked on the fusebox the rating marked on the fuse and the following tables all agree Good Failed CITRO N will not accept responsibility for the cost incurred in repair...

Page 175: ...ed FH40 30 A Trailer relay unit Fuse N Rating Functions F1 15 A Rear wiper F2 Not used F3 5 A Airbags and pretensioners control unit F4 10 A Steering wheel angle sensor air conditioning clutch switch...

Page 176: ...g mounted controls F11 15 A Ignition diagnostic socket F12 15 A Rain sunshine sensor trailer relay unit F13 5 A Main stop switch engine relay unit F14 15 A Parking sensors control unit seat belt unfas...

Page 177: ...he battery left hand side Access to the fuses Unclip the cover Change the fuse see corresponding paragraph When you have finished close the cover carefully to guarantee the sealing of the fuse box All...

Page 178: ...20 A Daytime running lamps F5 15 A Diesel fuel heater Diesel engine fuel pump petrol engine F6 10 A ABS ESP control unit ABS ESP cut off relay secondary stop switch F7 10 A Electrical power steering F...

Page 179: ...main beam headlamp F16 10 A Left hand main beam headlamp F17 15 A Left hand dipped headlamp F18 15 A Right hand dipped headlamp F19 15 A Multifunction engine control supply petrol engine air cooling...

Page 180: ...3 30 A ABS ESP control unit MF4 60 A Built in Systems Interface BSI supply MF5 60 A Built in Systems Interface BSI supply MF6 Not used MF7 Dashboard fusebox MF8 Not used The maxi fuses provide additio...

Page 181: ...t To gain access to it open the bonnet using the interior release lever then the exterior safety catch secure the bonnet stay lift the plastic cover on the terminal The presence of this label in parti...

Page 182: ...and lead They must be disposed of in accordance with regulations and must not in any circumstances be discarded with household waste Take used remote control batteries and vehicle batteries to a speci...

Page 183: ...reen indicating that the vehicle has switched to economy mode and the active functions are put on standby A flat battery prevents the engine from starting refer to the corresponding paragraph If the t...

Page 184: ...e in place and clip it Fold down the wiper arm carefully Before removing a front wiper blade Within one minute after switching off the ignition operate the wiper stalk to position the wiper blades in...

Page 185: ...han that of the towed vehicle The person at the wheel of the towed vehicle must have a valid driving licence When towing a vehicle with all four wheels on the ground always use an approved towing bar...

Page 186: ...g bar Switch on the hazard warning lamps on the towed vehicle Towing another vehicle Failure to observe this special condition could result in damage to certain braking components and the absence of b...

Page 187: ...heaviest items are as close as possible to the axle and the nose weight approaches the maximum permitted without exceeding it Air density decreases with altitude thus reducing engine performance Abov...

Page 188: ...ational legislation in order to comply with the regulations for transporting objects which are longer than the vehicle Braking Towing a trailer increases the braking distance To avoid overheating of t...

Page 189: ...ng boot floor Safety and security anti theft alarm warning triangle high visibility vest breathalyzer first aid kit snow chains non skid covers security wheel bolts vehicle tracking system child seats...

Page 190: ...accessories Installation of radio communication transmitters Before installing any after market radio communication transmitter you can contact a CITRO N dealer for the specification of transmitters w...

Page 191: ...eels check that no part of the chain or its fixings is in contact with the wheel rim All original tyre sizes 15 16 17 can be fitted with chains Original tyre size Maximum link size 195 60 R15 9 mm 195...

Page 192: ...capacity cc 1 397 1 598 1 598 Bore x stroke mm 77 x 75 77 x 85 8 77 x 85 8 Max power EU standard kW 70 84 88 84 88 Max power engine speed rpm 6 000 5 200 6 000 5 200 6 000 Max torque EU standard Nm 1...

Page 193: ...d within the GTW limit if the GVW of the towing vehicle is reduced by an equal amount warning towing using a lightly loaded towing vehicle may have an adverse effect on its road holding PETROL ENGINES...

Page 194: ...m 6 000 Max torque EU standard Nm 136 Max torque speed rpm 4 000 Fuel LPG Unleaded Catalytic converter Yes GEARBOX Manual 5 speed OIL CAPACITY in litres Engine with filter replacement 4 25 The maximum...

Page 195: ...f the towing vehicle is reduced by an equal amount warning towing using a lightly loaded towing vehicle may have an adverse effect on its road holding The GTW and towed load values indicated are valid...

Page 196: ...270 Max torque engine speed rpm 1 750 1 750 1 750 Fuel Diesel Diesel Diesel Catalytic converter yes yes yes Particle emission filter yes yes yes GEARBOXES Manual 5 speed Electronic gearbox system 6 s...

Page 197: ...TW on a 12 gradient 2 979 3 011 2 757 Braked trailer within GTW limit on a 10 or 12 gradient 1 200 1 200 950 Braked trailer with load transfer with the GTW limit 1 200 1 200 1 200 Unbraked trailer 675...

Page 198: ...Technical data 196 Dimensions in mm...

Page 199: ...Manufacturer s label This number is indicated on a self destroying label affixed to the centre pillar on the left hand side The inflation pressures must be checked when the tyres are cold at least on...

Page 200: ...Technical data 198...

Page 201: ...199 EMERGENCY OR ASSISTANCE CALL...

Page 202: ...f communication This call is dealt with by the CITRO N Emergency team which receives locating information from the vehicle and can send a detailed alert to the appropriate emergency services In countr...

Page 203: ...discharging of the battery the system switches off following the activation of the energy economy mode CONTENTS 02 Steering mounted controls 03 General operation 04 Navigation Guidance 05 Traffic inf...

Page 204: ...CD USB iPod Streaming AUX sources Long press open the Audio settings menu music ambience bass treble loudness left right balance front rear fader automatic volume adjustment Access to the RADIO menu a...

Page 205: ...ess reinitialisation of the system Open the Telephone menu and display the list of recent calls or accept an incoming call Open the Configuration menu Long press access to the GPS coverage and the nav...

Page 206: ...e to the previous radio station in the list Long press automatic search for a lower frequency CD select the previous track CD continuous press fast reverse RADIO change to the next radio station in th...

Page 207: ...ommended with no additional product RADIO TELEPHONE If conversation in progress SETUP PARAMETERS date and time display configuration sound Changing the audio source RADIO RADIO broadcasts MUSIC playin...

Page 208: ...rmal Random Random on all media Repetition TELEPHONE call in progress Private mode FULL SCREEN MAP OR IN A NEW WINDOW Stop Restore guidance Select destination Enter an address Directory GPS coordinate...

Page 209: ...N i ti id N i ti id N i ti id N i ti id N i ti id N i ti id N i i id To delete the list of recent destinations select Guidance options in the navigation menu then select Delete last destinations and...

Page 210: ...m the list offered then confirm Apre set list by entering the first few letters of the towns in the country selected can be accessed directly by selecting and confirming List on he screen t Turn the d...

Page 211: ...WARDS A CONTACT IN THE CONTACTS DIRECTORY Select Select destination and confirm then select Directory and confirm Selection the desired destination from your contacts and confirm OK to start the guida...

Page 212: ...ation guidance menu NAVIGATION GUIDANCE TOWARDS GPS COORDINATES TOWARDS A POINT ON THE MAP With the map displayed press OK to display the contextual menu Select Move the map and confirm Press OK to di...

Page 213: ...en select Around the current place and confirm To select a POI as a stage on the route select POI and confirm then select On the route and confirm To select a POI as a destination first enter the coun...

Page 214: ...GUIDANCE This icon appears when several POIs are grouped together in the same area Zooming in on this icon shows details of the POIs According to availability in the country The detailed procedure for...

Page 215: ...ance that Risk area warnings are given Select OK to confirm the screen Select Guidance options and confirm then select Set parameters for risk areas and confirm These functions are only available if r...

Page 216: ...ive a general indication of the guidance route Select Add a stage then confirm The address of the stage is entered as a destination by Enter an address a contact in Directory or Previous destinations...

Page 217: ...eria and confirm This function allows modification of the guidance criteria Fastest route Shortest route Distance Time the exclusion criteria With tolls or With Ferry traffic avoidance Traffic info Pr...

Page 218: ...lect Map management and confirm Select from the various categories the ones that you want to display on the screen Select Map details and confirm Select By default to have only Oil stations garages an...

Page 219: ...to keep the map always North up Perspective view to display a perspective view Select Map orientation and confirm The colour of the map different from the day and night mode is configured in the SETUP...

Page 220: ...synthesis and confirm Select the volume graph and confirm Select Deactivate to deactivate voice messages Select OK and press the dial to confirm Adjust the volume to the desired level and confirm The...

Page 221: ...E FEMALE VOICE Press SETUP to display the configuration menu Select Select male voice or Select female voice then confirm Yes to activate a male or female voice The system restarts Select Voice synthe...

Page 222: ...ion Traffic information Traffic information Traffic information Traffic information Traffic information Traffic information Traffic information Traffic information Traffic information Traffic informat...

Page 223: ...em can then suggest an alternative route to avoid a traffic problem Press the TRAFFIC button to display the Traffic information menu Select the Geographic filter function r and confirm The system offe...

Page 224: ...en a traffic report is transmitted the current audio source Radio CD USB is interrupted automatically to play the TA message Normal playback of the audio source resumes at the end of the transmission...

Page 225: ...hone T l h T l h T l h T l h Go from the list to the menu left right or Press PHONE To make a call select a number in the list and confirm OK to start the call Connecting a different telephone deletes...

Page 226: ...guration Press this button Select the name of the desired peripheral from the list of devices detected then select Connect and confirm The system offers to connect the telephone in Hands free mode tel...

Page 227: ...available depend on the network the SIM card and the compatibility of the Bluetooth telephone used Check the telephone manual and with your network provider for details of the services available to y...

Page 228: ...ation only the contacts saved in the system always present Display telephone contacts only the contacts saved in the telephone Display SIM card contacts only the contacts saved on the SIM card Display...

Page 229: ...Open to view an external contact or modify a contact saved in the system Select OK Select Delete to delete a contact saved in the system It is necessary to import an external contact to modify the rec...

Page 230: ...n Confirm OK to make the call Press TEL or twice on PHONE CALLING A NEW NUMBER CALLING A CONTACT Select the desired contact and confirm If access was via the PHONE button select Call and confirm Selec...

Page 231: ...lect Delete calls log and confirm ENDING A CALL Press PHONE then select OK to end the call Or make a long press on TEL at the steering mounted controls Or make two short presses on TEL at the steering...

Page 232: ...y a ring and a superimposed display on the screen Yes to accept the call is selected by default Press OK to accept the call Select No and confirm to reject the call A short press on TEL accepts an inc...

Page 233: ...Put call on hold and confirm to put the current call on hold Or select Resume the call and confirm to resume the call on hold Select DTMF ring tones to use the numerical keypad so as to navigate throu...

Page 234: ...iring of the selected telephone It is also possible to select all pairings USING THE TELEPHONE MANAGING PAIRED TELEPHONES CHANGING THE RING TONE Press PHONE twice Select Phone functions and confirm Se...

Page 235: ...d FM AM band FM AM band FM AM band FM AM band FM AM band FM AM band FM AM band FM AM band FM AM band FM AM b d FM AM b d FM AM b d FM AM b d FM AM b d Press or or use the rotary control to select the...

Page 236: ...y step by step SELECTING A STATION The external environment hill building tunnel underground car park may interfere with the reception including in RDS station tracking mode This phenomenon is a norma...

Page 237: ...been preset Press RADIO ACTIVATE DEACTIVATE RDS RDS if activated allows you to continue listening to the same station by automatic retuning to alternative frequencies However in certain conditions co...

Page 238: ...Access to the MUSIC MEDIA PLAYER menu MEDIA MEDIA MEDIA MEDIA MEDIA MEDIA MEDIA MEDIA MEDIA MEDIA MEDIA MEDIA MEDIA MEDIA MEDIA MEDIA MEDIA MEDIA MEDIA Go from the list to the menu left right or Press...

Page 239: ...low a speed as possible 4x maximum for optimum sound quality In the particular case of a multi session CD the Joliet standard is recommended INFORMATION AND ADVICE The system supports USB mass storage...

Page 240: ...ignition is switched off or connection of a USB memory stick However the system memorises these lists and if they are not modified the loading time will be shorter Play starts automatically after a pe...

Page 241: ...TRACK Previous track Next track Previous folder Next folder Fast forward Fast backward Pause long press on SRC MUSIC List of USB or CD tracks or folders Up or down in the list Confirm next menu level...

Page 242: ...y starts automatically Control is via the audio system The classifications available are those of the portable device connected artists albums genres playlists audiobooks podcasts The default classifi...

Page 243: ...to the JACK auxiliary audio socket or USB port using a suitable cable Press MUSIC to display the MUSIC menu Select Activate Deactivate AUX input and confirm First adjust the volume of your portable d...

Page 244: ...rs Le Ri balance Left Right Fr Re balance Front Rear Auto Volume depending on road speed Activate Deactivate The audio settings Equalizer r Bass Treble and Loudness are different and independent for e...

Page 245: ...armony and the map presentation mode day mode night mode automatic day night mode according to whether the headlamps are on Select Adjust luminosity and confirm to adjust the screen brightness Press O...

Page 246: ...on Guidance options Set speech synthesis Delete last destinations Map management Map orientation MAIN FUNCTION option A1 option A2 OPTION A OPTION B Map details Move the map Mapping and updating Descr...

Page 247: ...2 2 2 1 2 2 2 2 1 2 3 3 3 2 2 2 1 1 1 3 3 3 2 3 2 2 3 List of the paired peripherals Connect Disconnect Delete Delete all Contact mem status Phone functions Ring options Delete calls log Bluetooth fun...

Page 248: ...U Change Media Eject USB support Read mode Normal Random All passengers Le Ri balance Fr Re balance Auto Volume Update radio list Bass Treble Loudness Distribution Driver 1 2 2 1 1 3 3 3 3 3 3 2 Equal...

Page 249: ...ons volume Select male voice Select female voice 2 Select units SCREEN MENU MAP 2 3 3 2 Lighting configuration Parking assistance Engage rear wiper in REVERSE Duration of guide me home lighting 1 Defi...

Page 250: ...n com The risk areas audible warning does not work The audible warning is not active Activate audible warnings in the Guidance options menu Navigation guidance Set parameters for risk areas The system...

Page 251: ...button then select GPS coverage Depending on the geographical environment tunnel or the weather the conditions of reception of the GPS signal may vary This phenomenon is normal The system is dependent...

Page 252: ...ay Check that the CD is inserted in the player the right way up Check the condition of the CD the CD cannot be played if it is too damaged Check the content in the case of a recorded CD consult the ad...

Page 253: ...used by the station listened to or there is no transmitter in the geographical area through which the vehicle is travelling Activate the RDS function by means of the short cut menu to enable the syste...

Page 254: ...e balance or distribution settings to obtain the desired musical ambience When changing an distribution setting the balance setting is deselected There is a difference in sound quality between the dif...

Page 255: ...pplied with the memory stick may greatly slow down access to reading the memory stick multiplication by 10 of the catalogue time Delete the files supplied with the memory stick and limit the number of...

Page 256: ...254...

Page 257: ...n while the vehicle is stationary When the engine is switched off and to prevent discharging of the battery the audio equipment may switch off after a few minutes AUDIO SYSTEM BLUETOOTH 01 First steps...

Page 258: ...olders CD USB TA Traffic Announcements on off Long press PTY radio Programme TYpe mode Display main menu The DARK button changes the screen display for improved driving comfort at night 1st press uppe...

Page 259: ...conds telephone main menu Radio automatic search for a lower frequency CD MP3 USB selection of the previous track CD USB continuous press fast reverse Move in the list Radio automatic search for a hig...

Page 260: ...l view of the menus available refer to the Screen menu map in this section TELEPHONE Bluetooth hands free pairing management of a call PERSONALISATION CONFIGURATION vehicle parameters display language...

Page 261: ...g in RDS mode This is a normal effect of the way in which radio waves are transmitted and does not indicate any failure of the audio system RDS RADIO SELECTING A STATION Press the MENU button Select A...

Page 262: ...uttons to select a track on the CD Press the LIST REFRESH button to display the list of tracks on the CD Press and hold one of the buttons for fast forwards or fast backwards RECEIVING TA MESSAGES Pre...

Page 263: ...rs e g to avoid any playing or displaying problems MP3 CD INFORMATION AND ADVICE AUDIO Empty CDs are not recognised and may damage the system Insert an MP3 compilation in the player The audio equipmen...

Page 264: ...ain playlist formats are supported m3u On reconnection of the previous memory stick used play is resumed automatically with the last track played This unit consists of a USB port and an auxiliary Jack...

Page 265: ...previous next track on the classification list currently being played Press and hold one of the buttons for fast forward or backward play Press one of these buttons to gain access to the previous nex...

Page 266: ...IARY SOURCE JACK socket or USB port according to vehicle USB BOX Do not connect a device to both the JACK socket and the USB port at the same time Connect the portable device MP3 player to the JACK so...

Page 267: ...TH TELEPHONE SCREEN C The TELEPHONE menu permits access to the following functions in particular Directory Call list Pairing management The first 4 telephones recognised are displayed in this window A...

Page 268: ...KING A CALL From the Bluetooth telephone function Audio menu select Manage the telephone call then Call Call list or Directory Press this button for more than two seconds for access to your directory...

Page 269: ...LUETOOTH AUDIO STREAMING Wireless transmission of the telephone s music files via the audio equipment The telephone must be able to manage the appropriate Bluetooth profiles Profiles A2DP AVRCP Depend...

Page 270: ...The parameters vary according to vehicle OPTION A OPTION B MONOCHROME A OPTION A1 OPTION A2 REG MODE CD REPEAT RANDOM PLAY VEHICLE CONFIG REV WIPE ACT OPTIONS GUIDE LAMPS DIAGNOSTICS RDS SEARCH CONSU...

Page 271: ...HEIT FUEL CONSUMPTION KM L L 100 MPG 1 2 2 SCREEN MENU MAP DISPLAY ADJUST MONTH DATE HOUR MINUTES YEAR 12 H 24 H MODE LANGUAGE ITALIANO NEDERLANDS PORTUGUES PORTUGUES BRASIL FRANCAIS DEUTSCH ENGLISH E...

Page 272: ...IO activate deactivate Intro CD MP3 CD activate deactivate track repeat the entire current CD for CD the entire current folder for MP3 CD activate deactivate random play the entire current CD for CD t...

Page 273: ...ion RDTXT activate deactivate 1 2 3 4 3 4 3 4 PLAY MODES album repeat RPT activate deactivate track random play RDM activate deactivate 2 3 4 3 4 TRIP COMPUTER Distance x miles ENTER DISTANCE TO DESTI...

Page 274: ...GE THE TELEPHONE CALL Activate private mode 1 2 3 3 3 4 4 4 2 3 4 2 3 3 video brightness adjustment DISPLAY CONFIGURATION DEFINE THE VEHICLE PARAMETERS PERSONALISATION CONFIGURATION normal video inver...

Page 275: ...ormat which the player cannot play The CD is protected by an anti pirating protection system which is not recognised by the audio equipment Check that the CD is inserted in the player the right way up...

Page 276: ...is normal and does not indicate a failure of the audio equipment The aerial is absent or has been damaged for example when going through a car wash or into an underground car park Have the aerial che...

Page 277: ...able 99 100 Boot lamp 91 170 Bottle holder r 92 Brake discs 150 Brake lamps 168 Brake pads 150 Brakes 150 Braking assistance system 114 Capacity fuel tank 76 CD MP3 261 Central locking 64 72 Changing...

Page 278: ...sumption 20 Fuel filler flap 76 78 Fuel gauge 76 Fuel tank 76 78 Fusebox dashboard 172 Fuses 172 F Electronic brake force distribution EBFD 114 Electronic engine immobiliser r 66 68 Emergency boot rel...

Page 279: ...e oil filter r 149 Replacing the passenger compartment filter r 149 Replacing wiper blades 88 182 Resetting the service indicator r 32 Resetting the trip recorder r 34 Rev counter r 22 Reversing camer...

Page 280: ...peater 167 Ski flap 98 Snow chains 189 Spare wheel 156 Speed limiter r 135 Speedometer r 22 Stability control ESP 116 Starting the vehicle 66 127 Steering mounted controls audio 257 Stopping the vehic...

Page 281: ...279...

Page 282: ...280...

Page 283: ...integral part of your vehicle It should be passed on to the new user in the event of sale or transfer Automobiles CITRO N declares by application of the provisions of the European regulation Directive...

Page 284: ...CR ATIVE TECHNOLOGIE 2012 DOCUMENTATION DE BORD 4Dconcept Diadeis Edipro 12C3O 0030 Anglais...

Reviews: