78
Seats
JUMPY-ATLANTE-VP_EN_CHAP03_ERGONOMIE ET CONFORT_ED01-2014
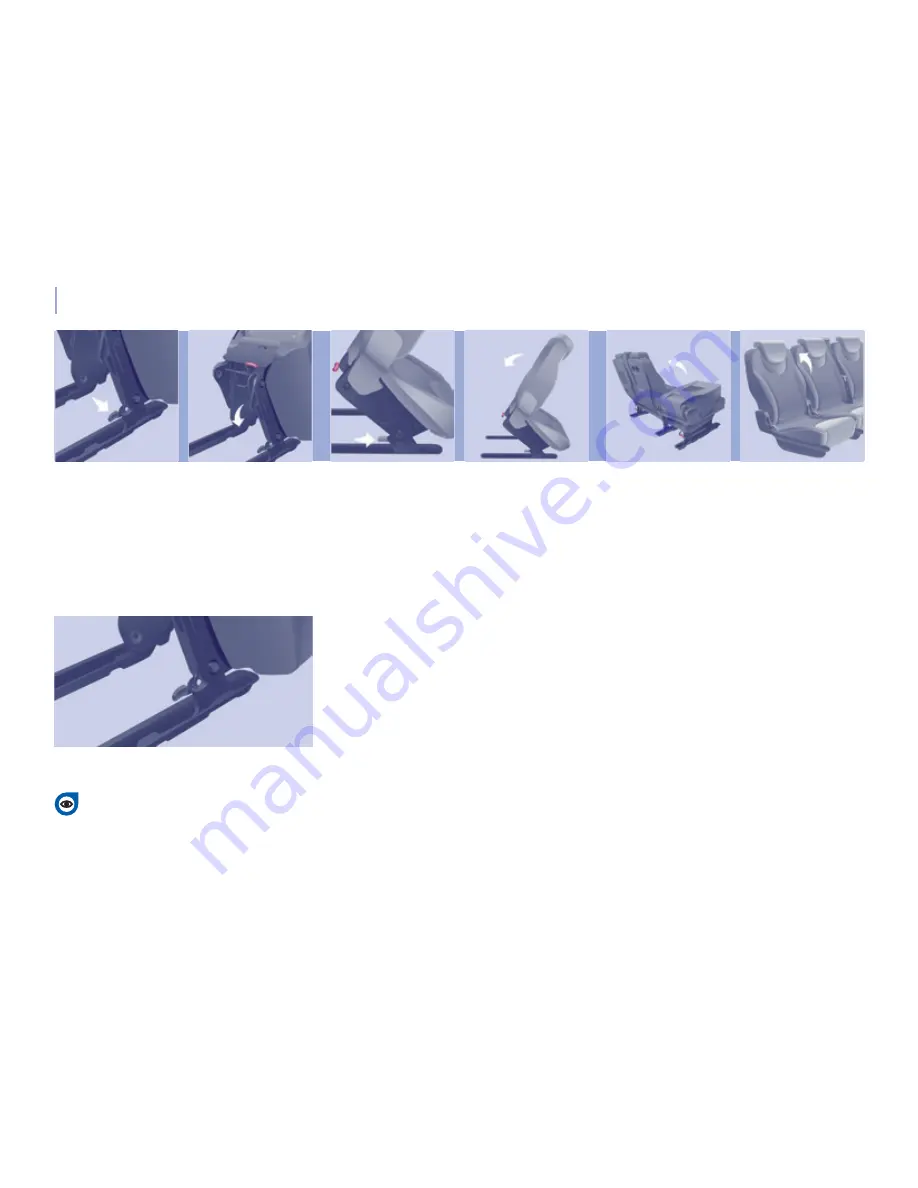
Installing the seat
Always install the bench first.
- Check that there are no objects
obstructing the anchorages and
preventing correct locking of the feet.
- Engage the front feet in the anchorages
on the floor.
- Lock the front feet using this handle.
- Tilt the seat towards the rear until the
rear feet lock. Be aware of the feet of
passengers when tilting.
For the type 2 seat and the type 2 / 3 bench:
fold up the seat back.
Correct anchoring of the front feet
Check that the seat is locked correctly
on the floor when it is returned to the
sitting position.
Summary of Contents for Jumpy Miltispace
Page 1: ...JUMPY ATLANTE VP_EN_CHAP0A_COUV DEBUT_ED01 2014 OWNER S HANDBOOK ...
Page 7: ...5 JUMPY ATLANTE VP_EN_CHAP01_PRISE EN MAIN_ED01 2014 ...
Page 8: ...2 3 4 7 2a 2b 8 Exterior 6 JUMPY ATLANTE VP_EN_CHAP01_PRISE EN MAIN_ED01 2014 ...
Page 70: ...68 JUMPY ATLANTE VP_EN_CHAP03_ERGONOMIEETCONFORT_ED01 2014 ...
Page 104: ...102 JUMPY ATLANTE VP_EN_CHAP04_SECURITE_ED01 2014 ...
Page 154: ...155 TECHNICAL DATA 8 JUMPY A TLANTE VP_EN_CHAP08_CARACTERISTIQUES TECHNIQUES_ED01 2014 ...
Page 155: ...156 Dimensions JUMPY A TLANTE VP_EN_CHAP08_CARACTERISTIQUES TECHNIQUES_ED01 2014 ...
Page 160: ...161 TECHNICAL DATA 8 JUMPY A TLANTE VP_EN_CHAP08_CARACTERISTIQUES TECHNIQUES_ED01 2014 ...


