21
CLAGE
EN
Classic
Arc
4. Installation
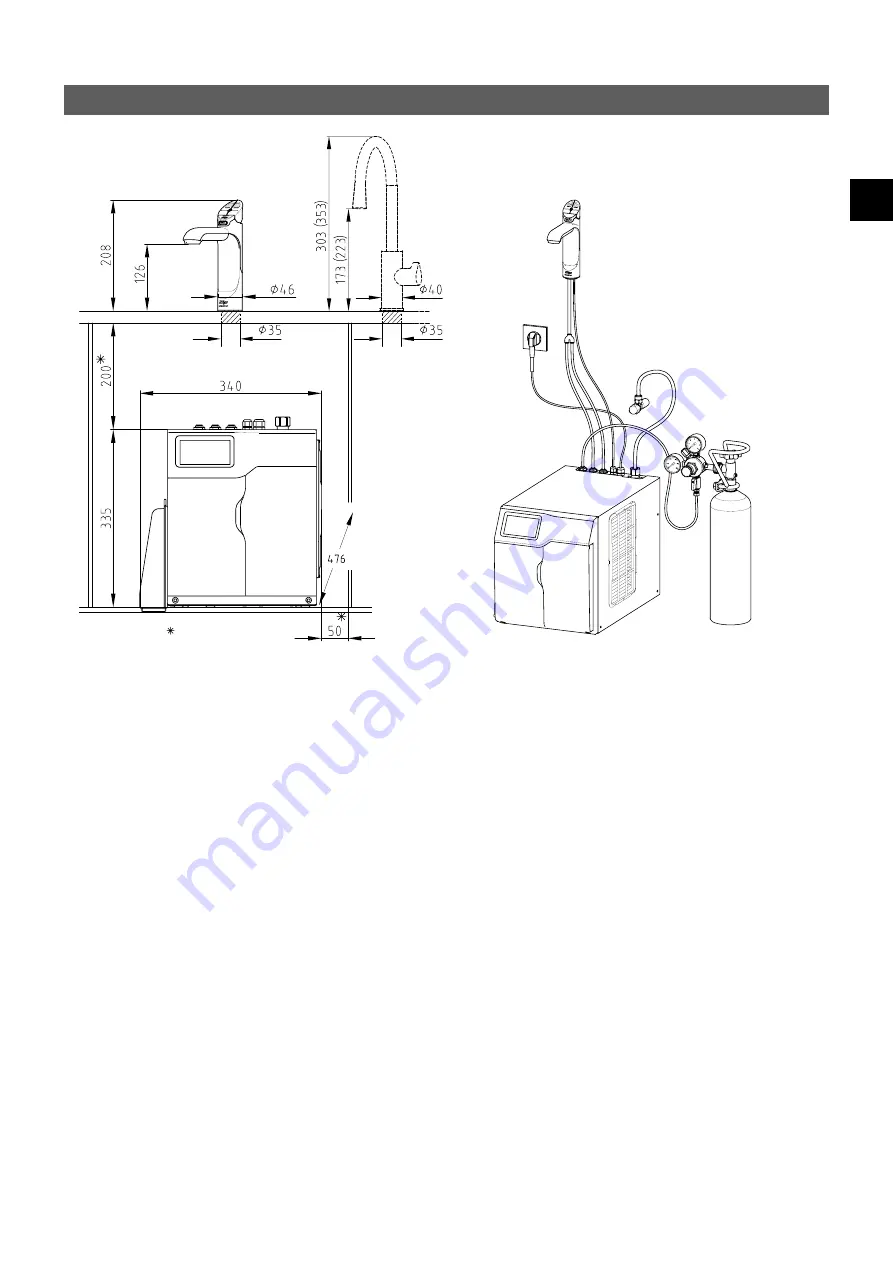
Dimensions in mm
Min. clearance
distance (in mm)
CO
2
bottle (obtainable
from specialist shops)
Electrical connection
with plug
230 V AC 50 Hz
Angle valve
(customer’s)
The following regulation must be observed:
• VDE 0100
• EN 806
• Installation must comply with all statutory regulations, as well as those of the local electricity and water supply companies.
• The rating plate and technical specifications
Before installation, ensure that:
• There is enough space for the undersink unit, the carbon dioxide bottle and the additional ventilation (see drawing).
• The undersink unit and the carbon dioxide bottle will stand upright on a horizontal surface.
• A socket fitted with at least a 10 A fuse is available within reach of the power cord and the socket will still be accessible after the
unit has been installed.
• A water supply connection at the rated pressure of the appliance with an isolating valve is available within reach of the feed pipe
and the connection will still be accessible after the unit has been installed.
In addition to standard tools, the following special tools may be required:
• 35 mm diameter sheet metal hole punch for sink tops (not supplied)
• 35 mm diameter hole saw for timber worktops (not supplied)
• Pipe wrench (supplied) for fixing the tap
Handling the plastic hoses and push-fit connector (supplied):
• If shortening the hoses be sure to make a clean cut straight across the hose, using a sharp blade. Never pinch off the hose with a
blunt instrument.
• The hoses must not be under tension when installed. The minimum bending radius is 25 mm. If there is a kink in the hose, there is
a risk of leakage at the kink.
• Push the hose into the quick-release connector as far as it will go (approx. 15 mm) to ensure a tight connection.


