background image


  ASSEMBLY INSTRUCTIONS  

Page 4 

5.  Your shelter should be standing up completely 

(Photo 9). 

Anchor the shelter to the ice by using ice anchors and 
ropes (Expedition models).  For Expedition FLR 
models skip to page 5. 


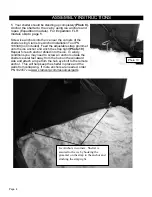
Screw ice anchors into the ice near the corners of the 
shelter using Clam’s Ice Anchor Installation Tool PN 
108348 (not included). Feed the adjustable strap grommet 
onto the ice anchor and cinch the strap tight 

(Photo 10)

.


Repeat for each anchor drilled into the ice.  In windy 
conditions you may need to screw an anchor outside the 
shelter several feet away from the hub on the windward 
side and attach a rope from the hub eye bolt to the remote 
anchor.  This will help keep the shelter in place and the 
walls from collapsing.  If more anchors are needed, order 
PN 102457 via www.clamcorp.com/resources/parts.
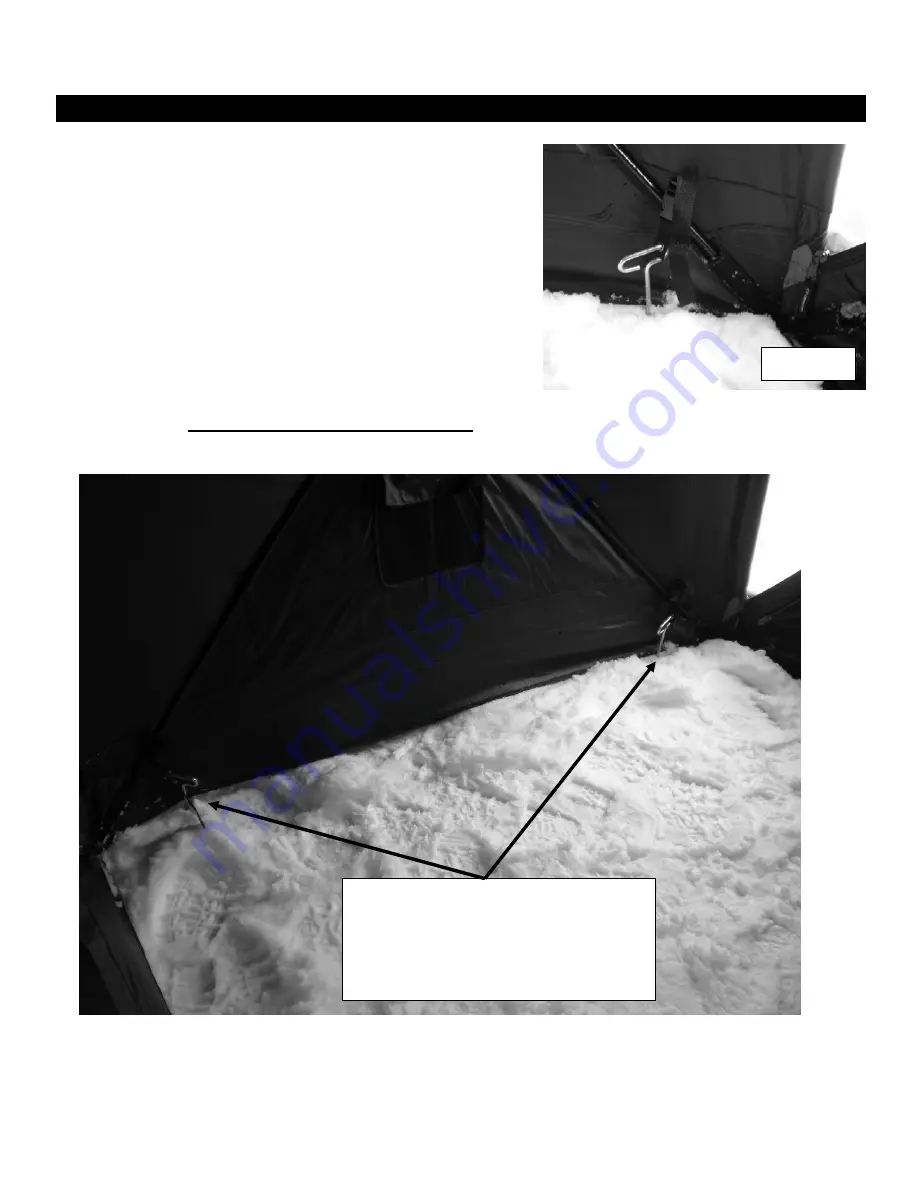


Photo 10 

Ice Anchors in corners.  Shelter is 
secured to the ice by hooking the 
grommet on the strap to the anchor and 
cinching the strap tight. 

Summary of Contents for 108396

Page 1: ...31 4121 Email customerservice clamcorp com Warranty cannot be honored without an original dated receipt IMPORTANT PLEASE READ Warranty Information This product is warranted to the original retail purc...

Page 2: ...substance may render the flame retardant properties ineffective Night time exterior reflectors must be visible to reduce risk of collisions This tent is made with flame resistant fabric which meets CP...

Page 3: ...ke a few practice times to get the set up process down Lifting straight up on the side walls is critical to set up of the Expedition This alleviates binding of the hubs poles 3 Stand on the skirt of t...

Page 4: ...the ice anchor and cinch the strap tight Photo 10 Repeat for each anchor drilled into the ice In windy conditions you may need to screw an anchor outside the shelter several feet away from the hub on...

Page 5: ...the bottom of the base place the grommeted hole from the buckle strap onto the bolt add the washer and the nut and tighten with a 7 16 wrench and Phillips screwdriver Place female buckles with short s...

Page 6: ...lter fit inside of the base Photo 12 Attach the four male buckles affixed to the inside of the tent to the female buckles attached to the floor and adjust tension Photo 13 In windy weather anchoring o...

Page 7: ...5 Unclip the shelter from the base on FLR models Fold up the shelter Photo 17 6 When folding the Expedition up for storage inspect the hub systems and poles for entanglement NOTE The Expedition hub s...

Page 8: ...helter Injury or death may result from fire if tent fabric is exposed to open flame The tent is not fireproof but the fabric is treated with a fire retardant that meets CPAI 84 specifications Applicat...

Page 9: ...Is there anything can be put on outside of the tent to prevent water from coming through when we are using it A Customers have been known to spray or apply water repellant on the outside of the shelte...

Page 10: ...10 FREQUENTLY ASKED QUESTIONS...

Reviews: