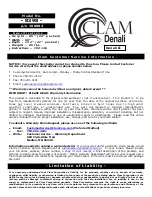
Model No.
- 8398 -
p/n 108884
S p e c i f i c a t i o n s
▪
H e i g h t - 6 5 ” ( 2 4 ” p a c k e d )
▪
Width - 5 9 ”
▪
Depth - 1 3 2 ” ( 4 1 ” p a c k e d )
▪
W e i g h t – 9 5 l b s .
▪
Instructions – 1 0 3 1 4 6
- C l a m C u s t o m e r S e r v i c e I n f o r m a t i o n -
NOTICE: Once used, this shelter cannot be returned to the store. Please contact Customer
Service directly at the email address or phone number below.
Customer Service Hrs: 9am to 4pm, Monday – Friday Central Standard Time
Phone: 763-231-4120
Fax: 763-231-4121
Email:
customerservice@clamcorp.com
**
Warranty cannot be honored without an original, dated receipt
**
IMPORTANT! PLEASE READ: Warranty Information
This product is warranted to the original retail purchaser ( n o t t r a n s f e r a b l e ) . T h i s product i s t o be
free from manufacturer’s defects for one (1) year from the date of the original purchase. W a r r a n ty
d o e s n ot c o v e r c r ac k e d w in d o w s, t en t t e a rs , b r o k en o r b e n t h oo p s du e to h ig h w in d
w e a th e r c o n d it io n s o r u n at t en d e d u s e . T h e p a r t will replaced or repaired (manufacturer’s
option) if found defective within the one (1) year time frame. Warranty will be void if product has been
subject to neglect, misuse, improper installation, misapplication, alteration, or accident including, but not
limited to, improper maintenance or use of unauthorized parts or attachments. Please read this entire
owner’s manual to ensure proper installation, use, storage, and care for your Clam shelter.
To submit a Warranty Claim Request, please use one of the following methods:
•
Email:
CustomerService@ClamCorp.com
(Preferred Method)
•
Fax: 763-231-4121
•
Write:
Customer Service – Warranty Department
600 Clydesdale Trail
Medina,
MN
55340
Information needed to submit a warranty claim:
If you need to submit a warranty claim, please e-mail
Clam’s Customer Service Department at
customerservice@clamcorp.com
. In your e-mail, please include
your full name, address, phone number, a copy of your receipt, a brief description of the problem, and
pictures to clearly show the area(s) of concern. Clam’s warranty department will review your request and a
Clam representative will contact you regarding your claim status. All returns must be returned with postage
pre-paid.
- L i m i t a t i o n o f L i a b i l i t y -
It is expressly understood that Clam Corporation’s liability for its products, whether due to breach of warranty,
negligence, strict liability, or otherwise, is limited to the repair of the product as stated above. Clam Corporation is not
liable for any injury, loss, damage, or expense, whether direct or consequential, including but not limited to loss of use,
income, profit, or damage to material arising in connection with the sale, installation, use of, inability to use, or the
repair or replacement of Clam Corporation products. Clam Corporation reserves the right to make alterations or
modifications in its products at any time, which in its opinion, may improve the performance and efficiency of the
product. Clam shall not be obligated to make such alterations or modifications to products already in service.
Denali II

