


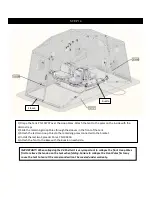


STEP 6
Slide the assembly from Step 5 thru the slider blocks on
the seat assemblies completed in Step 3.
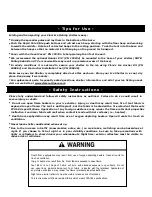
STEP 7
Assemble the second side of the Seat
Slider assembly.
Tighten all of the fasteners left loose at
this time.
Assembled view
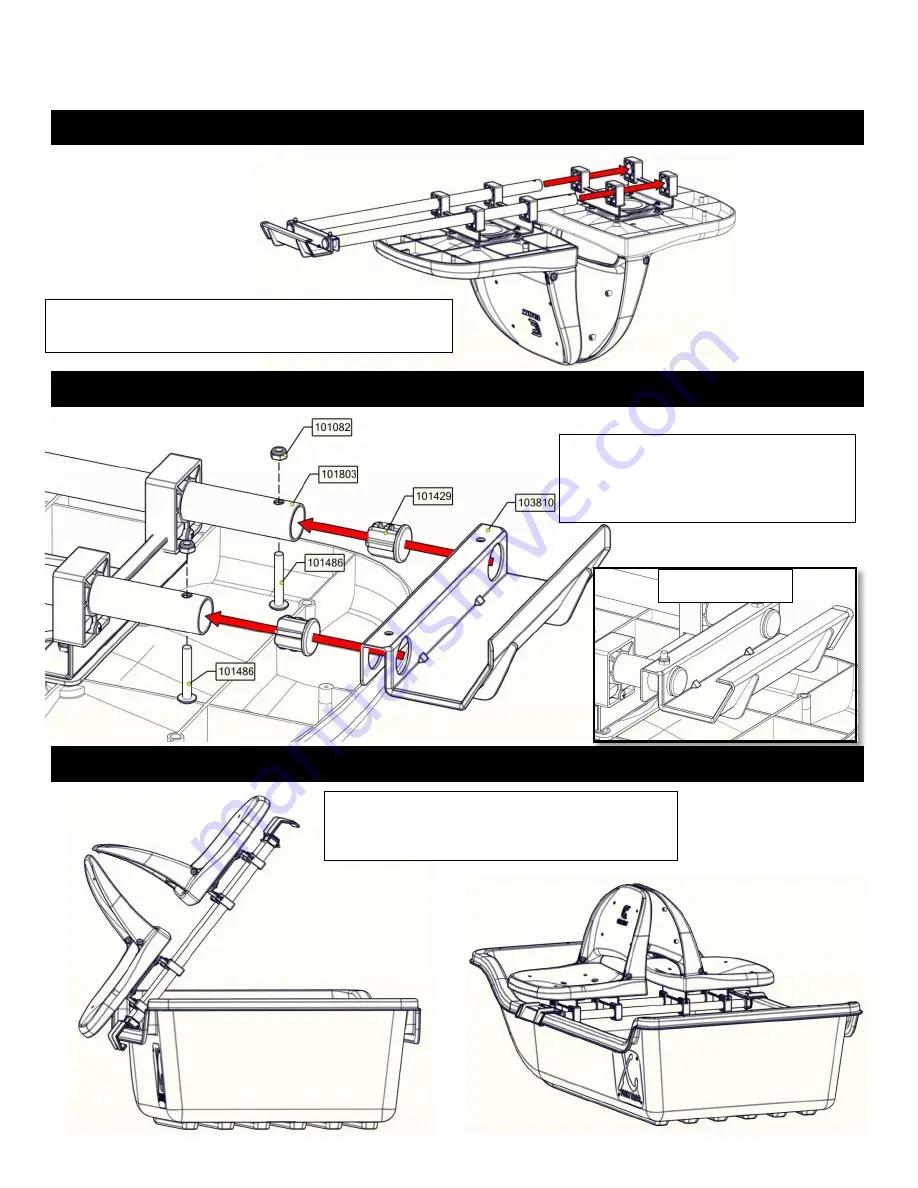
STEP 8
Install the Seat assemblies by hooking the
assembly on the lip of the Base and resting the
other side on the other lip of the Base.


