background image

Doc ID --197 • REV 05 


5 / 5 

Displaying the time and date in the menu bar 

If you wish, you can display the time and date in the system’s 

menu bar. 

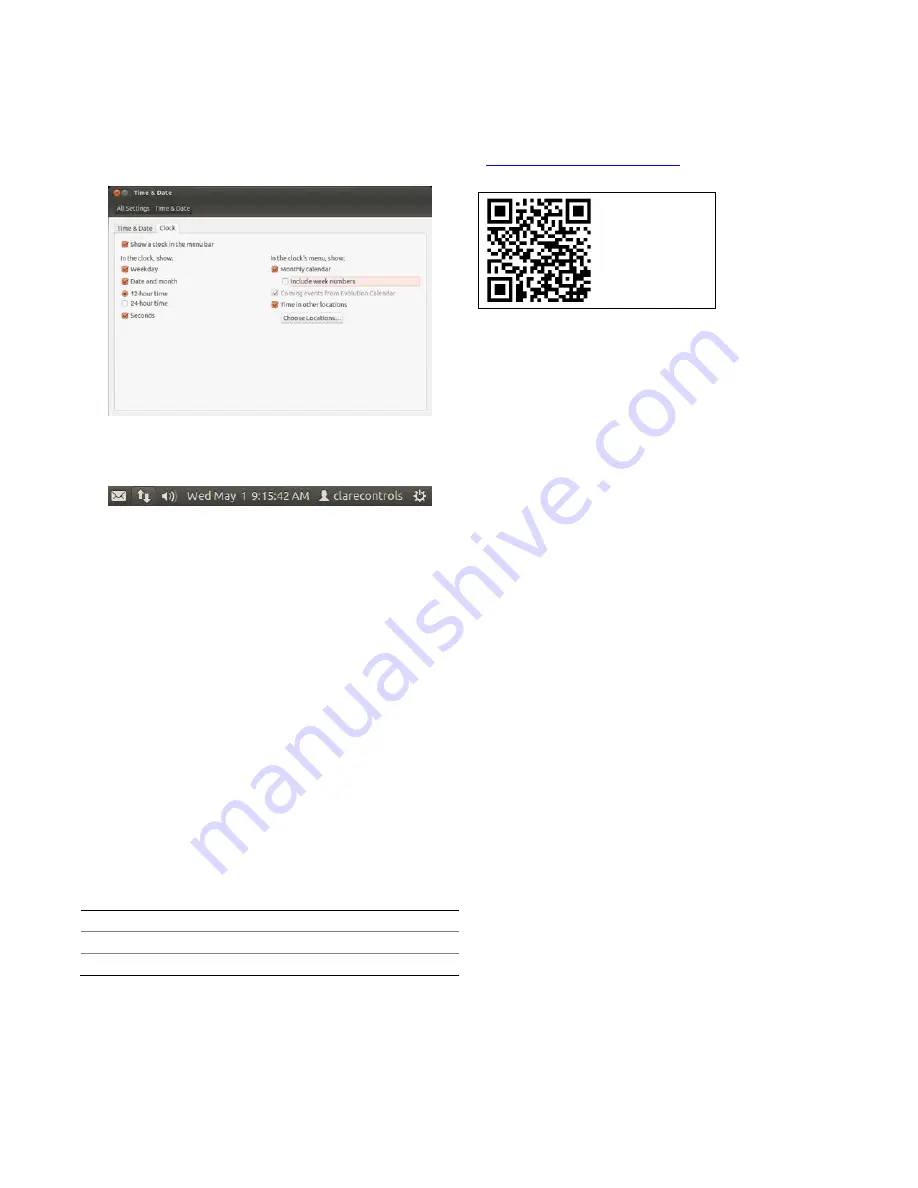
To display the time and date in the menu bar: 

1.  Click the Clock tab to display its options. 


2.  Select the boxes for the time and date format you want to 

appear on the menu bar, as shown below. 


Configure, test, and deploy a project 

Refer to the 

Fusion Configuration Tool Administrator Guide


(Doc ID 069) for instructions on creating, testing, and deploying 

a project. When you deploy the project from Fusion, it will 

deploy to the CH-OS-L.  

To test the CH-OS-L setup: 

1.  Create a new project with all Gateway settings and MAC 

address. 

2.  Create areas for the project. 
3.  Configure one device, and then create a service. 
4.  Deploy the project to the Gateway and test it in the Clare 

Controls App. 


Specifications 

 
Power 

65 W 

Dimensions (W × H × D)   7.5 × 1.0 × 5.3 in. (19.0 × 2.5 × 13.5 cm) 
Weight 

15.8 oz. (.45 kg) 

Warranty information 

Clare Controls offers a three (3) year limited warranty on 

original Clare Controls components, from the date of  

shipment from Clare Controls. To view complete limited 

warranty details, including limitations and exclusions, 

www.clarecontrols.com/warranty

. 


Scan the code  

to view product 

warranty details. 

Contact information 

Clare Controls 

7519 Pennsylvania Ave, Suite 104 

Sarasota, FL 34243 

Support: 941.404.1072 

Fax: 941.870.9646 

http://support.clarecontrols.com 

www.clarecontrols.com 


Summary of Contents for CH-OS-L

Page 1: ...ng with a CS iMR multi room audio device Use the mounting bracket included to mount the CH OS L in the panel To mount the CH OS L in the structured panel 1 Place the mounting bracket inside the structured panel under the CS iMR ensuring that you allow at least 5 in 1 3 cm of clearance space at sides and bottom of the bracket and at least 2 in 5 1 cm at the top See Figure 1 2 Using four 6 20 3 8 in...

Page 2: ...he power adapter to the power input port and then plug the other end into an electrical outlet See Figure 3 item 7 6 To power on the CH OS L press the power button on the front of the CH OS L See Figure 4 item 7 Figure 3 CH OS L rear connections 1 RF port not used 2 USB ports 3 Display Output port VGA 4 HGMI port not used 5 Network port 6 S PDIF out port not used 7 Power input port Figure 4 CH OS ...

Page 3: ...y selected 6 In the Device MAC address field click the drop down arrow and then select your connection s MAC address and system name eth0 This is the main network connected to the Internet 7 Click Save 8 Click Wired Connection 2 and then select the Edit button 9 In the Connection name field enter a meaningful name such as CobraNet 10 Select the Connect Automatically and Available to all users chec...

Page 4: ...ller comes preloaded with the Ubuntu operating system and is preset to the Eastern Time zone If you are installing your CH OS L controller in a different time zone and you wish to change the system time and date follow the directions below To change the time zone 1 From the desktop click the Gear icon in the upper right corner select System Settings from the drop down menu and then click the Time ...

Page 5: ... a new project with all Gateway settings and MAC address 2 Create areas for the project 3 Configure one device and then create a service 4 Deploy the project to the Gateway and test it in the Clare Controls App Specifications Power 65 W Dimensions W H D 7 5 1 0 5 3 in 19 0 2 5 13 5 cm Weight 15 8 oz 45 kg Warranty information Clare Controls offers a three 3 year limited warranty on original Clare ...

Reviews: