28
MAX973HD
English
Setting the Destination and Starting the Route
Guidance
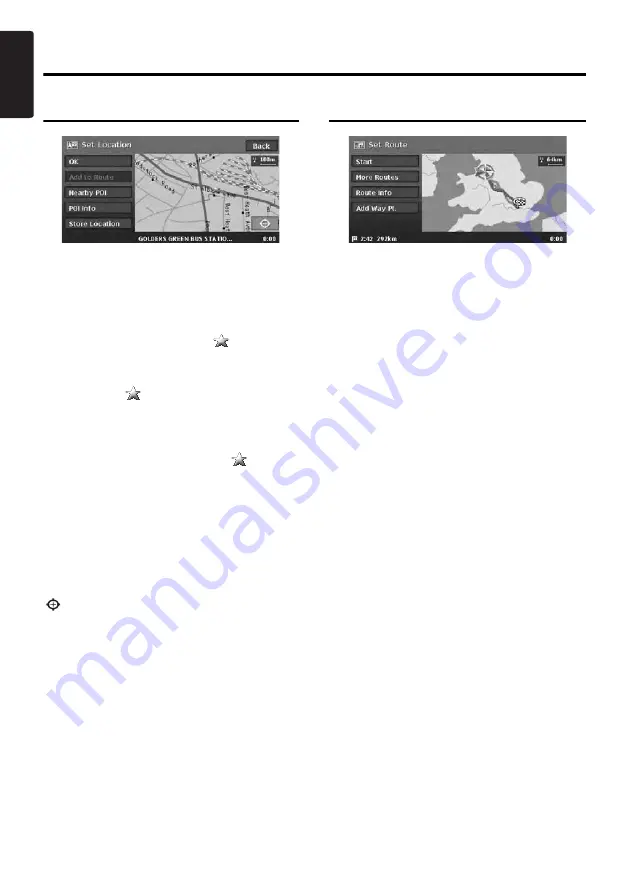
Set Location menu
From the Set Location menu displayed when
setting the searched place as the destination,
you can perform the following operations
according to the conditions:
Note:
•
The name of the road close to the cursor is
displayed at the bottom of the screen.
•
For the 2D maps, the road that will be set as
destination blinks when the map scale is 200 m(1/
8 mile) or smaller. When you set the following
places as the destination, confirm the position of
the blinking road:
• Place where roads of ascending and
descending have diverged
• Place near the intersection of overpass
• Place where no road exists in the vicinity
Set Route menu
When you enter the destination, the Set Route
menu is displayed with the map showing the
suggested routes. You can perform the following
operations from this screen according to the
situation:
Note:
If approx. 30 seconds pass without touching any key
after this screen is displayed, the route guidance will
be automatically started.
[Start] key:
Starts the route guidance to the destination.
[More Routes] key:
You can change to other suggested routes with a
different priority condition. You can also set this
from the Route menu.
➜
“
Selecting another
route
” (P. 35)
• [
Shortest Time
]
Shows the route of which the required driving
time is shortest.
• [
Minimize M-way
]
Shows the route of which motorways are not
used as much as possible.
• [
Shortest Distance
]
Shows the route of which the distance is
shortest.
• [
OK
]
Changes to the specified route.
[Route Info] key:
Shows the information of the suggested route
selected on the screen.
• [
Preview
]
You can confirm the route from the map.
Touching the [
F
] key scrolls the map so that
the cursor moves along the travelling direction
of the suggested route. Touching the [
R
] key
scrolls the map so that the cursor moves to the
opposite direction of travelling along the
suggested route. Touching the [
G
] key stops
scrolling temporarily.
[OK] key:
Sets the location shown by the “
”on the map
as the destination.
[Add to Route] key:
When a destination is already set, you can set the
location of the “
” as a waypoint. Specify the
order of passing when setting the location as a
waypoint.
➜
“
Editing the route
” (P. 33)
[Nearby POI] key:
You can search for a place of the specified
category around the location of the “
”, and set
it as the destination. The searching procedure is
similar to the procedure for POI search.
➜
“
By
Nearby POI
” (P. 23)
[POI Info] key:
When the navigation system has information
concerning the searched location, you can
display this information by pressing the [
POI Info
]
key.
[Store Location] key:
Register the location found to the Address Book.
[
] key:
Touching this key changes the map to the map
scrolling screen. You can adjust the location of
the searched place.


