12
Italiano
Nederlands
Español
English
Français
Deutsch
English
Français
Deutsch
Nederlands
Italiano
Español
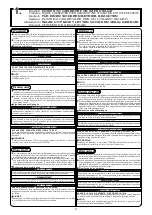
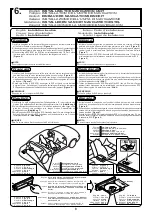
Place the navigation unit with the brackets attached where it is to be installed on the
carpet.
Mark the position for the brackets with a pen.
Detach the brackets from the navigation unit.
Place the detached brackets in the marked positions.
Align the brackets inside the marks and mark the clip hole positions with a pen.
Pull up the carpet a bit from the floor and drill holes in the positions you marked.
Reattach the navigation unit with the screws.
Affix the bracket with the clips.
1.
2.
3.
4.
5.
6.
7.
8.
NOTE
If the carpet is not securely fixed to the floor, please install it somewhere else.
Type affixed with clip
Type fixé avec attache
Befestigung mit Clips
Tipo fissato con graffa
Type dat met klem wordt vastgezet
Tipo con fijación de clip
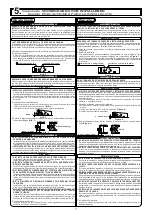
This installation method is for affixing the navigation unit if there is not a surface under the
carpet that would permit secure fixing with two-sided tape, such as if there is padding on
the floor, etc.
1.
2.
3.
4.
5.
6.
7.
8.
NOTA
Questa modalità d'installazione prevede il fissaggio dell'unità di navigazione qualora,
sotto il tappeto, non vi siano superfici disponibili per il fissaggio in sicurezza dell'unità con
nastro biadesivo, ad esempio nei casi in cui il pavimento sia rivestito, ecc.
1.
2.
3.
4.
5.
6.
7.
8.
REMARQUE
Cette méthode d’installation concerne la fixation de l’unité de navigation s’il n’y a pas de
surface sous le tapis qui vous permettrez de fixer l’appareil en toute sécurité avec de la
bande adhésive double face, comme par exemple s’il y a un matelassage sur le sol etc.
1.
2.
3.
4.
5.
6.
7.
8.
OPMERKING
Deze installatiemethode wordt gebruikt wanneer het navigatietoestel niet met behulp van
de dubbelzijdige plakband aan de vloer bevestigd kan worden, bijv. in geval van
opvullingen, enz.
1.
2.
3.
4.
5.
6.
7.
8.
HINWEIS
Diese Installationsmethode dient der Befestigung der Navigationseinheit, wenn sich unter
dem Bodenbelag keine Oberfläche befindet, welche die sichere Befestigung mit
doppelseitigem Klebeband zulässt, z. B. wenn sich Polster am Boden befinden.
1.
2.
3.
4.
5.
6.
7.
8.
NOTA
Si la alfombrilla no esta bien fijada al suelo, instálela en otro lugar.
Este método de instalación permite fijar la unidad de navegación cuando no hay una
superficie debajo de la alfombrilla que pueda permitir la fijación segura con una cinta
adhesiva de doble cara (por ejemplo, si hay un fieltro sobre el suelo, etc.).
(
Figure 12
)
(
Figura 12
)
(
Afb. 12
)
(
Figura 12
)
(
Figure 12
)
(
Abbildung 12
)
Placez l’unité de navigation avec les appliques attachées sur l’emplacement choisi pour
l’installation sur le tapis.
Marquez la position des appliques avec un crayon.
Détachez les appliques de l’unité de navigation.
Placez les appliques détachées sur les emplacements préalablement marqués.
Alignez les appliques à l’intérieur des marques et marquez les emplacements du trou de
l’attache avec un crayon.
Tirez un peu sur le tapis pour le soulever du sol et percez des trous dans les
emplacements que vous avez préalablement marqués.
Revissez l’unité de navigation en utilisant les vis.
Fixez les appliques avec les attaches.
Setzen Sie die Navigationseinheit mit angebrachten Bügeln an der Installationsstelle
auf den Bodenbelag auf.
Zeichnen Sie die Bügelpositionen mit einem Stift an.
Nehmen Sie die Bügel von der Navigationseinheit ab.
Setzen Sie die abgenommenen Bügel auf die angezeichneten Stellen auf.
Richten Sie die Bügel innerhalb der Markierungen aus und markieren Sie die Positionen
der Klemmenbohrungen mit einem Stift.
Heben Sie den Bodenbelag etwas vom Boden ab und bohren Sie Löcher an den
markierten Positionen.
Schrauben Sie die Navigationseinheit wieder mit Hilfe der Schrauben fest.
Befestigen Sie den Bügel mit den Klemmen.
Coloque la unidad de navegación con los soportes fijados en el lugar de instalación
sobre la alfombrilla.
Marque la posición de los soportes con un bolígrafo.
Separe los soportes de la unidad de navegación.
Coloque los soportes separados en las posiciones marcadas.
Alinee los soportes con las marcas y marque las posiciones de los orificios de los clips
con un bolígrafo.
Levante un poco la alfombrilla del suelo y realice los orificios en las posiciones
marcadas.
Vuelva a atornillar la unidad de navegación con los tornillos.
Fije el soporte con los clips.
Plaats het navigatietoestel met de bevestigde beugels op de installatieplek op de
vloerbedekking.
Markeer de positie voor de beugels met een pen.
Haal de beugels van het navigatietoestel af.
Plaats de losgemaakte beugels op de gemarkeerde posities.
Zet de beugels op één lijn binnen de gemarkeerde posities en markeer de posities voor
de klemgaten met een pen.
Trek de vloerbedekking enigszins omhoog en boor gaten in de gemarkeerde posities.
Schroef het navigatietoestel met behulp van de schroeven opnieuw vast.
Bevestig de beugels met de klemmen.
Posizionare l'unità di navigazione tenendo le staffe fissate al punto di installazione sul
tappeto.
Marcare con una penna, la posizione delle staffe.
Staccare le staffe dall'unità di navigazione.
Posizionare le staffe scollegate nelle posizioni precedentemente marcate.
Allineare le staffe all'interno dei segni e, con una penna, marcare le posizioni dei fori
delle graffe.
Tirare leggermente il tappeto verso l'alto e forare nei punti precedentemente marcati.
Riavvitare l'unità di navigazione.
Fissare la staffa con le graffe.
Si le tapis n’est pas fixé en toute sécurité sur le sol, veuillez l’installer dans un autre
emplacement
Wenn der Bodenbelag nicht stabil mit dem Boden verbunden ist, nehmen Sie die
Installation an einer anderen Stelle vor.
Nel caso in cui il tappeto non sia adeguatamente fissato al pavimento, installare l'unità in
un punto diverso.
Installeer het toestel op een andere plek als de vloerbedekking niet goed aan de vloer is
vastgezet.

