background image

;/&

I

ncidental or Consequential Damages:

 Neither Clarity nor your retailer 

dealer or selling distributors have any responsibility for any incidental 
or consequential damages including without limitation, commercial 
loss of profit, or for any incidental expenses, expenses, loss of time,  or 
inconvenience.  Some states do not allow exclusion or limitation of 
incidental or consequential damage, so the above limitation or exclusion 
may not apply to you.

Other Legal Rights

: This warranty gives you specific legal rights and you 

may also have other rights which vary from state to state.

To obtain warranty service, please prepay shipment and return the unit to 
the appropriate facility listed below.

Clarity Service Center

6131 Preservation Dr.
Chattanooga, TN 37421
Tel: 800-426-3738
Fax:  800-325-8871

)RU5HWXUQVLQ&DQDGDSOHDVHFRQWDFW&ODULW\&XVWRPHU6HUYLFHDW
IRULQVWUXFWLRQV

Please use the original container, or pack the unit(s) in a sturdy carton 
with sufficient packing material to prevent damage. Include the following 
information: 

A proof-of-purchase indicating model number and date of purchase;

Bill-to address;

Ship-to address;

Number and description of units shipped;

 Name and telephone number of person to call, should contact be
necessary;

Reason for return and description of the problem.

Damage occurring during shipment is deemed the responsibility of the 
carrier, and claims should be made directly with the carrier.

The following warranty and service information applies only to products 
purchased and used in the U.S. and Canada. For warranty information in 
other countries, please contact your local retailer or distributor. 

WARRANTY INFORMATION

Summary of Contents for XLC8HS

Page 1: ...XFWV FRP k ODULW 3URGXFWV ODULW ODULW 3URIHVVLRQDO 6 JR DQG WKH DPSOLILHG ILJXUH DUH WUDGHPDUNV RU UHJLVWHUHG WUDGHPDUNV RI ODULW 3URGXFWV 2WKHU WUDGHPDUNV DQG WUDGH QDPHV DUH WKRVH RI WKHLU UHVSHFWLYH RZQHUV 6 6SHFLILFDWLRQV DUH VXEMHFW WR FKDQJH ZLWKRXW QRWLFH 5HY 3ULQWHG LQ KLQD ...

Page 2: ... I S H User Guide Home and cellphone calls MAKE CALLS WITH AND WITHOUT A LANDLINE PAIR UP TO TWO 2 5 66 1 DEVICES 50 DB OF AMPLIFICATION AND FOUR 4 TONE SETTINGS EXPANDABLE UP TO THREE 3 EXTRA HANDSETS XLC HS ...

Page 3: ......

Page 4: ... Base Quick Reference Guide Handset Quick Reference Guide Battery QIRUPDWLRQ LUHOHVV QDEOHG XQFWLRQ Placing Answering Calls 9ROXPH DQG 7RQH GMXVWPHQWV DOOHU XQFWLRQ 6ORZ Button Phonebook Screen Details Telephone Menu Handset Registration Troubleshooting Technical Information Regulatory Compliance Warranty Information TABLE OF CONTENTS ...

Page 5: ...at register This telephone should not be placed in a built in installation unless proper ventilation is provided 9 Operate this telephone using the electrical voltage as stated on the base unit or the owner s manual If you are not sure of the voltage in your home consult your dealer or local power company 10 Do not allow anything to rest on the power cord or locate this product in an area where th...

Page 6: ...y Clarity This phone amplifies sound to loud volumes To prevent hearing damage all users of the phone should be informed of the high volume capability of the phone and children should only use the phone when supervised by an adult Exposure to high volume sound levels or excessive sound pressure may cause temporary or permanent damage to your hearing Although there is no single volume setting that ...

Page 7: ...d skin It may be toxic if swallowed 3 Exercise care in handling batteries in order not to short the battery with conducting materials such as rings bracelets and keys The battery or conduction material may overheat and cause burns 4 Remove batteries when they are discharged and when the equipment will not be used for an extended period of time Dispose of batteries according to local environmental ...

Page 8: ...5 Base Handset AC power adapter Phone cords 1 long 1 short User guide User Guide MENU TALK FLASH EXIT MUTE BACK RD P 1 BOOST 6 2 CONTENTS PARTS CHECKLIST Wall mount bracket Belt clip ...

Page 9: ...he correct end to hold should already be plugged into the back of your telephone base unit Simultaneously pull the other end of the adapter cord away from the phone unraveling it and allowing you to plug that end of the cord into a wall electrical outlet Plug EODFN power adapter cord on left rear of the base into a wall electrical outlet Remove handset from package Pull the handset s battery tab l...

Page 10: ...7 INSTALLATION ...

Page 11: ...t as shown Guide the short phone cord through the wall mount bracket as shown in the diagram Using a screwdriver loosen the screws on your phone wall outlet 1 2 turns Plug the loose end of the short phone cord into the wall phone outlet Attach the wall mount bracket with the base onto the wall phone outlet Plug the power adapter into a wall electrical outlet Pull the handset s battery tab located ...

Page 12: ...9 WALL MOUNTING YOUR XLC ...

Page 13: ... JR EDFN 7 Use thLV WR GHOHWH PHVVDJHV 3 6723 3UHVV WR SOD DQG VWRS PHVVDJHV VOLUME UP DOWN Use these keys to increase or decrease the ringer volume 5 66 1 3 5 BUTTONS 1 2 Use these keys to pair the ZLUHOHVV enabled cellphone s RINGER STYLE Base Use this key to choose the base ring tone There are six ring tones available NOTE Base You can only set the ringer volume or style when the phone is not i...

Page 14: ... LV RQ ZKLFK PD GDPDJH XVHU ZLWK QRUPDO KHDULQJ 3 Speaker During a call press to activate handset speakerphone Press again to switch back to earpiece When in speakerphone mode the speakerphone icon is displayed on the screen to the left of the battery icon and the speakerphone button lights up red 4 Phonebook This button allows you to access your XLC s list of saved names and numbers HANDSET Quick...

Page 15: ...between 7 10 11 digit formats for the number you are viewing 10 FLASH EXIT FLASH While on a call press FLASH EXIT to receive another incoming call Call Waiting service is required EXIT In MENU mode allows you to return to standby mode 11 RD P Redial Pause Press to redial last number dialed or insert pause two seconds when programming memories or pre dialing 12 Headset A 2 5 mm headset can be used ...

Page 16: ...13 VO LU ME T O N E O N O FF NEC K LOO P 12 13 14 15 16 17 18 19 HANDSET Quick Reference Guide ...

Page 17: ...base unit operates in battery mode no AC power the base POWER light will blink once every two seconds Open battery compartment door here BATTERY INFORMATION To install batteries in the base 1 Turn base over and open battery compartment door 2 Install batteries according to the polarity shown inside the battery compartment NOTE To replace handset batteries or to install base backup batteries use ON...

Page 18: ...the appropriate key on your cell phone to continue the pairing process Your cell phone may prompt you to enter the PIN of the telephone base The default PIN of the telephone base is 0000 When the cell phone is connected to the telephone base the corresponding status icon 3 5 1 or 3 5 2 displays The corresponding device light 3 5 1 or 3 5 2 turns on If the pairing fails turn off the feature on your...

Page 19: ...ALK when the number is complete NOTE Pre dial is not available if your default dial option is a mobile enabled cellphone Follow with steps 2 3 above to enjoy a clear and comfortable phone conversation TO ANSWER A CALL 1 When phone is ringing press TALK to answer the call 2 Adjust the volume and tone of the incoming voice according to your preferences 3 When finished press TALK to hang up NOTE 1 For...

Page 20: ... all calls Every time a call starts the user will need to press the BOOST button in order to gain the extra level of amplification TONE Press the TONE button to change the style of amplification Switching audio tones will change how the telephone conversation sounds to you In order to achieve the best audio experience we recommend the following Adjust the Volume Control and enable the Boost functi...

Page 21: ...n the Caller List on your phone To access this list and for further details regarding this function press UP or DOWN in standby mode and or follow the instructions under CALLER LIST NOTE If you have CID service the date and time will automatically be set after the first incoming call BOOST 4 08 8 8 8 8 8 8 8 8 8 4 08 8 VOLUME TONE ADJUSTMENTS CALLER ID FUNCTION The 6 2 button DOORZV RX WR VORZ GRZQ...

Page 22: ...your Caller List The phone is in a call in speakerphone mode The phone is in a call in earpiece mode New voicemail separate service Handset is connected to base and in range 1 2 LUHOHVV HQDEOHG devices are paired and in range Indicates home phone line is default dial out mode To access your phone s stored records Phonebook and for further details regarding this feature press the Phonebook button o...

Page 23: ... 9 3 OLVW names and numbers for your frequently dialed locations 3OD PHVVDJHV WR SOD QHZ DQG ROG DQVZHULQJ PDFKLQH PHVVDJHV QVZHULQJ 6 VWHP WR FKDQJH RXU DQQRXQFHPHQW GHOHWH PHVVDJHV UHFRUG PHPR WXUQ PDFKLQH RQ DQG RII DQG PDFKLQH VHWWLQJV QWHUFRP SUHVV WR FDOO DGGLWLRQDO KDQGVHWV ZLWKLQ WKH V VWHP Ringer Setup to choose ringer tones set ringer volume turn keypad tones on or off default On Visual ...

Page 24: ...or this function Dial Default If you have a mobile phone paired to the along with your home phone line you can choose the mobile phone to be your default device when placing an outgoing call In 02 9 6 mode press MENU to select Dial Default You will see list of options for this function Home is your regular phone line wall outlet Use UP or DOWN to choose your default dial mode Press MENU to save yo...

Page 25: ...t number is correct press TALK if you wish to dial the number back Delete Save Delete All from Caller List If you wish to save or delete the record from your memory press MENU after formatting the number You will see the options available for that record From here choose one of the paths described below Del Number Select by pressing MENU The screen displays Delete Press MENU to delete screen displ...

Page 26: ...FN PHVVDJH WKH ZLOO EH FRQQHFWHG WR WKH FDOOHU DOO IORZV 0RGH 9 3 3 FRQWDFWV ORFN OLVW OO RWKHU FDOOHUV 9 3 PRGH OORZ 6HQG WR 0 ORFN ZLWK 0 6FUHHQ ZLWK 60 6FUHHQ 2WKHU DOOHUV OORZ OORZ ORFN ZLWK 0 6FUHHQ ZLWK 60 2WKHU DOOHUV WR 0 OORZ OORZ ORFN ZLWK 0 6HQG WR 0 2II OORZ OORZ ORFN ZLWK 0 OORZ 127 QVZHULQJ 0DFKLQH 0 ORFN 0HVVDJH 0 6FUHHQLQJ 0HVVDJH 60 DOO ORFNHU 9RLFH 0HVVDJHV v ORFN PHVVDJH 7KH QXP...

Page 27: ...WR GHFLGH LI RX ZLVK WR WDNH WKH FDOO W ZLOO EORFN ZLWK EORFN PHVVDJH IRU WKH EORFN OLVW v I 2WKHU DOOHUV WR QV 0DFK LV VHOHFWHG LW ZLOO DOORZ 9 3 FRQWDFWV DQG 3KRQHERRN FRQWDFWV DQG VHQG DOO RWKHU FDOOV WR DQVZHULQJ PDFKLQH ZLWKRXW ULQJLQJ KDQGVHWV W ZLOO EORFN ZLWK EORFN PHVVDJH IRU WKH EORFN OLVW v I DOO ORFNHU IHDWXUH LV WXUQHG RII LW ZLOO DOORZ 9 3 FRQWDFWV 3KRQHERRN FRQWDFWV DQG DOO RWKHU FD...

Page 28: ...se the numeric keypad to enter the name to be saved When finished press MENU to save the number Screen will display OK and you will hear five beeps Edit Number While viewing the record press DOWN to advance the row that reads Edit Number to the top of the screen Press MENU to select this option You will be prompted to edit the number use UP or DOWN to move the cursor or use MUTE BACK to delete the l...

Page 29: ... HOHWH DOO ROG PHVVDJHV 5HFRUG 0HPR 5HFRUG PHPR DIWHU WKH WRQH QVZHU RQ RII QVZHULQJ PDFKLQH On Off QVZHU V VWHP VHWXS P 6FUHHQLQJ 2Q 2II P RI ULQJV 7ROO 6DYHU P 5HPRWH RGH VHW IRU FKHFNLQJ PHVVDJHV UHPRWHO P 0HVVDJH OHUW 7RQH 2Q 2II P 5HFRUGLQJ 7LPH PLQXWHV In standby mode press MENU Press UP or DOWN WR SOD QHZ DQG ROG DQVZHULQJ PDFKLQH PHVVDJHV MENU 16 5 1 6 67 0 MENU 17 5 20 In standby mode pre...

Page 30: ...e To adjust the ringer tone press DOWN to advance the row that reads Ringer Tone to the top of the screen Press MENU to select this option Use UP or DOWN to scroll through the available ring tones Press MENU to save the setting you selected Screen will display OK and you will hear five beeps Keypad Tone To turn the keypad tones high low or off press DOWN twice to advance the row that reads Keypad T...

Page 31: ... option activates the audio numbers both for the phone numbers dialed as well as the incoming phone numbers with optional CID service from your local phone service provider Press UP or DOWN to advance the row reading Voice Asst Press MENU to enter this option Use UP or DOWN to make your selection Press MENU to save your In standby mode press MENU Press UP or DOWN to advance the row that reads Auto...

Page 32: ...e row reading OSA Press MENU to enter this option Use UP or DOWN to make your selection Press MENU to save your selection The screen will display OK and you will hear five beeps Language Press UP or DOWN to advance the row reading Language Press MENU to enter this option Use UP or DOWN to make your selection Press MENU to save your selection The screen will display OK and you will hear five beeps Di...

Page 33: ... Time Press MENU to enter the date and time setup Use the numeric keypad to enter the date follow format on screen Press MENU to save your selection Use the numeric keypad to enter the time follow format on screen Press MENU to save your selection The screen will display OK and you will hear five beeps ...

Page 34: ...l see displayed on the screen Handset Needs Registration Press and hold the FIND key on the base for five seconds until the base visual ringer starts flashing Release FIND key on the base Press MENU key on the handset The screen shows Registering then Registration Successful accompanied by five quick beeps Your handset is now registered to your system Your screen will display Handset X where X is ...

Page 35: ...onnection or setup menus Please refer and then look for the ZLUHOHVV SDLULQJ menu in the settings or connection menu In the ZLUHOHVV SDLULQJ menu select the option to search for or add new devices Reset the telephone base Unplug the unit s electrical power Wait for approximately 15 seconds and then plug it back in Repeat the above sug gestions The PIN on the telephone base does not work Make sure ...

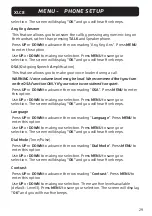
Page 36: ...handset Make sure you are within the usable range of the base station Make sure the handset battery is fully charged Try relocating the base unit to another location Make sure the AC adapter is not plugged into the wall outlet with other appliances Phone will not hold charge Make sure the charging contacts on the handset and base are free of dust and dirt While unplugged clean the contacts with a ...

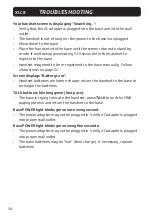
Page 37: ...27 Screen displays Battery Low Handset batteries are low on charge return the handset to the base to rechargw the batteries TALK button is blinking green fast pace The base is trying to locate the handset press TALK to end the FIND paging process and return the handset to the base Base POWER light blinks green once every second The power adapter may not be plugged in Verify AC adapter is plugged i...

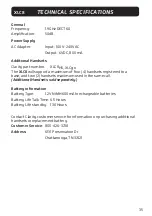
Page 38: ...d two 2 handsets maximum used in the same call Additional Handsets sold separately Battery information Battery Type 1 2V NiMH 600mAh rechargeable batteries Battery Life Talk Time 6 5 Hours Battery Life standby 130 Hours Contact Clarity customer service for information on purchasing additional handsets or replacement battery Customer Service 800 426 3738 Address 6131 Preservation Dr Chattanooga TN ...

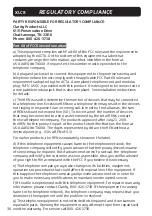
Page 39: ...r products approved after July 23 2001 the REN for this product is part of the product identifier that has the format US AAAEQ TXXXX The digits represented by are the REN without a decimal point e g 03 is a REN of 0 3 For earlier products the REN is separately shown on the label d If this telephone equipment causes harm to the telephone network the telephone company will notify you in advance that ...

Page 40: ...the limits of a Class B digital device pursuant to Part 15 of FCC rules These limits are designed to provide reasonable protection against harmful interference in residential installation This equipment generates uses and can radiate radio frequency energy and if not installed and used in accordance with the instructions may cause harmful interference to radio communications However there is no gu...

Page 41: ...line individual service may be extended by means of a certified connector assembly telephone extension cord The customer should be aware that compliance with the above conditions may not prevent degradation of service in some situations Repairs to certified equipment should be made by an authorized Canadian maintenance facility designated by the supplier Any repairs or alterations made by the user...

Page 42: ...rvation Dr Chattanooga TN 37421 Tel 800 426 3738 Fax 800 325 8871 RU 5HWXUQV LQ DQDGD SOHDVH FRQWDFW ODULW XVWRPHU 6HUYLFH DW IRU LQVWUXFWLRQV Please use the original container or pack the unit s in a sturdy carton with sufficient packing material to prevent damage Include the following information A proof of purchase indicating model number and date of purchase Bill to address Ship to address Num...

Page 43: ...condition caused by accident abuse misuse or improper operation violation of instructions furnished by Clarity destruction or alteration improper electrical voltages or currents or repair or maintenance attempted by anyone other than Clarity or an authorized service center is not a defect covered by this warranty Telephone companies manufacture different types of equipment and Clarity does not war...

Reviews: