


-18 - FORM NO. 70202B
Clarke
®
American Sanders Operator's Manual - Sander 1600 120V
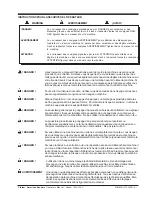
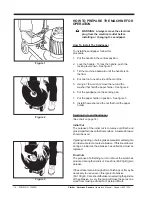
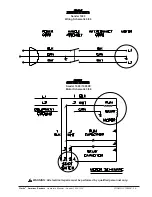
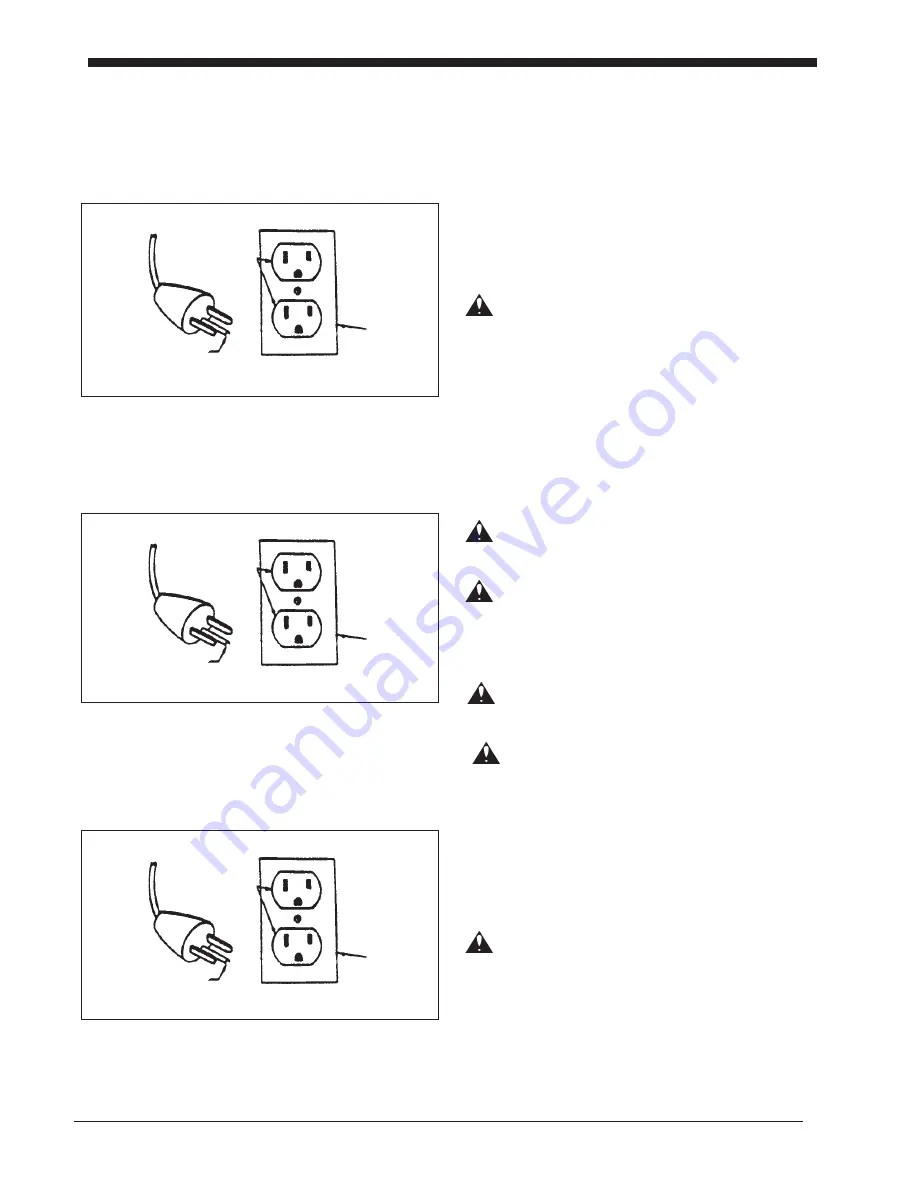
Figure 7
Figure 7a
Figure 7b
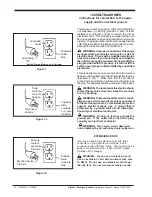
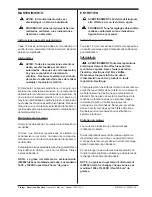
120 VOLT MACHINES
Instructions for connection to the power
supply and the electrical ground.
This product must be grounded. If it should malfunction
or breakdown, grounding provides a path of least
resistance for electric current to reduce the risk of
electrical shock. This product is equipped with a cord
having an equipment-grounding conductor and ground-
ing plug. The plug must be inserted into an appropriate
oulet that is properly installed and grounded in accor-
dance with all local codes and ordinances.
WARNING: Improper connection of the equip-
ment-grounding conductor can result in a risk of
electric shock. Check with a qualified electrician
or service person if you are in doubt as to whether
the outlet is properly grounded. Do not modify the
plug provided with the product - if it will not fit the
outlet, have a proper outlet installed by a qualified
electrician.
This product is for use on a nominal 120 volt circuit and
has a grounding attachment plug that looks like the plug
illustrated in Fig. 7. Make sure that the product is
connected to an outlet having the same configuration as
the plug. No adaptor should be used with this product.
WARNING: To prevent possible electric shock,
protect the machine from rain. Keep the machine
in a dry building.
WARNING: To prevent possible electric shock,
always use a 3-wire electrical system connected
to the electrical ground. For maximum protection
against electrical shock, use a circuit that is
protected by a ground fault circuit interrupter.
Consult your electrical contractor.
WARNING: Do not cut, remove or break the
ground pin. If the outlet does not fit the plug,
consult your electrical contractor.
WARNING: Have worn, cut or damaged
cords replaced by an authorized service person.
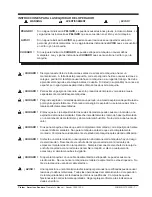
EXTENSION CORDS
Use only an approved extension cord with three
conductors, a plug with three terminals, and a
connector body with three holes. The machine has a
power cord with wire size 14 AWG (AWG means
American Wire Gauge).
WARNING: If you use an extension cord,
use an extension cord with minimum wire size
12 AWG. Do not use an extension cord longer
than 50 feet. Do not join two extension cords.
Grounded
Outlet
Grounding
Pin
Grounded
Outlet
Box
Toma
corriente
con polo
de tierra.
Terminal
de tierra
Tapa del
toma
corriente
con polo
de tierra.
Prise de
courant
avec mise
à la terre
Broche de mise
à la terre.
Boîte de
sortie
mise à la
terre
(United States, Mexico and Canada)
Summary of Contents for 07100A
Page 23: ...22 FORM NO 70202B Clarke American Sanders Operator s Manual Sander 1600 120V NOTES...
Page 31: ...NOTES...
Page 32: ......


