14
CUTTING
1. With the torch in starting position, activate the torch trigger button.
• The unit will initiate gas purge (pre-flow) to remove any
condensation that has accumulated in the torch
• When the gas purge is complete, pilot arc will come on and stay on
until the main cutting arc starts.
• If cutting arc has not started after 2-3 seconds. The pilot arc will go
out. The trigger should be released and pressed again to relight the
pilot arc.
2. Once on, the main cutting arc remains on as long as the trigger is held
down, unless the torch is withdrawn from the work or torch motion is too
slow. Keep moving while cutting.
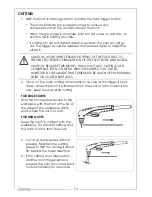
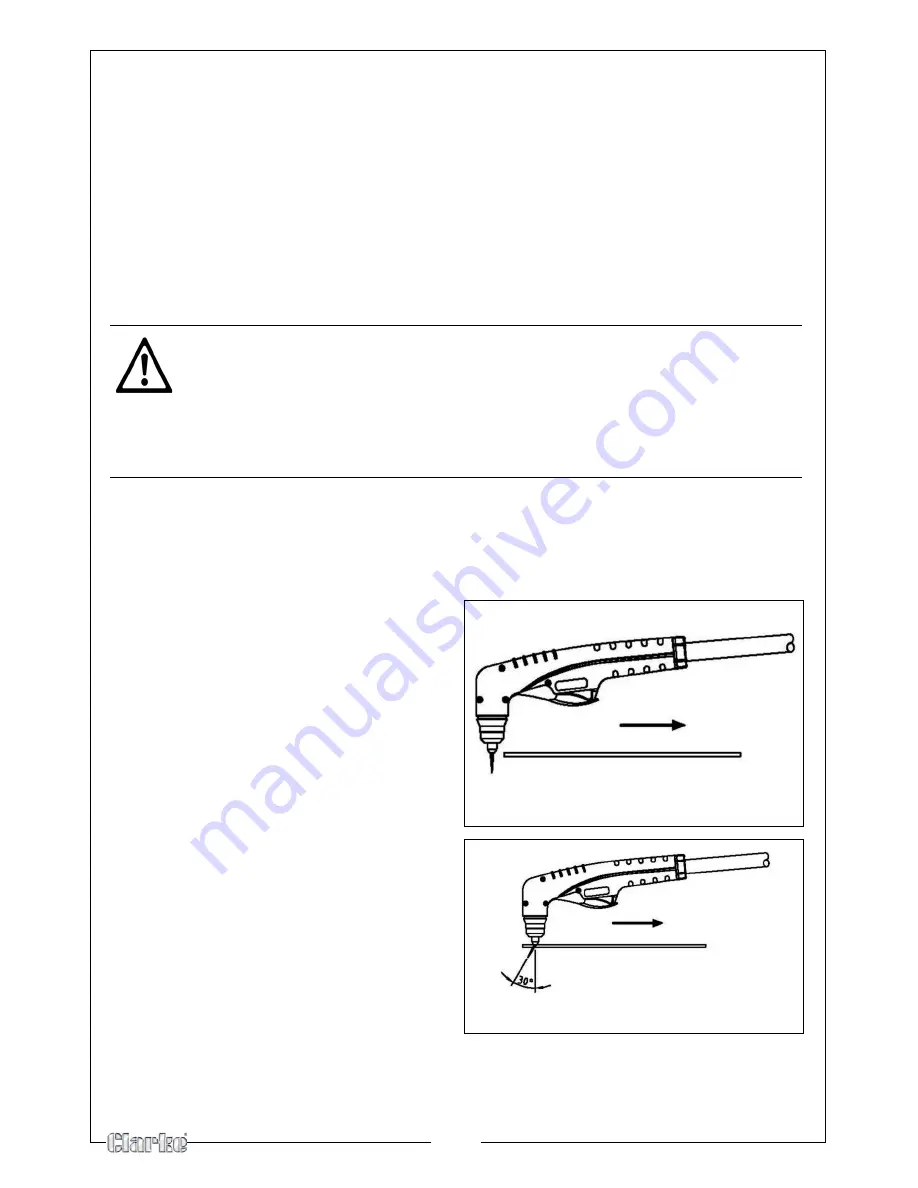
FOR EDGE STARTS
Hold the torch perpendicular to the
workpiece with the front of the tip on
the edge of the workpiece at the
point where the cut is to start.
FOR DRAG CUTS
Keep the torch in contact with the
workpiece. For standoff cutting hold
the torch 2-3 mm from the work.
3. Cut at a steady speed without
pausing. Maintain the cutting
speed so that the arc lag is about
30° behind the travel direction.
4. If the cutting arc is interrupted,
and the torch trigger remains
pressed, the pilot arc comes back
on automatically for 3 seconds.
CAUTION: AVOID UNNECESSARY LIGHTING OF THE PILOT ARC, TO
PREVENT EXCESSIVE CONSUMPTION OF THE ELECTRODE AND NOZZLE.
CAUTION: BECAUSE THIS MODEL HAS A PILOT ARC, CUTTING CAN
COMMENCE EVEN ON METAL WHICH IS PAINTED OR COATED.
HOWEVER, DO BE AWARE THAT FUMES MAY BE GIVEN OFF BY BURNING
PAINT OR COATED SURFACES.
Summary of Contents for 20CI
Page 1: ...OPERATION MAINTENANCE INSTRUCTIONS LS0109 PLASMA CUTTER MODEL NO 20CI PART NO 6016020 ...
Page 2: ...2 ...
Page 24: ...24 WIRING DIAGRAM ...
Page 25: ...25 DECLARATION OF CONFORMITY ...
Page 26: ...26 NOTES ...
Page 27: ...27 NOTES ...
Page 28: ......


