6
Parts & Service: 020 8988 7400 / E-mail: Parts@clarkeinternational.com or Service@clarkeinternational.com
BEFORE USE
ASSEMBLING THE NEEDLE HOLDER
The needle scaler is packed in two halves.
• The main body and hammer assembly
• The needles with needle holder, needle tube and spring
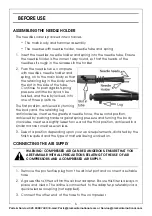
1. Insert the needles, needle holder and spring into the needle tube, Ensure
the needle holder is the correct way round, so that the heads of the
needles sit snugly in the recesses in the holder.
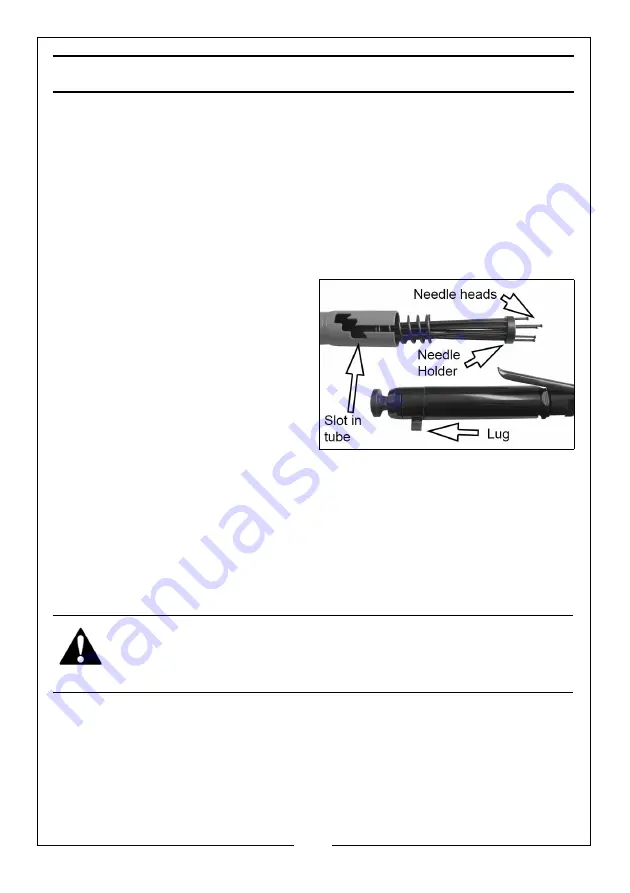
2. Push the needle tube, complete
with needles, needle holder and
spring, on to the main body so that
the retaining lug in the body enters
the slot in the side of the tube.
Continue to push against spring
pressure until the body can be
twisted, and thereby locked, into
one of three positions.
The first position, achieved by turning
the body and the retaining lug
anticlockwise, creates the greatest needle force, the second position,
achieved by pushing harder against spring pressure and turning the body
clockwise, creates a slightly lesser force, and the third position, achieved in a
similar manner, creates even less.
3. Select a position depending upon your work requirements, dictated by the
finish required and the type of material being worked on.
CONNECTING THE AIR SUPPLY
1. Remove the protective plug from the air inlet port and connect a suitable
hose.
2. A gauze filter is fitted within the air inlet adapter. Ensure this filter is always in
place and clean. The airline is connected to the adapter, preferably via a
quick release coupling (not supplied).
3. Connect the other end of the hose to the compressor.
WARNING: COMPRESSED AIR CAN BE DANGEROUS. ENSURE THAT YOU
ARE FAMILIAR WITH ALL PRECAUTIONS RELATING TO THE USE OF AIR
COMPRESSORS AND A COMPRESSED AIR SUPPLY.
Summary of Contents for 3120187
Page 12: ......


