


A - 8
CA30 20B - 56091130
7/2014
INSTRUCTIONS FOR USE
A - ENGLISH
CHARGER INDICATOR LIGHTS (FIGURE 3)
(Optional, applicable to models with built-in charger)
When charging starts, the red indication light (45)
fl
ashes a few times and then steadies to
1.
become a permanent red indication light, entering into the
fi
rst stage of charging.
After charging for a period of time, the red light (45) will go out. A yellow indication light (46) will
2.
light up permanently: entering the second stage of charging.
After charging for approximately 10 hours, the amber indication light (46) will turn off & the green
3.
light (47) will become permanently lit, indicating that the charge is full, and charging has ended.
NOTE
While charging, if the yellow indication light
fl
ashes: the battery is incompatible with the
1)
charger, or the battery is not properly connected, or a short circuit has taken place at
the output terminal.
If the red indication light is
fl
ashing: a short circuit inside the charger. (For details,
2)
please refer to the related sections in the charger instruction.)
GUIDE FOR USE
WARNING !
On certain parts of the machine are pasted some indicative signs:
DANGER !
WARNING !
CAUTION !
CONSULTATION
When reading this manual, the operator must pay particular attention to the symbols on these labels. Under no circumstances shall these labels be
covered. If they are damaged, please replace them immediately.
BATTERY INSTALLATION
WARNING !
If the batteries are incorrectly installed or inaccurately connected, the electric components of the machine may be seriously damaged.
The batteries may only be installed by quali
fi
ed personnel. According to the battery model number (WET or GEL) being used, set the
functional circuit board and onboard charger (optional).
Please check if the battery is damaged before installing.
Disconnect the battery connector and the on-board charger plug.
Be careful when touching the battery.
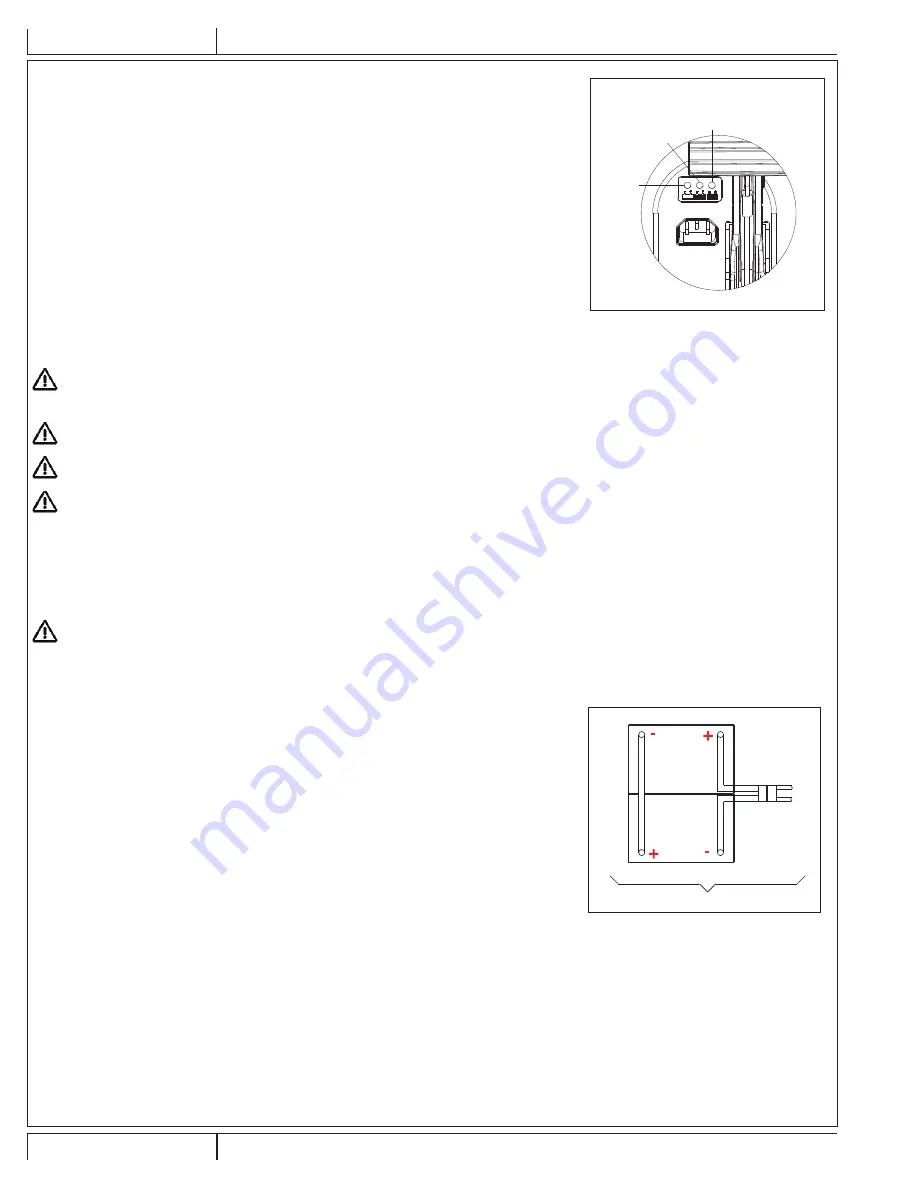
This machine requires two (2) 12V batteries. Either wet or GEL / AGM batteries can be used. Please
connect as shown in Figure 4 to the right.
Check the batteries. Ensure the connector (9) is connect to the battery pack.
1.
Press the on / off switch (41) into the “on” position. If the green light is on, that indicates the
2.
batteries are ready for use. If the amber or red light is on, that indicates the batteries need
charging. (Please refer to the section on maintenance for related procedures)
45
46
47
FIGURE 3
12V
12V
FIGURE 4
Summary of Contents for 510B
Page 7: ...7 2014 A 7 56091130 CA30 20B ENGLISH A INSTRUCTIONS FOR USE 38 39 40 41 42 44 43...
Page 19: ......
Page 25: ...7 2014 B 7 56091130 CA30 20B ESPA OL B INSTRUCCIONES DE USO 38 39 40 41 42 44 43...
Page 37: ......
Page 43: ...7 2014 C 7 56091130 CA30 20B FRAN AIS C MODE D EMPLOI 38 39 40 41 42 44 43...
Page 55: ......
Page 56: ...D 2 CA30 20B 56091130 7 2014 PARTS LIST TANK SYSTEM...
Page 60: ...D 6 CA30 20B 56091130 7 2014 PARTS LIST WHEELS AND SOLUTION SYSTEM...
Page 62: ...D 8 CA30 20B 56091130 7 2014 PARTS LIST BRUSH SYSTEM...
Page 64: ...D 10 CA30 20B 56091130 7 2014 PARTS LIST SQUEEGEE SYSTEM...
Page 67: ......


