background image

9

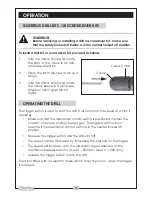
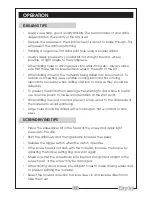
DIRECTION OF ROTATION

The direction control switch is used to alter
the direction of  rotation of the drill.

1

The direction of rotation is selected by
moving the directional control switch to
either side of the drill.

2

Reverse direction should only be used
for removing screws.

WARNING!

The directional control switch can also be used as the safety locked
off button to lock the trigger switch in the OFF position when the drill
is not being used or adjustments are being made to the speed or
torque settings. This is an important safety feature and must be
observed.

TORQUE ADJUSTMENT

The drill is fitted with a torque setting ring to vary the amount of torque
produced when drilling or screwdriving.

1

Select the setting by rotating the torque setting ring to align with the
torque setting indicator.

2

When the   symbol is selected, the clutch is designed not to slip and
therefore most drilling applications should be performed on this setting.

3

To select the correct torque setting for screwdriving, first set the torque
setting ring to position 1.

4

Fit and tighten the first screw, if the clutch starts to ratchet before the
screw is correctly seated, rotate the setting ring to a higher number until
the clutch ratchets only when the head of the screw is flush with the
surface of the material.

5

The settings are provided to vary the amount of torque available to seat
screws of different sizes in a variety of materials.

CAUTION!

Do not adjust the torque setting while the chuck is rotating.

BEFORE USE

Summary of Contents for Contractor CON24

Page 1: ...1 VARIABLE SPEED JIG SAW OPERATING MAINTENANCE INSTRUCTIONS 0608 Part No 6460200 CORDLESS IMPACT DRILL MODEL No CON24 Part No 6485065 CORDLESS IMPACT DRILL ...

Page 2: ...Faulty goods should be returned to their place of purchase no product can be returned to us without prior permission This guarantee does not effect your statutory rights PACK CONTENTS CON24 Cordless Impact Drill 2 x 24volt 1 300 mAh battery pack Auxiliary handle Magnetic bit holder 6 x HSS drill bits various 6 x screwdriver bits various Battery charger SPECIFICATIONS Model Number CON24 Hammer dril...

Page 3: ...ALWAYS disconnect the tool machine from the power supply before servicing and when changing accessories 5 ALWAYS wear safety goggles manufactured to the latest European Safety Standards Everyday eyeglasses do not have impact resistant lenses they are not safety glasses 6 ALWAYS keep work area clean Cluttered areas and benches invite accidents 7 ALWAYS ensure that adequate lighting is available A m...

Page 4: ...in Keep your work area well illuminated Do not use in explosive atmosphere around paint fumes flammable liquids etc Avoid dangerous environments HELPFUL HINTS ON DRILLING After drilling material to the full depth do not simply pull out the drill but maintain chuck rotation to ease withdrawal Keep drill bits sharpened for optimum performance Always drill directly in line with the bit Do not use sid...

Page 5: ...t ensure it is disposed of according to all local ordinances It must not be disposed of with general household waste This battery contains Nickle Cadmium Maximum operating temperature 40 degrees celcius The mobius loop with the letters cd means the battery contains cadmium and is capable of being recycled Do not submerge WARNING SYMBOLS WARNING The following symbols are displayed on the unit to re...

Page 6: ...be obtained from your local Clarke dealer or most electrical stockists If the plug has to be changed because it is not suitable for your socket or due to damage it should be cut off and a replacement fitted following the wiring instructions below The old plug must be disposed of safely as insertion into a 13 amp socket could cause an electrical hazard WIRING INSTRUCTIONS The wire which is coloured...

Page 7: ...ed fully 2 When the battery is fully charged the red LED will extinguish and the green LED will remain illuminated 3 Switch off the charger at the mains and remove the battery from the charger NOTE Whilst charging the battery pack and charger may become warm This is normal and will continue until the battery is fully charged and the charger has been disconnected from the mains supply FITTING THE B...

Page 8: ...ammer drilling mode rotate the mode selector until the symbol is aligned with the mode indicator 2 To select the rotary drilling mode rotate the mode selector until the symbol or any of the torque settings are aligned with the mode indicator CAUTION Do not change the drilling mode while the chuck is rotating Never use the hammer mode for drilling materials other than concrete and masonry SPEED RAN...

Page 9: ...t of torque produced when drilling or screwdriving 1 Select the setting by rotating the torque setting ring to align with the torque setting indicator 2 When the symbol is selected the clutch is designed not to slip and therefore most drilling applications should be performed on this setting 3 To select the correct torque setting for screwdriving first set the torque setting ring to position 1 4 F...

Page 10: ... DRILL The trigger switch is used to start the drill It also controls the speed at which it operates Make sure that the directional control switch is positioned in either the forward or reverse position See page 9 The trigger switch will not operate if the directional control switch is in the central locked off position Squeeze the trigger switch and the drill will start The speed can be increased...

Page 11: ...d be drilled dry To prevent the drill bit from slipping when starting to drill a hole in metal use a centre punch to make an indentation at the start point When drilling in wood clamp a piece of scrap wood to the underside of the material to avoid splintering Large holes should be drilled with wood augers flat wood bits or hole saws SCREWDRIVING TIPS Place the screwdriver bit in the head of the sc...

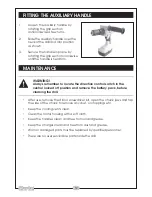
Page 12: ...te the direction control switch in the central locked off position and remove the battery pack before cleaning the drill After use remove the drill or screwdriver bit open the chuck jaws and tap the side of the chuck to remove any dust or chippings etc Keep the cooling vents clear Clean the motor housing with a soft cloth Keep the handles clean and free from oil and grease Keep the charger clean a...

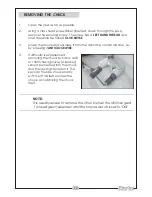
Page 13: ... the drill in the normal manner i e by screwing it ANTICLOCKWISE 4 If difficulty is experienced removing the chuck by hand an 8 or 10mm hexagon key Allen key should be inserted into the chuck and the jaws tightened on it The key can then be struck smartly with a soft mallet to loosen the chuck Avoid striking the chuck itself NOTE It is usually easier to remove the chuck when the drill has gear 1 l...

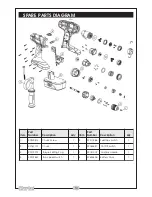
Page 14: ...S k c u h C 1 5 8 8 5 1 1 3 P K h c t i w S v e R d w F 1 2 1 0 1 1 6 1 P K k c u h C 1 6 1 5 6 3 6 1 P K h c t i w S f f O n O 1 3 9 7 0 2 1 3 P K g n i R g n i t t e S e u q r o T 1 7 9 0 0 1 5 1 P K e l d n a H y r a i l i x u A 1 4 7 6 8 2 1 3 P K h c t i w S d e e p S o w T 1 8 6 0 8 4 5 6 P K k c a P y r e t t a B 1 SPARE PARTS DIAGRAM ...

Page 15: ...est dealer or CLARKE International on one of the following numbers PARTS SERVICE TEL 020 8988 7400 or e mail as follows PARTS parts clarkeinternational com SERVICE service clarkeinternational com DECLARATION OF CONFORMITY DECLARATION OF CONFORMITY We declare that this product complies to the following standards directives 98 37 EC Product Description Cordless Impact Drill Model No CON24 Signed Eng...

Page 16: ......

Reviews: