FEATURES
T
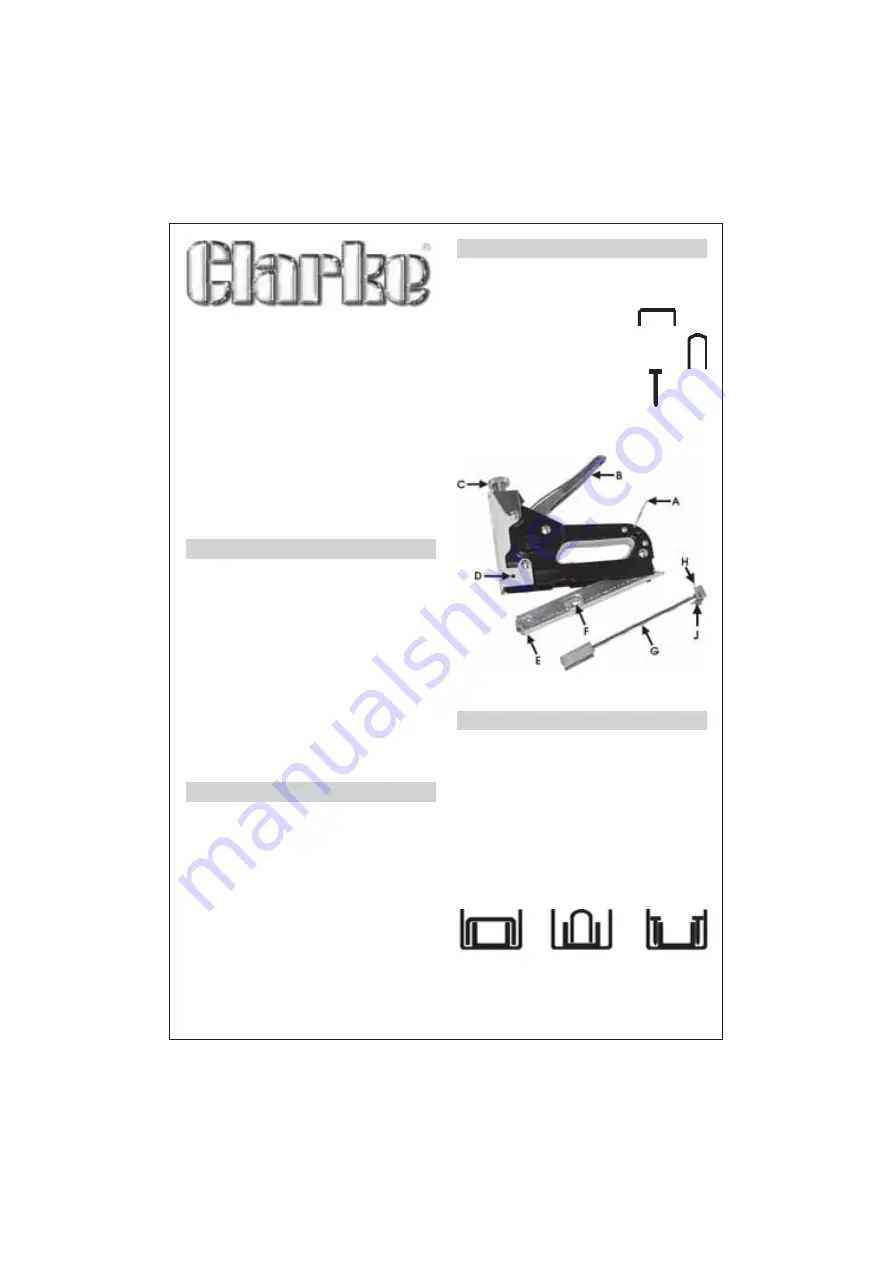
his staple gun is capable of accepting the
following;
• Staples ...................................
• ‘U’ shaped Staples .............................
• Nails ........................................
T
hank you for purchasing this CLARKE 3-WAY
Staple Gun.
Please read this leaflet thoroughly and follow the
instructions carefully, in doing so you will ensure
the safety of yourself and that of others around
you, and you can look forward to the Staple Gun
giving you long and satisfactory service.
SAFETY PRECAUTIONS
Extreme care should be exercised when using the
Staple Gun.
•
Never point it at anyone.
•
Do not allow children to use the gun.
•
When not in use, you should always remove
any staples or nails remaining in the gun,
and secure the handle with the safety
catch (A).
Take extra care when stapling into walls.
The danger of coming in to contact with
electric cables or plastic water pipes should
not be overlooked.
WARNING: Do not staple cables carrying
electric current.
3-Way Staple Gun
See ‘Accessories’ on reverse
Model No: CSG10
Part No: 1800200
GUARANTEE
This CLARKE product is guaranteed against faulty
manufacture for a period of 12 months from the
date of purchase. Your receipt is required as proof
of purchase.
This guarantee is invalid if the product is found to
have been abused or tampered with in any way,
or not used for the purpose for which it was
intended.
Faulty goods should be returned to their place of
purchase, no product can be returned to us
without prior permission.
This guarantee in no way effects your statutory
rights under common law.
OPERATION
1. Loading the Gun
(a)
Press in the plate (J), against spring pressure,
dislocating the tab (H) from its slot, and with
slight downwards movement, remove the
Pressure Rod and spring assembly (G) from
the back of the gun.
(b)
Ensure there are no old or disfigured staples
or nails in the gun, as these could cause it to
jam (see Maintenance section). Slide the
appropriate staples into the carriage as
shown below
(c)
Replace the pressure rod assembly, against
spring pressure ensuring the end plate tab
(H) is correctly located in the slot in the gun
body.


