


7
PREPARATION FOR USE
WARNING: Before using the ash can, make sure that you have read
and understood the safety instructions.
UNPACKING & ASSEMBLY
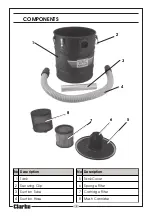
1. With the ash can removed from the packaging, undo the securing clips
(2) securing the tank cover (5) and remove the components from within
the tank. Check for shortages and that no damage was suffered in transit.
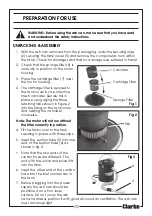
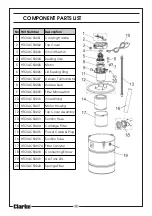
2. Check that the sponge filter (6) is
correctly in position on the motor
housing
.
3. Place the cartridge filter (7) over
the motor housing.
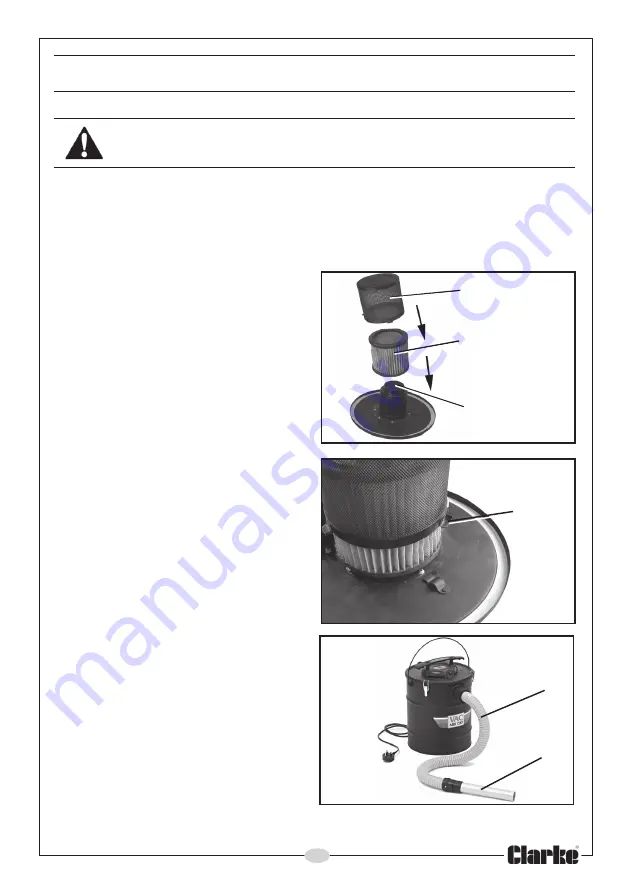
4
The cartridge filter is secured to
the tank cover by a protective
mesh cannister. Secure this in
place by engaging the three
retaining tabs shown in figure 2
into the fixing on the tank cover
and twisting the cannister
clockwise.
Note: The motor will not run without
the filter correctly in position.
4. Fit the tank cover to the tank,
securing in place with three clips.
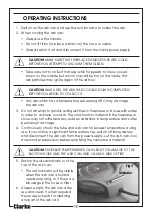
5. Insert the suction tube (3) into one
end of the suction hose (4) as
shown in fig 3.
•
Note that the two ends of the
suction hose are different. The
end with the collar and swivel fits
into the tank.
6. Insert the other end of the suction
hose into the inlet connection in
the tank.
7. Before plugging into the power
supply, the ash can should be
positioned on a firm, level
surface. Do not cover the ash
can and always position it with good all-round air ventilation. The ash can
must remain upright.
4
3
Fig 3
Cannister
Cartridge Filter
Sponge Filter
Fig 1
Fig 2
Tab


