background image

10

Parts & Service: 020 8988 7400 / E-mail: Parts@clarkeinternational.com or Service@clarkeinternational.com

OPERATING INSTRUCTIONS

FIRST USE

The heater reaches a very high temperature and during first use you may 
notice an odour coming from the heater - this is quite normal and will disperse 
quickly  (It is recommended the heater is initially run outside to enable the 
odour to clear).

It should also be noted that the paint on the surface of the heater will 
discolour due to the heat being produced.

LIGHTING THE HEATER

1. Ensuring there is sufficient gas, and that it is correctly connected and leak 

free, turn on the gas supply and check all fittings and connections for gas 
leaks using a mild soap and water solution. NEVER use a match to check 
for gas leaks. When satisfied, open the valve on the gas cylinder.

NOTE:

 The heater, has a fixed, regulated gas flow.

2. Press and hold the control valve 

plunge as shown whilst continually 
pressing the piezo-electric button 
until the burner ignites.

• Once the burner ignites, keep 

the button pressed for one (1) 
minute or until the burner stays 
lit after it is released.

WARNING: DO NOT FACE THE HEATER 
ELEMENT WHEN STARTING - ALWAYS 
STAND TO ONE SIDE.

NOTE:

If a new gas cylinder has been 
connected, it may take some 
time for the gas line to be 
purged of air. Press the Piezo 
electric button every10-15 
seconds until it ignites.

3. Alternatively, hold a lit taper to 

the burner face while pressing and holding the control valve button. After 

WARNING: BEFORE STARTING THE HEATER, YOU MUST ENSURE THAT THE 
MINIMUM VENTILATION REQUIREMENTS ARE OBSERVED TO AVOID THE 
RISK OF CARBON MONOXIDE POISONING.

Summary of Contents for GRH35

Page 1: ...OPERATION MAINTENANCE INSTRUCTIONS ORIGINAL INSTRUCTIONS GC0718 Issue 9 PROPANE GAS HEATER MODEL NO GRH35 PART NO 6920016...

Page 2: ...rself and that of others around you and you can look forward to your purchase giving you long and satisfactory service Proper combustion depends upon the air flow therefore the heater must not be modi...

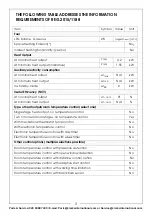
Page 3: ...t output nth nom 91 At minimum heat output nth nom N A Type of heat output room temperature control select one Single stage heat output no temperature control No Two or more manual stages no temperatu...

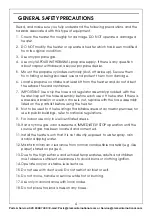
Page 4: ...r Inspect the hose assembly before each use of the heater If there is excessive abrasion or wear or hose is cut replace with the hose assembly listed on the parts list before using the heater 8 Not to...

Page 5: ...nfluence of alcohol or those at high altitude are more likely to be effected by Carbon Monoxide CO can build up in a confined space and failure to provide adequate ventilation can be fatal The early s...

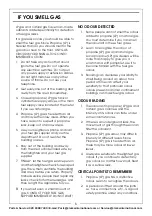
Page 6: ...rea before you return Properly trained service people must repair any leaks check for further leakages and then re light the appliance for you 8 If you smell even a small amount of gas CONTACT YOUR FU...

Page 7: ...Use a 100 pound 45 kg tank for longer operation or in very cold weather Less gas is vaporized at lower temperatures Your local propane gas dealer will help you select the proper supply system The min...

Page 8: ...HEATER Although this heater incorporates a tip over switch the heater and propane gas cylinder must be located on a hard flat level surface to minimize the risk of accidental tipping The propane gas c...

Page 9: ...to blast away any dust or dirt Turn the nut in an anticlockwise direction i e LEFT HAND THREAD until tight DO NOT use a thread compound on threads To check for leaks use soapy water or liquid soap ON...

Page 10: ...tion NEVER use a match to check for gas leaks When satisfied open the valve on the gas cylinder NOTE The heater has a fixed regulated gas flow 2 Press and hold the control valve plunge as shown whilst...

Page 11: ...necessary to bleed trapped air out of supply lines before lighting pilot New installations generally require bleed of supply lines Wait a minimum of five minutes after bleeding supply lines before att...

Page 12: ...e connections for leaks Apply a mixture of liquid soap and water to the connections Bubbles forming show a leak Correct all leaks at once 4 Clean the inside of the heater using compressed air where po...

Page 13: ...gas tap closed 2 Cylinder is empty 3 Orifice is obstructed 4 Gas leaks from the supply hose or from the tap 5 Low gas pressure 6 Thermocouple loose or needs to be replaced 7 Automatic control valve n...

Page 14: ...an be returned to us without prior permission This guarantee does not effect your statutory rights Fault Cause Remedy Heater stops during operation 1 Excessive gas supply 2 Insufficient gas supply due...

Page 15: ...h 115285 01 2 Thermocouple 114121 01 10 Brass Elbow 111090 02 3 Bracket 117384 01 11 Hose Regulator 115290 04 4 Igniter Electrode 115291 01 12 Wheel 115292 01 5 Igniter Bracket 117385 01 13 Wheel Brac...

Page 16: ...16 Parts Service 020 8988 7400 E mail Parts clarkeinternational com or Service clarkeinternational com DECLARATION OF CONFORMITY...

Page 17: ...17 Parts Service 020 8988 7400 E mail Parts clarkeinternational com or Service clarkeinternational com ALSO AVAILABLE FROM THE CLARKE RANGE...

Page 18: ...18 Parts Service 020 8988 7400 E mail Parts clarkeinternational com or Service clarkeinternational com ALSO AVAILABLE FROM THE CLARKE RANGE...

Page 19: ...19 Parts Service 020 8988 7400 E mail Parts clarkeinternational com or Service clarkeinternational com...

Page 20: ......

Reviews: