- 7 -
- 8 -
the performance of the machine, and even
shorten its life.
To clean the air intake filter, carefully remove the
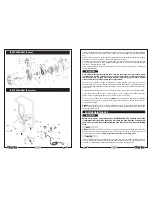
sponge element shown in Fig. 3. clean the sponge
and the housing using a brush and/or clean lint
free cloth.
If necessary, the sponge may be gently washed
in warm soapy water, it must be rinsed and
allowed to dry thoroughly before refitting.
Every 500 hours of operation or every 6 months
•
Clean all the external parts of the compressor.
(This cleaning makes the cooling process more efficient and prolongs the life of the
machine).
•
Examine the non-return valve and renew if
necessary (fig. 4) (Item 55, page 9/10,)
•
In the event of an air leak follow the procedure
below:
• Load compressor to maximum pressure
• Unplug the compressor
• With a brush and soapy water wet all ‘screwed’ air connections
• Any leaks will show through the formation of air bubbles.
Fig. 3
WARNING
NEVER unscrew a connection whilst the air receiver is under pressure.
ALWAYS make certain that the tank has been emptied.
Fig. 4
ACCESSORIES
Your Clarke Pioneer Oil Free Air Compressor can be used in conjunction with a wide range
of optional accessories for inflating tyres, air brushing, stapling, blowing and many other
uses. For details contact your local accessory stockist.
A suitable Spraygun and air hose is available for use with your Pioneer 210 oil free
compressor, part numbers as follows.
Spraygun PS .............................................. Part No. 5080813
Hose JP3 .................................................... Part No. 3120203
A wide range of accessories is available from your nearest CLARKE dealer, for further
information, contact your nearest dealer, or telephone CLARKE International Sales
department on 01992 565300.
CAUTION Do not attempt any repair or adjustment if you are uncertain as to how it should be done.
If you have any queries, contact your local CLARKE Dealer.
TROUBLE SHOOTING
With considerate use, your CLARKE Air Compressor should provide you with long and trouble free
service. Routine checks should be made on both the electrical supply as well as the compressed
air lines and connections. If any fault appears, the reason for which is not immediately obvious,
please contact your local CLARKE Dealer.
PROBLEM
PROBABLE CAUSE
REMEDY
Motor windings burnt out.
Contact your local dealer for a
replacement motor.
Switch off and wait 5 minutes
before switching on.
Overload cutout switch
has tripped.
The compressor
stops and will not
start again.
Bad connections.
Check electrical connections.
Clean and tighten as necessary.
The compressor
does not reach the
set pressure and
overheats easily.
Compressor head gasket
blown or valve broken.
Worn Piston
Contact your CLARKE dealer.
Replace Piston (contact your
CLARKE dealer)
Compressor does
not start.
Air receiver charged
Open drain cock to expel air.
Compressor should start again
when pressure reduces to approx.
Air leaking from the
pressure switch valve
when the compressor
is not running.
Faulty non-return valve.
First drain the receiver completely.
Replace non-Return Valve
Air pressure from
regulator will not
adjust.
Replace Regulator
The diaphragm within the
regulator body is broken.
IMPORTANT:
T
he use of parts other than CLARKE replacement parts may result in safety hazards,
decreased tool performance and may invalidate your warranty.


