4
Parts & Service: 020 8988 7400 / E-mail: Parts@clarkeinternational.com or Service@clarkeinternational.com
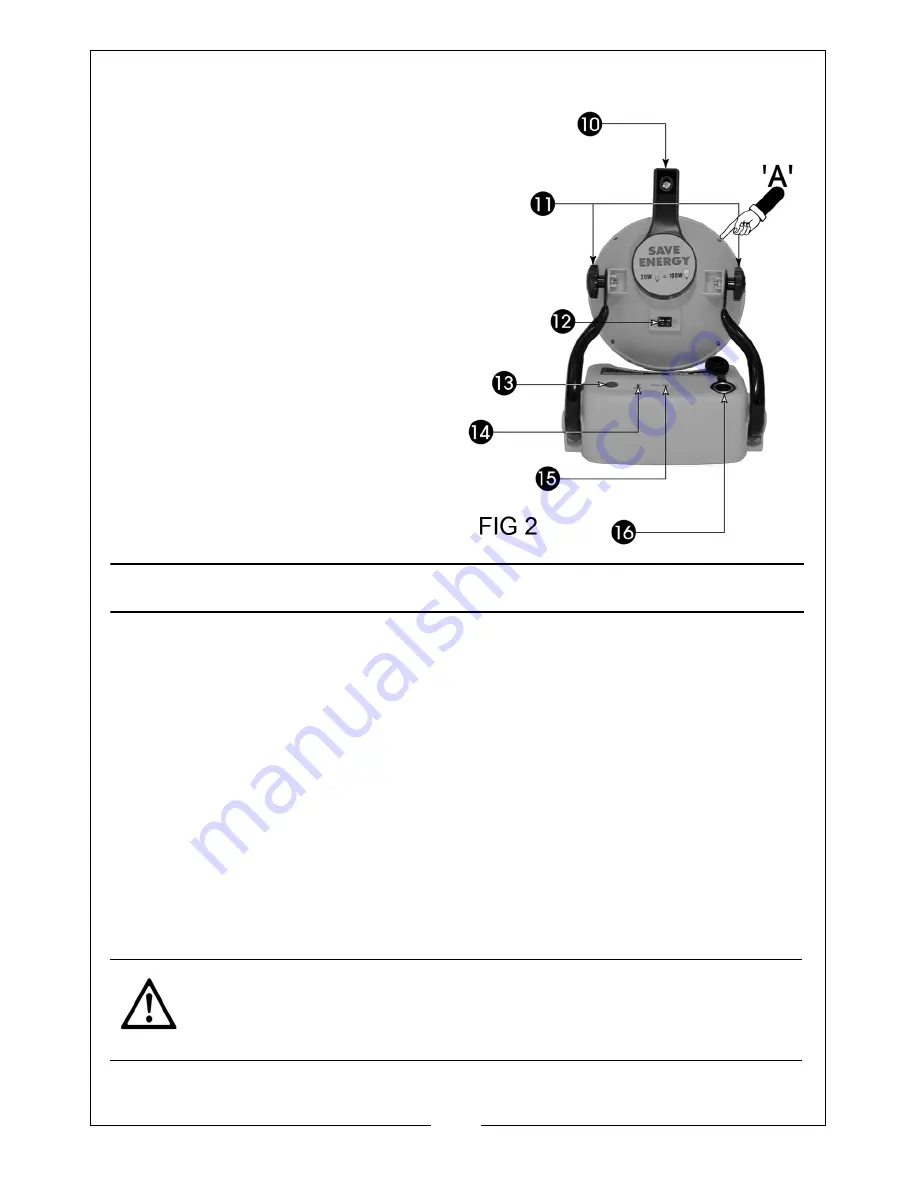
10. Carry Handle
11. Adjusting Knobs
12. 12V DC input Socket
13. Battery Level Test Button
14. Battery Condition Indicator
15. AC/DC Charging Socket
16. 12v Power Socket
CHARGING
To charge the battery using the AC adapter, first ensure the lamp is switched
off and connect the plug of the AC charger to the AC/DC Charging socket
on the back of the power pack, (see Fig. 2 above). Plug the AC charger into a
suitable mains socket and switch on.
Fully charging a partially discharged battery may take several hours, whereas
a completely discharged battery will take the full 16 hours, (4 hours if charging
from a car battery).
To gain the maximum life of the battery, it is not advisable to charge regularly
from a DC supply.
The charge state of the battery can be checked by operating the battery
level test button on the back of the power pack. When pressed, the battery
level indicator will glow RED if the battery requires charging. If charged the
indicator will glow GREEN
CAUTION: NEVER CHARGE THE BATTERY FOR LONGER THAN 48 HOURS
AS THIS MAY CAUSE DAMAGE TO THE UNIT AND OR PREMATURE FAILURE
OF THE BATTERY.


