6
Parts & Service: 020 8988 7400 / E-mail: Parts@clarkeinternational.com or Service@clarkeinternational.com
BULB REPLACEMENT
Your RWL12 uses a fluorescent 230v-20w bulb with screw-type fitting, which
can be purchased locally, or from your nearest Clarke distributor. DO NOT
substitute a different type or size.
To replace the bulb, proceed as follows.
1. Ensure the lamp is turned off and the 12v power cable is disconnected.
2. Loosen the two adjusting knobs and adjust the angle of the lamp to gain
access to the four retaining screws, (‘A’) on the back of the lamp housing,
(See Fig 2).
3. Using a small phillips screwdriver, remove the four screws and store safely.
4. Carefully remove the lens assembly and store safely.
5. Gripping the base of the bulb to be removed, unscrew anticlockwise and
remove. Dispose of the bulb according to local authority regulations.
6. Fit the replacement bulb in reverse order. Take care when handling the
bulb. DO NOT overtighten.
7. Re-assemble the lens assembly, ensuring the screws line up with the screw
holes in the back of the lens, and gently tighten all screws. DO NOT force or
overtighten. If the screws do not go back easily, remove and recheck the
alignment.
Your lamp is now ready for use again.
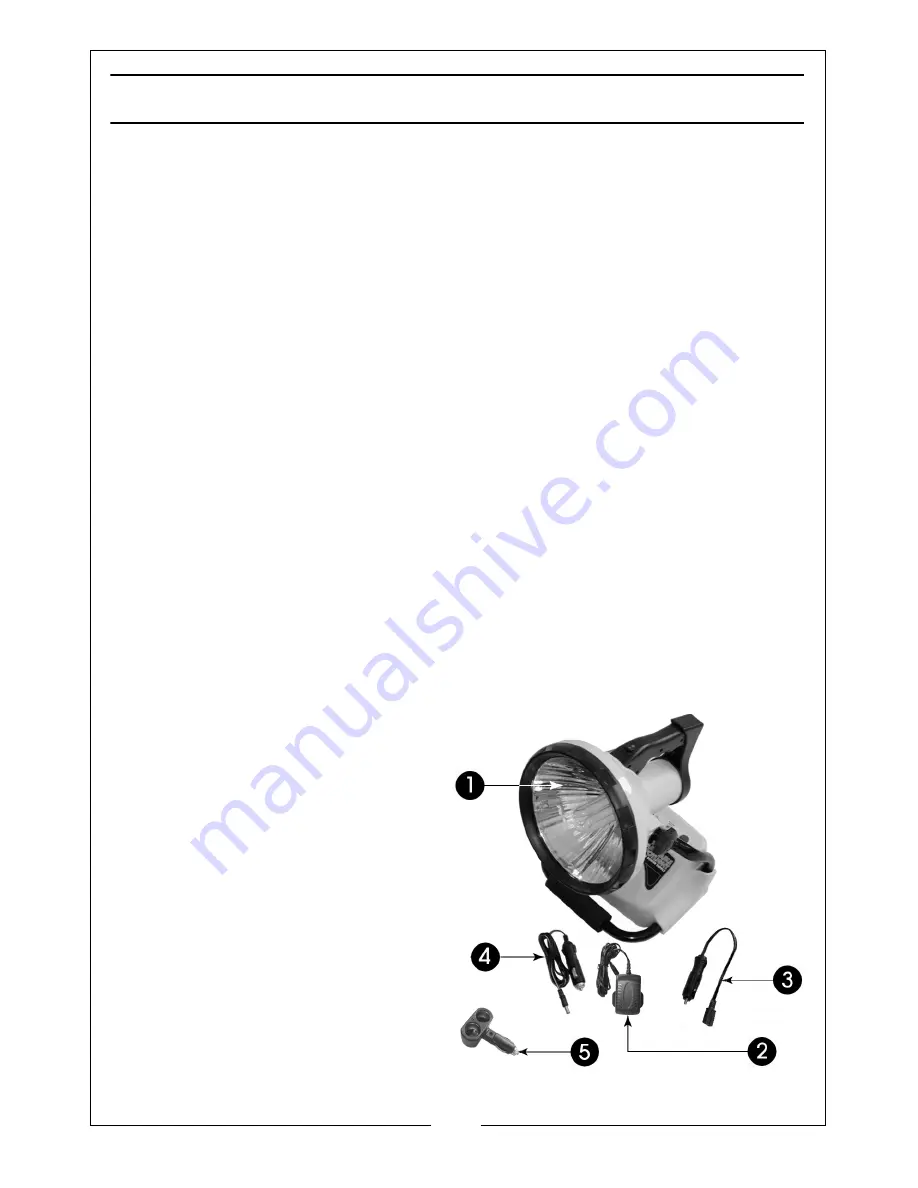
PARTS
1. Safety Lens Assy............... AU12001
2. AC charger ...................... AU12002N
3. 12v Power Cable............. AU12003
4. 12v DC Charger .............. AU12004
5. Twin Socket Adapter ...... AU12005
6. Bulb (not shown) ............. AU12006
There are no other user serviceable
parts inside the lamp, DO NOT
disassemble the unit.


