English
GREAT BRITAIN •
customer service
tel:
020 8247 9300
customerservice@clasohlson.co.uk
internet:
www.clasohlson.co.uk postal: 10 – 13 Market Place, Kingston Upon Thames, Surrey, KT1 1JZ
1
2
3
5
6
4
Ver
. 20160525
CO
Mickey Mouse Train Set
Art.no 31-1713 Model 054080
Please read the entire instruction manual before using the product
and then save it for future reference. We reserve the right for
any errors in text or images and any necessary changes made
to technical data. In the event of technical problems or other
queries, please contact our Customer Services.
Safety
• The train is designed for children aged 1–3 years with a max
weight of 25 kg.
• Only one child may ride the train at any one time.
• The child must always be under the supervision of an adult.
• Keep any small parts away from children, they may cause
choking.
• All parts of the train set, including the battery, must be
assembled by an adult.
• The train is intended for indoor use only.
• Never immerse the train into any type of liquid.
• The train must only be used on a flat surface.
• Check regularly that none of the parts is loose.
• The train must be assembled correctly to minimise the risk
of collapse.
• Shoes must be worn by the child riding the train.
• The train must be used with great care to avoid injuries to
the child or other person.
Product description
Battery-powered train with light and sound effects. The train
engine has buttons for lighting and sound effects and forward/
backward motion. The train can be run on its tracks or directly
on the ground (surface permitting). Operates on 6 × D/LR20
batteries (sold separately). Comes with a 27-piece track which
can be laid in different shapes.
Buttons and functions
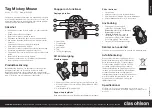
Handlebar control buttons
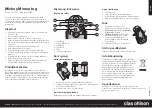
Inserting batteries
1. Lift the seat.
2. Unscrew and remove the battery cover.
3. Insert the batteries according to the markings in the battery
compartment. Always follow the polarity markings during
battery insertion.
4. Screw the battery cover back on and close the seat.
Operating instructions
1. Sound effects
2. Forwards/backwards
3. Start button
4. Sound effects
5. Whistle
6. [ STOP ] Stop button
Getting started
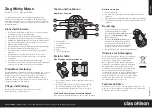
Assembling the carriage
1. Turn the carriage upside down and place it on a flat surface.
2. Click the wheels and axles into the slots on the bottom of
carriage.
Laying the tracks
Build your own railway by clicking the pieces of track together.
1. Slide the switch on the bottom
of the locomotive to the desired
setting. Choose between
Foot
Powered
or
Battery Powered
.
2. In
Battery Powered
mode, press
the start button (3) to start the motor
and then move the selector lever (2)
forwards or backwards to choose
direction. The train will begin
to move.
3. Press [ STOP ] to stop the train.
Care and maintenance
Clean the product by wiping it with a soft, damp cloth.
Responsible disposal
This symbol indicates that this product should not
be disposed of with general household waste.
This applies throughout the entire EU. In order to
prevent any harm to the environment or health
hazards caused by incorrect waste disposal,
the product must be handed in for recycling so that
the material can be disposed of in a responsible
manner. When recycling your product, take it to
your local collection facility or contact the place
of purchase. They will ensure that the product is
disposed of in an environmentally sound manner.
Specifications
For children aged 1–3 years. Locomotive and carriage,
length: 82 cm. Height: 36 cm. The toy is only designed to
support the weight of a child up to 36 monthts.


