background image

6

7

English

English

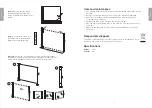
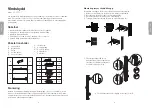
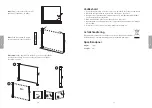
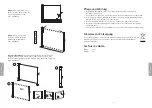
Note:

 Make sure that the post is 

standing straight when the side 
screen is extended (as shown in the 
picture). 

90°


Max. 3 m

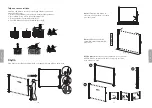
Note: 

Do not pull the side screen 

out further than to the maximum 
mark, as shown in the picture.

2

3

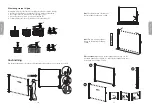
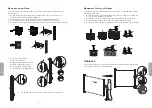
After use:

 Lift the side screen a little to release it from the post and 

hold it while it retracts gently towards the wall. Make sure that the side 
screen is held straight all the way to the wall (check the picture).

STOP HERE!

1

2

3

Care and maintenance

•  Check regularly that all the brackets are securely attached. Tighten the screws  

if needed.

•  Never use the privacy/side screen if it or any of the brackets is damaged.
•  Clean the screen fabric regularly using water and a mild cleaning agent.  

Let the fabric dry completely.

•  Never dry the fabric with a hair dryer, fan heater or similar.
•  Store the side screen awning indoors, in a dry place if it is not to be used for  

a long time.

•  Make sure that the fabric is completely dry before putting the screen away  

for storage.

Responsible disposal

The product should be disposed of in accordance with local regulations. If you 
are unsure how to proceed, contact your local council.

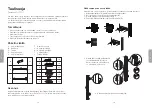
Specifications

Height:

   1.6 m

Length:

   3 m

Summary of Contents for 31-1751-1

Page 1: ...E ngl i sh S ve n sk a N orsk S uomi Deut sc h Retractable Side Screen Vindskydd Innsynsskjerm Tuulisuoja Sichtschutz Art no 31 1751 1 Ver 20201009...

Page 2: ...stallation Never modify the product The product is intended to provide protection from sunlight and give you privacy Never use the product in very windy weather Package contents A 2 x wall brackets B...

Page 3: ...Note Make sure that the side screen is turned the right way up check the picture 6 Tighten the bolts I using the hex key F A B F Post to floor installation Make sure that the floor surface is flat so...

Page 4: ...eck regularly that all the brackets are securely attached Tighten the screws if needed Never use the privacy side screen if it or any of the brackets is damaged Clean the screen fabric regularly using...

Page 5: ...t l mplig f stmetod skruv plugg etc och f rs kra dig om att inga el eller vattenledningar finns i v ggen d r du ev avser att skruva borra Om du r det minsta os ker p hur produkten ska monteras kontakt...

Page 6: ...trall Skruv fast f stet J med de st rre skruvarna E Anv ndning Dra ut insynsskyddet mot stolpen och f rankrar det mot stolpen och stolpens fot se bild Obs Se till att stolpen st r rakt n r insynsskydd...

Page 7: ...fremtidig bruk Vi tar forbehold om eventuelle feil i tekst og bilder samt endringer av tekniske data Ved tekniske problemer eller sp rsm l ta kontakt med v rt kundesenter se kontaktopplysninger p bak...

Page 8: ...jermen B med bolteskruene I til veggfestet A Obs P se at skjermen vender riktig vei se bildet 6 Fest boltene I med hjelp av sekskantn kkelen F A B F Montering av stolpe til gulv Kontroller at gulvet e...

Page 9: ...Dra til skruene ved behov Ikke bruk innsynsskjermen dersom den eller festene er skadet Rengj r stoffet regelmessig med lunkent vann og et mildt rengj ringsmiddel La stoffet t rke f r det rulles inn Br...

Page 10: ...isompi ruuvi Asennus K yt kiinnityskohtaan sopivaa kiinnitystapaa ruuvi tulpat Varmista ett poraus ruuvauskohdassa ei ole s hk tai vesijohtoja Jos et ole varma miten tuote asenne taan pyyd apua osaava...

Page 11: ...ruuveilla E 4 Puuritil Kiinnit kiinnike J isommilla ruuveilla E K ytt Ved n k suoja tolppaa kohti ja kiinnit se tolppaan ja tolpan jalkaan katso kuva Huom Varmista ett tolppa on suorassa kun n k suoj...

Page 12: ...o ggf gebohrt oder geschraubt wird keine Strom oder Wasserleitungen verlaufen Bei Unsicherheit oder nicht ausreichenden Kenntnissen ber die Befestigung des Regals an der Wand die Installation von qual...

Page 13: ...d am Pfosten und am Fu des Pfostens verankern siehe Abbildung E G1 J J J E E J E Montage an einer Wand Sicherstellen dass die Wand gerade ist sodass die Halterungen stabil befestigt werden k nnen 1 Di...

Page 14: ...sgem festsitzen Bei Bedarf nachziehen Das Produkt nie benutzen wenn eine oder mehrere Halterungen besch digt sind De Stoff regelm ig mit lauwarmem Wasser und einem milden Reinigungsmittel reinigen Den...

Page 15: ...lvelu clasohlson fi Internet www clasohlson fi Osoite Clas Ohlson Oy Kaivokatu 10 B 00100 HELSINKI United Kingdom Customer Service Contact number 020 8247 9300 E mail customerservice clasohlson co uk...

Reviews: