


4
E
N
G
LI
S
H
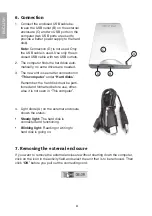
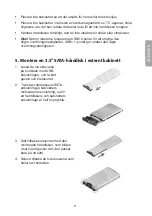
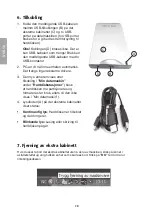
6. Connection
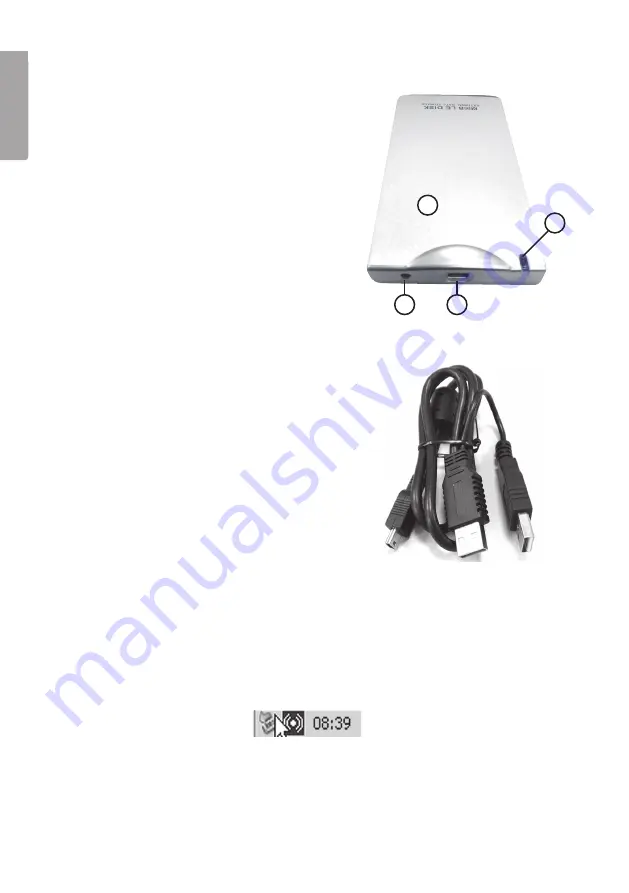
1. Connect the enclosed USB cable be-
tween the USB outlet (B) on the external
enclosure (C) and two USB ports on the
computer (two USB ports are used to
provide a better power supply to the hard
disk).
Note:
Connection (D) is not used. Only
the USB cable is used. Use only the en-
closed USB cable with two USB outlets.
2. The computer finds the hard disk auto-
matically, no extra drivers are needed.
3. The new unit is seen after connection in
“
This computer
” under “
Hard disks
”.
Remember: the hard disk must be parti-
tioned and formatted before use, other-
wise it is not seen in “This computer”.
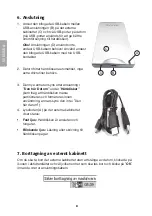
4. Light diode (A) on the external enclosure
shows the status:
•
Steady light:
The hard disk is
connected and functioning.
•
Blinking light:
Reading or writing to
hard disk is going on.
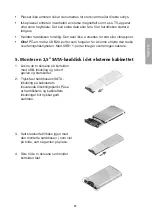
7. Removing the external enclosure
If you want to remove the external enclosure without shutting down the computer,
click on the icon in the activity field and select the unit that is to be removed. Then
click “
OK
” before you pull out the connecting cord.
A
B
D
C


