6
E
n
g
li
s
h
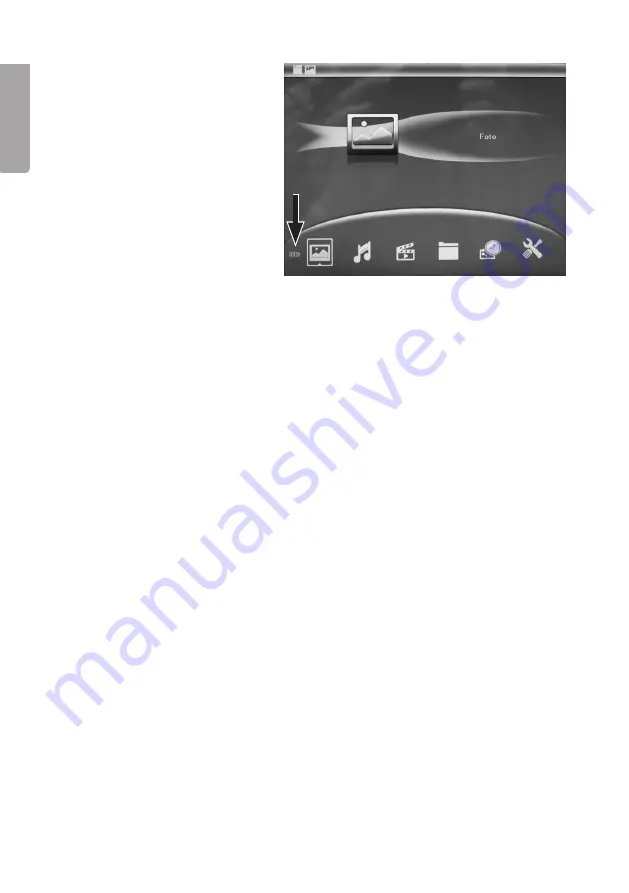
Built-in battery
• The photo frame’s built in
battery will be charged once
the mains adaptor is con-
nected. An icon will appear in
the frame’s bottom left hand
corner of the start screen to
indicate charging.
• Charging time is approximately
5½ hours. The photo frame
switches automatically to
maintenance charge when
the battery is fully charged.
Operation
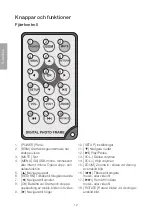
• Press [ POWER ] either on the remote or the photo frame.
• If no USB or memory card is connected and no files have been saved to
the internal memory the start screen will appear.
• If a USB or a memory card is connected to the frame when it is started
a slideshow will be displayed along with background music if such files are
present on the memory device.
• If files have been saved to the internal memory and no USB or memory card is
connected the photo frame will play slideshow images from internal memory
when started.
• To stop the slideshow and return to the start screen, press [ RETURN ] twice.
• The start screen icon selections are:
Photo, Music,
Video, File,
Calendar
and
Setup
.
Still images/slideshow
1. Select from which memory source you wish to show your pictures from the ones
that you have connected. Press [ RETURN ] from the start screen and then select
either
Built-in memory
(internal memory),
USB
or
SD/MMC card
using [
◄
][
►
].
Confirm with [ OK ]. The frame will then return to the start screen. Two icons will
appear in the top left hand corner which will show both the active memory source
and selected functions.
2. Select
Photo
.
3. Press [ OK ] to display thumbnail images.
4. Use [
◄
][
►
][
▲
][
▼
] to select an image.
5. Push [ OK ] to display the image.
6. Push [ OK ] to start the slideshow.
7. Press [ RETURN ] to return to thumbnail images and press [ RETURN ] again to
return to the start screen.


