13
English
When the basic setup has been completed, do the following with
the remaining images:
1. Change images in the slide holder and slide it down into the feeder slot.
2. Press [ SCAN ]; “Save” appears in the display.
3. Press [ ENTER ] to scan the image and save it to the memory card.
4. Do the same with the next image.
7.2 Open the slide holder and load the slides
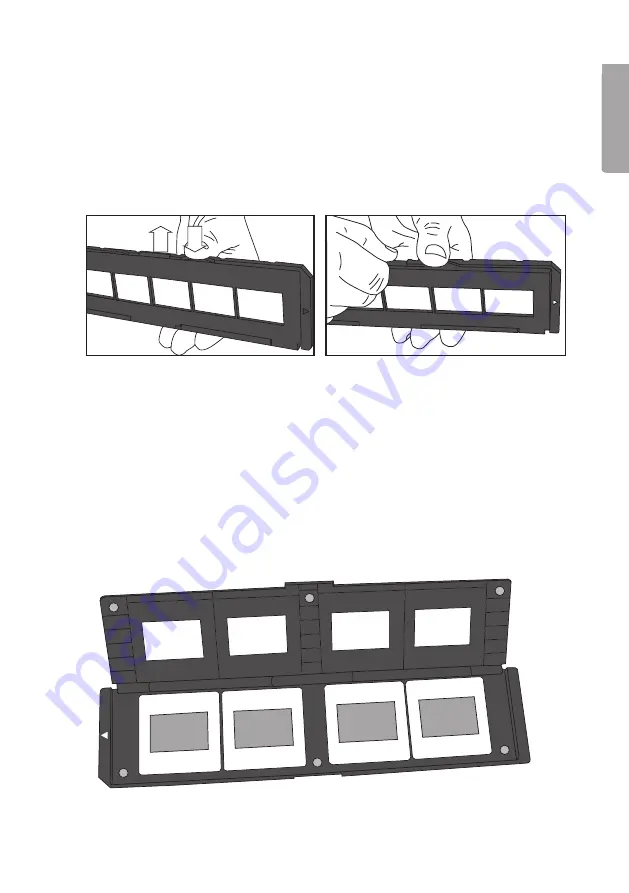
1. Hold down the slide holder with one thumb as shown in the picture.
2. Push up the snap lock with the other thumb on the opposite side to the “OPEN”
marking.
3. Open the slide holder.
4. Hold the slide up to the light; you must see the image the right way round (not
a mirror image).
NB:
Try to avoid getting fingerprints on the slide; if possible,
use thin cotton gloves. Blow off dust and dirt using compressed air from a spray
can designed for cleaning. Other suitable aids are also available, e.g. a blower brush.
5. Place the slide in the holder. Press the holder together so that the magnets keep it
closed. Make sure you mount the images the right way round.
6. Set both controls [ Film scanner - Photo scanner ] (9) and (15) to
Film scanner
.
7. Guide the slide holder into the feeder slot (18) with the white arrow first.


