10
English
Audio recording
1. Switch on the camera and select audio-recording mode. See the
Menus-
Camcorder-Capture
mode
section above.
2. Start recording by pressing the button for recording (1).
3. Press the button for recording again to conclude and save the recording.
NB:
When the camera is activated from standby mode, it is set to video-recording mode.
Voice-activated recording
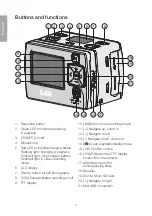
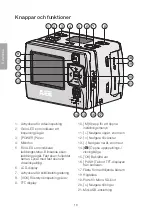
• If the control for voice-activated recording (8) is set to
ON
, video recording starts
when the camera senses a certain noise level, e.g. voice command or other sound.
NB:
This system only works in quiet environments.
• If the camera is switched on and [ VOX ] (8) is
ON
and the noise level around
the camera is very low, the camera will switch to standby mode once the set time in
Auto Standby has elapsed (see the
Use-Menus-Setup-Auto Standby
section above).
• If the camera senses noise in standby mode, it will be activated and recording will
commence. The camera will continue to record as long as it can sense noise and
will finish recording 2 minutes after the noise has ceased.
• The camera can be activated from standby mode when voice-activated recording
is switched on by pressing any of the buttons for start of video recording (1) or
the button for still photography (7).
Playback/viewing mode
Press [
] (14) to open the playback menu. The menu has 2 sub-menus:
Record
and
Capture
.
Record
Video and audio files.
1. Press [ OK ] to open the menu; the last recorded file is shown. Press [ < ] [ > ] to
change file.
2. Press [ - ] to view recorded files as miniatures. Select file using [ < ] [ > ] or [ + ] [ - ] and
press [ OK ] to open.
Control playback of video as follows:
• [ OK ] Start and stop playback.
• [ + ] [ - ] Volume
• [ < ] [ > ] Fast-forward or rewind. Press once to fast-forward at 2 × speed.
Press once to fast-forward at 4 × speed. Press [ OK ] to return to normal playback.
• [
]: Pause/play


