English
GREAT BRITAIN •
customer service
tel:
08545 300 9799
e-mail:
customerservice@clasohlson.co.uk
internet:
www.clasohlson.com/uk
V
er
. 20
140
103
Extra Push-Button for 36-4832
Art.no 36-4832-1 Model WA PUSH WHITE
Please read the entire instruction manual before use and save it for future reference. We reserve
the right for any errors in text or images and for making any necessary technical changes to this
document. If you should have any questions concerning technical problems please contact our
Customer Services.
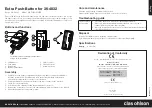
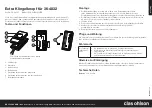
Buttons and functions
1. LED indicator
2. Push button
3. Name plate
4. Battery compartment
5. Chime selector
6. Channel selector
7. Retaining screws
Care and maintenance
Clean the product using a lightly moistened cloth.
Only use mild cleaning agents, never solvents or corrosive chemicals.
Troubleshooting guide
The doorbell is
not working.
• Check the batteries in both the doorbell and push-button.
• Make sure both the push-button and doorbell are set to the same
channel (that they are in the same position).
• Move the doorbell to another location. The signal may be blocked by walls,
other interfering electronics, etc.
Disposal
Follow local ordinances when disposing of this product.
If you are unsure about how to dispose of this product contact your municipality.
Specifications
Battery
12 V, V23GA
Assembly
1. Carefully open the battery compartment using a screwdriver or similar (see diagram).
Insert the included 12 V, V23GA battery. Note the polarity markings at the bottom
of the battery compartment to ensure correct insertion.
2. Set the push-button’s channel selector (6) to the same channel as the doorbell.
3. Check for correct functioning.
4. Select the desired chime by setting the push-button’s selector (5).
5. Remove the clear plastic cover over the nameplate and write in your name, if so desired.
6. Mount the push-button in a desired location.
Declaration of Conformity
Hereby, Clas Ohlson AB, declares that following product(s):
Wireless doorbell
36-4832, 36-4832-1 / WA-638S, WA-PUSH
is in compliance with the essential requirements and
other relevant provisions of Directive 1999/5/EC.
Article 3.1a (Safety): EN 60950-1
Article 3.1b (EMC):
EN 301 489-1
EN 301 489-3
Article 3.2 (Radio):
EN 300 220-2
Insjön, Sweden, February 2012
Klas Balkow
President
Clas Ohlson, 793 85 Insjön, Sweden
Carefully pry open the battery compartment
using a small screwdriver.
12
3
12
3
45
6
1
2
3
4
5
6
7

