2.
Press [
REVIEW
] button until
“
SET LANGUAGE
” appears.
3.
Press [
DIAL
] button again. The
LCD display shows "
ENGLISH
".
4.
Press [
REVIEW
] or [
REVIEW
] button to select English,
French or Spanish.
5.
Press [
DIAL
] button to save
your setting and [
REVIEW
]
button to go to the next setting
option SET AREA CODE.
Set Area Code
Area codes of all incoming calls will
be compared with the area code you
entered to determine if it is a local
call.
1.
Press [
DIAL
] button when “
SET
AREA CODE
” appears on the
LCD. The first digit of the 3-
digit area code will blink.
2.
Press [
REVIEW
] or [
REVIEW
] button to scroll digits to enter
the first digit of your area code.
3.
Press [
DIAL
] button to move on
to the second digit.
4.
Repeat steps (2) and (3) until
you have entered your local
area code.
5.
Press [
DIAL
] button to save
your setting and [
REVIEW
]
button to go to the next setting
option SET TIME / DATE.
Note
: If you want to change your
area code, repeat the steps
1~4.
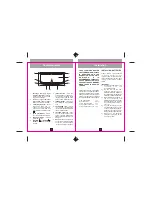
IDLE MODE
When ML-300ad is in idle mode, the
calls status and clock are shown on
the LCD display :
SETUP MENU
There are five options in the setup
menu.
Set Language
Allows you to select the LCD display
prompts in English, Spanish or
French. It is set at English when ex-
factory.
1.
During idle mode, press and
hold [
DIAL
] button for about 3
seconds. The LCD display
shows "
SETUP MENU
".
Real time clock
Date
You have 80 Caller ID
records including 10 calls
you have not reviewed yet.
You have new
voice mail
message(s)
12:00AM 01/01
TOTAL 80 NEW 10
Operation
7
Set Time / Date
Allows you to set the clock (hour
and minute) and date (month and
day). The clock will also be updated
by incoming Caller ID, if you have
subscribed to Caller ID service. The
clock is set at “12:00AM 01/01” when
ex-factory.
1.
Press [
DIAL
] button when “
SET
TIME / DATE
” appears on the
LCD. The hour digit will blink.
2.
Press [
REVIEW
] or [
REVIEW
] button to scroll digits to set
the hour. After the hour is set,
press [
DIAL
] button to move on
to set the minute.
3.
Repeat step 2 until you have
set the hour, minute, month and
day.
4.
Press [
DIAL
] button to save
your setting and [
REVIEW
]
button to go to the next setting
option SET CONTRAST.
Set Contrast
Allows you to adjust the LCD display
contrast at 8 different levels. It is
set at level 4 when ex-factory.
1.
Press [
DIAL
] button when “
SET
CONTRAST
” appears on the
LCD.
2.
Press [
REVIEW
] or [
REVIEW
] button to decrease or
increase the LCD display
contrast.
3.
Press [
DIAL
] button to save
your setting.
4.
Press [
REVIEW
] button to go
to the next setting option SET
DIAL VM.
Set Dial VM
Allows you to set your own voice
mail access number.
1.
Press [
DIAL
] button when “
SET
DIAL VM
” appears on the LCD.
The first digit of the voice mail
access number will blink.
2.
Press [
REVIEW
] or [
REVIEW
] button to scroll digits to enter
the first digit of the access
number.
3.
Press [
DIAL
] button to move on
to the second digit.
4.
Repeat steps (2) and (3) until
you have entered your voice
mail access number. You are
now ready to dial your voice
mail access number by pressing
the [
DIAL VM
] button.
5.
Press [
DIAL
] button to save
your setting and [
REVIEW
]
button to go to the next setting
option EXIT and press [
DIAL
]
button to leave the setup menu.
Note
: If you want to change your
voice mail access number,
repeat the steps 1~4.
Operation
8


