background image

Owner’s Manual

CP-700 

Preamplifier

Summary of Contents for CP-700

Page 1: ...Owner s Manual CP 700 Preamplifier ...

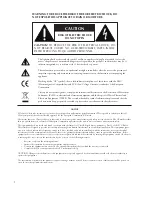
Page 2: ...terference by one or more of the following measures Reorient or relocate the receiving antenna Increase the separation between the equipment and the receiver Connect the equipment into an outlet on a circuit different from that to which the receiver is connected Consult the dealer or an experienced radio TV technician for help CAUTION Changes or modifications to this equipment not expressly approve...

Page 3: ... may damage the unit and void the warranty 5 AC cords should be routed so that they are not likely to be walked on or pinched by items placed upon or against them Do not stress the AC cord by stretching it to reach a plug If damage does occur to the AC cord take it to your Classé dealer for a thorough check up and proper repair or replacement 6 If your component will be out of use for an extended ...

Page 4: ... 10 robust isolated power supplies 10 Front Panel 11 Rear Panel 14 optional phono preamp 14 The Remote Control 19 The Menu System 21 operational menu 21 input selection 21 tape loop 21 main menu system 22 system setup 22 volume 23 rotary 23 max volume 25 startup volume 25 mute setup 26 input 26 phono gain 28 triggers 28 teach IR 28 display setup 29 brightness 29 timeout 29 language 30 main balance...

Page 5: ...ly and quickly even if you have mislaid your original sales slip Please take a few minutes to fill out the warranty registration card and drop it in the mail You will find the warranty registration card at the end of the separate warranty policy booklet enclosed a word about installation Every effort has been made to make the Classé CP 700 simple and straightforward to install and use Still we have ...

Page 6: ... suggest leaving eight inches 20 cm of free space behind your preamplifier to allow all cables sufficient room to bend without crimping or undue strain Classé recommends that the unit not be placed directly on the top surface of a power amplifier or any other heat source ventilation Your Classé preamplifier generates a certain amount of heat in the course of normal operation Be sure to allow three inc...

Page 7: ...plifier is incorrect please contact your local authorized Classé dealer or distributor The CP 700 can easily be powered by a normal 15 ampere AC mains line If other devices are also powered from the same AC line their additional power consumption should be taken into account The CP 700 includes protection circuitry that will prevent the preamplifier from operating at dangerously high or low voltages...

Page 8: ...is unplugged for an extended period of time allowing it to cool down Depending on the degree of cooling involved you should expect a brief warm up period before the preamplifier s sound quality is at its best Unless your preamplifier was allowed to become quite chilled subsequent thermal re stabilization should not take long Fortunately you should never have to repeat the initial 300 hour break in p...

Page 9: ...requires the volume to change by quite a lot for a given amount of turning of the knob while the other requires small incremental changes for the same turn of the knob The volume control system on your CP 700 solves this problem by responding differently based on the specific circumstances e g how quickly you are turning the knob and where in the volume range you are After extensive testing we feel...

Page 10: ...arkable improvement indeed all based on careful listening tests which we view as a necessary complement to the solid engineering you might rightly expect from Classé extraordinary longevity Another benefit of having worked with highly refined circuit designs so extensively over many years is that we have vast experience in what works well over the long term By using only the highest quality parts to...

Page 11: ...ff operate on dim display timeout flashing after power up AC mains voltage out of range If you are planning not to use the preamplifier for an extended period of time e g vacation or other travel we suggest you disconnect it from the AC mains Please be certain that the preamplifier is turned off prior to disconnecting it from the AC mains Also it is a good practice to physically disconnect any and al...

Page 12: ... the button a second time restores the volume to its previous setting The behavior of the mute can also be customized Setup information on this feature is available in the Volume Setup section However if you increase the volume manually using either the volume knob or the remote control while the Mute button is engaged the mute control will disengage and the volume will be set to zero This approac...

Page 13: ...gle functions e g separate operate and standby commands in addition to the normal command that toggles between the two states 6 Volume Knob The large knob on the right side of the front panel of the CP 700 is used to control the volume of the system The volume is raised or lowered in precise 0 5dB increments throughout the range of the control most likely to be used while listening to music At ext...

Page 14: ... shielded interconnect cables Please consult with your local Classé dealer for advice on the best cables for use in your system optional phono preamp If you have a turntable you would like to use with the system an optional phono preamplifier module is available from your Classé dealer Once installed in your preamplifier the Line 1 input connectors become your phono inputs and the phono gain control...

Page 15: ... connectors are the most common form of analog connection used in consumer electronics When implemented carefully and used with high quality interconnect cables this standard can provide excellent performance Classé has gone to extraordinary effort to ensure that the single ended RCA outputs of your preamplifier are as good as possible However this connection standard cannot offer the immunity from...

Page 16: ...rever possible especially if you plan to use long interconnect cables between your preamplifier and the power amplifier s in order to minimize the length of the speaker wires The pin assignments of these XLR output connectors are Pin 1 Signal ground Pin 2 Signal non inverting Pin 3 Signal inverting Connector ground lug chassis ground These pin assignments are consistent with the standard adopted by ...

Page 17: ...ility is of interest to you we strongly recommend discussing it with your authorized Classé dealer Note that IR Input and Output is a bit of a misnomer the input and output of these plugs is electrical in nature not infrared They are used with standard IR receivers distribution amplifiers and emitters available from your dealer to translate the remote s IR signal to an electrical signal and vice ve...

Page 18: ...suming you have the optional phono module installed see your authorized Classé dealer for more information on this option if you are interested Connecting the ground wire from your turntable s tonearm to this screw terminal usually minimizes any hum or buzzing to which the turntable might otherwise be susceptible Your authorized Classé dealer can assist you in handling this problem if it should ar...

Page 19: ...t using we suggest deactivating them in order to provide faster easier access to the inputs you are actually using See the section The Menu System for information on how to do this The Up and Down arrow keys on the right side of the remote control will raise and lower volume the square key between them will activate the Mute function of the CP 700 as defined in the menu system see The Menu System f...

Page 20: ... to the selected source and listening to the output of your recording device If you have a recording device such as a three head tape deck which can play back a recording while it is being made you will be able to compare the original signal to the recording while you are making it 4 Fkey Controls The CP 700 remote control can also control user defined functions as well The F1 F2 F3 F4 keys are ava...

Page 21: ...ves their associated buttons from the touchscreen reducing confusion for occasional users of the system tape loop In addition the CP 700 has a dedicated tape loop for use with sources that can both record and play back bringing the total number of sources you can connect to the CP 700 to six four single ended and two balanced When you touch the tape button to highlight it you will notice that the ...

Page 22: ...e CP 700 works within the context of your particular system system setup The first button on the control menu takes you to a series of submenus that collectively provide a great deal of control over your system setup Here you can customize the behavior of your volume control tailor your inputs to your particular source components adjust the gain of the optional phono module activate and name your t...

Page 23: ... points of precision than with getting what he wants with a quick twist of the knob You can see the problem in these scenarios Person A wants extremely fine gradations on the volume control which will require many rotations to go from extremely low setting to normal listening levels Person B wants to get from one to the other with a quick twist of the knob requiring coarse gradations in order to co...

Page 24: ...nst accidentally blowing your speakers In fact if you like you may establish a speed limit beyond which the knob will simply be ignored The factory default settings for these behaviors are generally found to be intuitive and a pleasure to use However if you prefer to alter these behaviors you may do so in the rotary menu shown below All of the rotary setup settings are interactive You can set the ...

Page 25: ...tory pressing this button will restore the factory default settings So feel free to experiment you can always return to the original settings max volume The max volume screen allows you to establish a maximum volume setting for your system This scale runs from 0 to 100 with 100 indicating that you do not want any artificial limit placed on the maximum gain your preamplifier can provide This setting ...

Page 26: ...o enhance either the performance or the ease of use of the system A quick look at the input menu and submenus gives you an overview of what is possible in use determines whether the selected input is displayed on the main input selection screen and whether it is included in the rotation of inputs cycled through from the remote control s input selection buttons name provides a way to customize the ...

Page 27: ...ication is removed from the main menu This is useful in situations where the CP 700 is being used to pass through a signal coming from a component with its own volume control e g Classé SSP 300 surround sound processor or when one of its outputs is sent to a component with its own volume control SSP 300 Care should be taken to adjust the volume control of the other component before selecting the S...

Page 28: ...dd to both the cost and complexity of your system If this seems an obscure point that s okay It is a feature designed to solve problems you may not even have but your installation professional appreciates being able to easily solve such problems when they occur teach IR The CP 700 provides discrete infrared IR command codes for all its functions a list that extends far beyond what is required by n...

Page 29: ...listening to music in a dimly lit or darkened room you may find even the low brightness setting of the display somewhat distracting If so you can vary the timeout of the backlighting so as to turn it off entirely after a period of inactivity you select In this context activity refers to any use of the user interface This includes hard buttons the LCD touchscreen and the remote control For example i...

Page 30: ...ns to suit their local customs and terminology in an effort to ensure that the CP 700 s operation is as intuitive to use in every country as it is in our home country of Canada main balance The main balance control gives you both a numeric and a graphic indication of the current balance setting for the CP 700 Some recordings are not balanced particularly well between the left and right channels If...

Page 31: ...the specific function in the list that you want that Fkey to perform cautionary note on Fkey use Note that all Classé remote controls provide these same four Fkeys so that you need not worry about which remote you happen to pick up Thus F1 on the preamplifier s remote control sends the same infrared signal as F1 on the CD player s remote control While this is intended to minimize confusion amongst d...

Page 32: ...ve occasion to call our technical support people to ask a question not covered in this manual they may want to know precisely what version of software your unit is running Having this information available will help enable them to give you the best possible service sensors The sensors button on the status screen takes you to the sensors screen which displays information about several internal sens...

Page 33: ...e preamplifier If the problem occurs with all inputs check the cables between the preamplifier and the power amplifier If no fault is found there check the speaker wires for secure connections Important Check that the power amplifier is off before checking any connections between the preamplifier and power amplifier or between the power amplifier and the speakers 2 There is no sound and the Standby LED i...

Page 34: ...esh ones 5 There is a hum coming out of the speakers If you are running single ended interconnects make sure they are not running alongside any AC power cords If you are running single ended interconnects make sure they are not too long Long runs of single ended interconnects have a natural tendency to pick up noise even if they are shielded If any source components connected to your preamplifier h...

Page 35: ...t and another even though the volume was not adjusted You may need to adjust the input offset setting to compensate for differences in output level between source components Conversely the input offset setting may have been adjusted inappropriately Either way you can correct the problem by going to the following location in the menu system Menu system setup input input name offset where input name...

Page 36: ...rect application of liquids may result in damage to electronic components within the unit cleaning the LCD touchscreen To clean the LCD touchscreen use a microfiber eyeglass wipe or soft lint free cloth together with a cleaning solution designed for plastic eyeglasses or LCD computer monitors televisions Important Spray the solution onto the cloth or tissue never directly onto the touch screen inst...

Page 37: ...ry for which the unit was manufactured cannot be reset by dealer or user Overall dimensions preamplifier Width 17 5 445mm Depth 16 5 419mm Height 4 75 121mm Overall dimensions power supply Width 5 127mm Depth 12 305mm Height 5 5 140mm Net weight preamplifier 23lbs 10 5kg Net weight power supply 10lbs 4 6kg Shipping weight 45lbs 20 5kg For more information see your Classé dealer or contact Classé Aud...

Page 38: ...38 Dimensions ...

Page 39: ......

Page 40: ...Audio 5070 François Cusson Lachine Quebec Canada H8T 1B3 1 514 636 6384 1 514 636 1428 fax http www classeaudio com email cservice classeaudio com Copyright 2005 Classé Audio Inc Printed in Canada v1 3 100805 ...

Reviews: