w w w . c l a s s i c
e x h i b i t s . c o m
Step 1
866.652.2100
© 2011
WHEN DISASSEMBLING ALUMINUM EXTRUSION, TIGHTEN ALL
SETSCREWS AND LOCKS TO PREVENT LOSS DURING SHIPPING
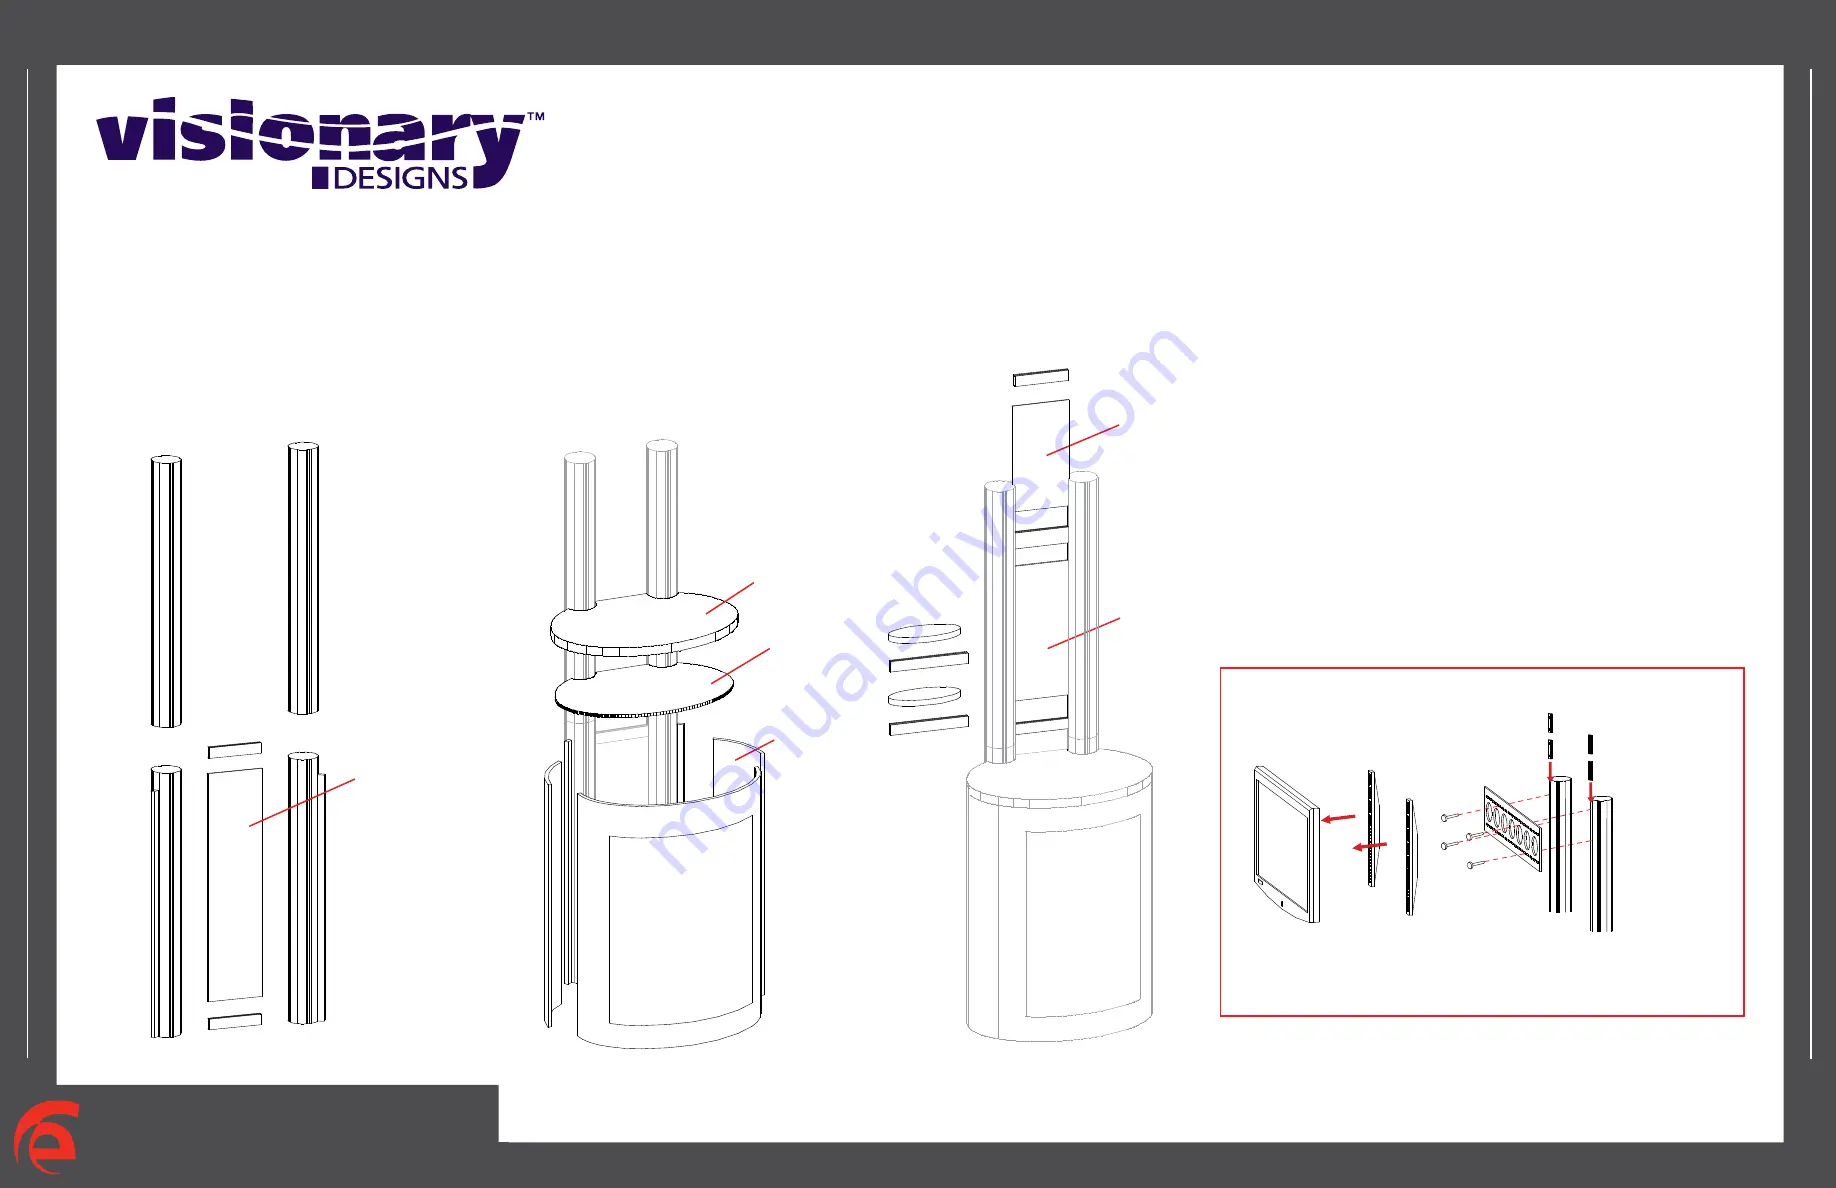
Order #XXXXX - MOD-1204 - Kiosk Assembly
Insert Size:
9.529”w x 23.331”h
Item Number
1
2
3
Description
Curve Panel
Curve Panel w/ Door
Curve Panel
Item
1
2
3
4
5
5a
6
Description
44.5”h Round Vertical Extrusion w/ Connector Attached
44.5”h Round Vertical Extrusion
44.5”h Round Vertical Extrusion w/ Connector Attached
44.5”h Round Vertical Extrusion
9.029”w Horizontal Extrusion
9.029”w Horizontal Extrusion
13”w Horizontal Extrusion
Qty.
1
1
1
1
4
1
2
Steps:
1) Attach upper extrusions to lower extrusions [2 to 1 and 4 to 3].
2) Attach (2) extrusions [5] between vertical assembly [1/2 and 3/4], placing insert
between horizontals as shown in illustration.
3) Assemble counter base by connecting panel #
1
to connect on vertical extrusion [1],
then continue in numerical order.
4) Velcro internal shelf supports to inside of assembled counter base.
5) Place internal shelf atop supports.
6) Attach remaining horizontal extrusions [5] between vertical assembly,
placing inserts where indicated.
7) Attach shelf supports [6] to vertical extrusion [2], then set shelves atop supports.
2
3
4
5
1
Insert Size:
9.529”w x 18.331”h
Insert Size:
9.529”w x 38.417”h
Internal Shelf
Counter Top
1
2
3
5
5
5a
5
6
6
Modul Extrusion Part List
Euro LT Panel System Part List
Attach monitor brackets
to back of monitor.
Hook monitor brackets over top of wall
plate, then secure with safety bolts to
bottom of monitor brackets.
Modul
Extrusion
Monitor Mount Attachment
Insert connectors into groove of
extrusions. Then attach wall mount
to connectors using bolts provided.
Connector


