R E P L A C I N G T H E L I G H T
B U L B S
This fireplace uses (3) clear 120V, 40 Watt E12 Socket
base light bulbs (open small base, chandelier candle
type). The 18E01 insert only requires (2) clear 120V,
40 Watt E12 Scoket bulbs, installed in a pull-out tray
accessable once the kickplate has been removed. The
40 Watt bulbs are accessed through the front kick plate
(see illustration below). For convenience, if a bulb
burns out, it is a good idea to replace all of the bulbs
at the same time.
1.) Turn the master power switch off, then UNPLUG
the power cord from the wall.
2.) If fireplace has been operating, let the unit cool at
least 2 hours.
3.) Loosen the 2 screws recessed in the front kick plate
(see illustration below). Gently pull the kick plate
towards you (careful not to scratch the fireplace
hearth/base).
4.) Remove light bulbs and replace with (3) clear 120V,
40 Watt E12 Socket base light bulbs, (2) bulbs for
18E01 Insert, via pull-out tray.
5.) Slide kick plate back into position and tighten
recessed screws. (Careful not to over tighten).
WARNING: Do not exceed 40 Watts per
bulb. Use of higher rated bulbs may
result in a fire, causing property dam-
age or personal injury.
O P E R AT I N G
I N S T R U C T I O N S
CONTROL FUNCTIONS
MAIN POWER
- The Main Power switch supplies
power to all of the functions of the fireplace.
WARNING: During any service of this appliance, the
power to the unit must be turned off. First turn the
main power switch to the “OFF” position. Then
remove the electrical plug from the wall outlet.
HEATER
- The Heater switch turns the heater element
and blower motor on and off.
DOWN LIGHT (28E01 & 33E01 ONLY)
-
The Down Light switch turns on the down lights that
illuminate inside of the firebox.
TEMPERATURE
- The Temperature control knob
regulates the temperature level of the heater. Turning
the knob clockwise will increase the heat output. The
further the knob is rotated clock-wise, the higher the
set point temperature. Turning the knob counter-
clock-wise will lower the set point temperature.
FLAME BRIGHTNESS
- The Flame Brightness
control knob adjusts the flame brightness. Turning the
knob to the left dims the lights and flame effect.
Turning the knob to the right brightens the lights and
flame effect.
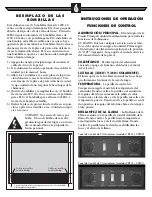
3. Remove Kickplate to Access Lightbulbs
4. Replace all Lightbulbs
1. Lossen reccessed
phillips head screw
2. Lossen reccessed
phillips head screw
3 Switch Control Panel (models 28E01 and 33E01)
2 Switch Control Panel (models 18E01 and 23E02)


