background image


15/EN


Room size

Room size

Room size

Room size    

Ventilat

Ventilat

Ventilat

Ventilation opening

ion opening

ion opening

ion opening    

smaller than 5  m

3


min. 100 cm

2


5 m

3

 to 10 m

3


min. 50 cm

2


greater than 10  m

3


not required 

In the cellar or 
basement 

min. 65 cm

2


Installation and connection  

Product can only be installed and connected in 
accordance with the statutory installation rules. 


Do not install the product next to refrigerators 
or freezers. The heat emitted by the product 
will increase the energy consumption of 
cooling appliances. 


Carry the product with at least two persons. 


Product must be placed directly on the floor. It 
must not be placed onto a base or a pedestal. 


Do not use the door and/or handle to carry or 
move the product. The door, handle or hinges 
get damaged. 

Electrical connection 

Connect the product to a grounded outlet/line 
protected by a fuse of suitable capacity as stated in 
the "Technical specifications" table. Have the 
grounding installation made by a qualified electrician 
while using the product with or without a transformer. 
Our company shall not be liable for any damages that 
will arise due to using the product without a grounding 
installation in accordance with the local regulations. 


DANGER: 

The product must be connected to the mains 
supply only by an authorised and qualified 
person. The product's warranty period starts 
only after correct installation. 
Manufacturer shall not be held responsible for 
damages arising from procedures carried out 
by unauthorised persons. 


DANGER: 

The power cable must not be clamped, bent or 
trapped or come into contact with hot parts of 
the product. 
A damaged power cable must be replaced by 
a qualified electrician. Otherwise, there is risk 
of electric shock, short circuit or fire! 

Where to find your model number and serial 

Where to find your model number and serial 

Where to find your model number and serial 

Where to find your model number and serial 
number

number

number

number    
The mains supply data must correspond to the data 
specified on the type label of the product. The rating 
plate is either seen when the door or the lower cover is 

opened or it is located at the rear wall of the unit 
depending on the unit type. 
Power cable of your product must comply with the 
values in "Technical specifications" table. 


DANGER: 

Before starting any work on the electrical 
installation, disconnect the product from the 
mains supply. 
There is the risk of electric shock! 

Connecting the power cable 

1.  If a power cable is not supplied together with 

If a power cable is not supplied together with 

If a power cable is not supplied together with 

If a power cable is not supplied together with 

your product,

your product,

your product,

your product,a power cable that you would select 
from the table (

Technical specifications, page 11

in accordance with the electrical installation at 
your home must be connected to your product by 
following the instructions in cable diagram. 

If it is not possible to disconnect all poles in the supply 
power, a disconnection unit with at least 3 mm contact 
clearance (fuses, line safety switches, contactors) 
must be connected and all the poles of this 
disconnection unit must be adjacent to (not above) the 
product in accordance with IEE directives. Failure to 
obey this instruction may cause operational problems 
and invalidate the product warranty. 


Additional protection by a residual current 
circuit breaker is recommended. 

2.  Open the terminal block cover with a screwdriver. 
3.  Insert the power cable through the cable clamp 

below the terminal and secure it to the main body 
with the integrated screw on cable clamping 
component. 

4.  Connect the cables according to the supplied 

diagram. 


5.  After completing the wire connections, close the 

terminal block cover. 

Summary of Contents for CLFG95SS

Page 1: ...en CLFG95SS NOTE This user manual contains important information including safety installation points which will enable you to get the most out of your Classique appliance Please keep it in a safe pla...

Page 2: ...nts carefully before using the product and keep it as a reference for future use If you handover the product to someone else give the user manual as well Follow all warnings and information in the use...

Page 3: ...ion 18 4 Preparation 19 Tips for saving energy 19 Initial use 19 First cleaning of the appliance 19 Initial heating 19 5 How to use the hob 20 General information about cooking 20 Using the hobs 20 6...

Page 4: ...lly Do not operate the product if it is defective or has any visible damage Control that the product function knobs are switched off after every use Safety when working with gas Safety when working wi...

Page 5: ...confined space or cellar Check all tubes and connections for tightness If you still smell gas leave the property Warn the neighbours Call the fire brigade Use a telephone outside the house Do not re e...

Page 6: ...y Product safety The appliance and its accessible parts become hot during use Care should be taken to avoid touching heating elements Children less than 8 years of age shall be kept away unless contin...

Page 7: ...re with water but switch off the appliance and then cover flame e g with a lid or a fire blanket Danger of fire Do not store items on the cooking surfaces For the reliability of the fire of the produc...

Page 8: ...rective and Disposing of the Waste Product This product complies with EU WEEE Directive 2012 19 EU This product bears a classification symbol for waste electrical and electronic equipment WEEE This pr...

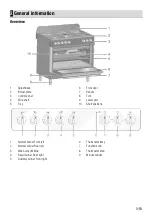
Page 9: ...4 Wire shelf 5 Tray 6 Front door 7 Handle 8 Foot 9 Lower part 10 Shelf positions 1 Normal burner Front left 2 Normal burner Rear left 3 Wok burner Middle 4 Rapid burner Rear right 5 Auxiliary burner...

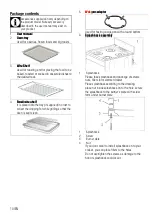
Page 10: ...supplied in order to collect the dripping fat while grilling so that the oven is kept clean 5 Wok Wok Wok Wok pan adaptor pan adaptor pan adaptor pan adaptor Used for hosting a wok pan with a round bo...

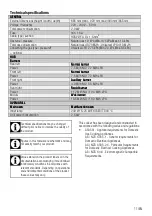
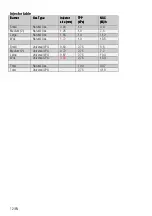
Page 11: ...4 Mj h LPG Middle Wok burner Wok burner Wok burner Wok burner Power 13 5 Mj h NG 13 0 Mj h LPG OVEN GRILL OVEN GRILL OVEN GRILL OVEN GRILL Main oven Main oven Main oven Main oven Multifunction oven M...

Page 12: ...kPa kPa kPa NGC NGC NGC NGC Mj h Mj h Mj h Mj h Small Natural Gas 0 90 1 0 4 0 Medium 2 Natural Gas 1 25 1 0 7 5 Large Natural Gas 1 55 1 0 11 2 Wok Natural Gas 1 72 1 0 13 5 Small Universal LPG 0 50...

Page 13: ...ation clearances and protection of combustible surfaces shall comply with the AS 5601 gas installations code Installation shall comply with the dimension in figure bearing in mind that CLEARANCES from...

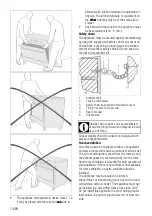
Page 14: ...ooker 6 Kitchen wall Stability chain to be as short as practicable to avoid oven tilting forward and diagonal to avoid oven side tilting Cooker stability chain for cookers not designed with bracket en...

Page 15: ...model number and serial Where to find your model number and serial Where to find your model number and serial Where to find your model number and serial number number number number The mains supply da...

Page 16: ...isolation valve union and regulator 1 Test point 2 Gas regulator 3 Elbow 4 Gas inlet pipe Gas connection for LPG Gas connection for LPG Gas connection for LPG Gas connection for LPG Propane Gas Propan...

Page 17: ...g 1 Foot 2 Foot slot For products with cooling fan 1 Cooling fan 2 Control panel 3 Door The cooling fan cools both the control panel and the front of the appliance Cooling fan continues to run for up...

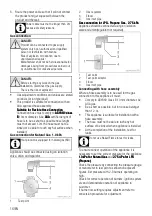
Page 18: ...he screw clockwise If it is smaller turn anticlockwise 5 For the last control bring the burner both to high flame and reduced positions and check whether the flame is on or off Depending on the type o...

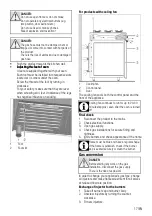
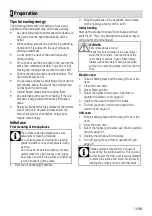
Page 19: ...use harsh abrasive cleaners or sharp metal scrapers to clean the oven door glass since they can scratch the surface which may result in shattering of the glass 1 Remove all packaging materials 2 Wipe...

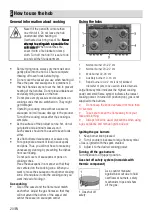
Page 20: ...ns and pans Thus you will not have to make any unnecessary cleaning by preventing the dishes from overflowing Do not put covers of saucepans or pans on cooking zones Place the saucepans in a manner so...

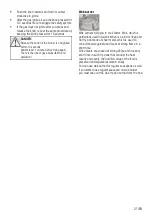
Page 21: ...risk of gas accumulation and explosion Wok burner Wok burners help you to cook faster Wok which is particularly used in Asian kitchen is a kind of deep and flat fry pan made of sheet metal which is us...

Page 22: ...g When meat fish and poultry are grilled they quickly get brown have a nice crust and do not get dry Flat pieces meat skewers and sausages are particularly suited for grilling as are vegetables with h...

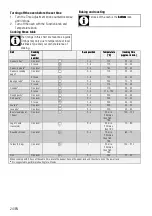
Page 23: ...It is suitable for cooking your meals in different rack levels and preheating is not required in most cases Suitable for cooking with multi trays Full grill Fan Full grill Fan Full grill Fan Full gri...

Page 24: ...approx in min Cakes in tray One level 2 3 175 25 35 2 levels 1 4 175 40 50 Cakes in mould One level 2 3 180 25 35 Cakes in cooking paper One level 2 3 175 25 35 2 levels 1 4 175 30 45 Sponge cake One...

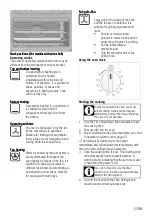
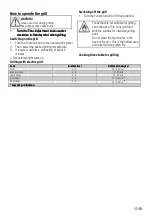
Page 25: ...tes Temperature light turns on Switching off the grill 1 Turn the Function knob to Off top position Foods that are not suitable for grilling carry the risk of fire Only grill food which is suitable fo...

Page 26: ...sharp objects during cleaning Do not use harsh abrasive cleaners or sharp metal scrapers to clean the oven door glass since they can scratch the surface which may result in shattering of the glass Do...

Page 27: ...g three screws that secure it To remove the plastic holders 2 use a flat metal or plastic e g a knife slotted screwdriver to free the fixing foot 5 Push the fixing foot through the window 6 in arrow d...

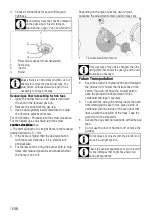
Page 28: ...ined from Authorised Service Agents or technician with licence Position of lamp might vary from the figure If your oven is equipped with a round lamp 1 Disconnect the product from mains 2 Turn the gla...

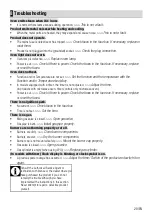
Page 29: ...with microwave oven timer controls only microwave oven Power is cut Check if there is power Check the fuses in the fuse box If necessary replace or reset the fuses There is no ignition spark No curren...

Page 30: ...30 EN...
Page 31: ...31 EN Imported by Applico Ltd Private Bag 92900 Onehunga Auckland 1061 New Zealand Website www classique co nz 485 9304 89 R AA 21 04 2015...

Reviews: