background image


Contents 


Environmental note 


Important safety information 


Specifications of your rangehood 


Using your rangehood 


Before first use 


To use your rangehood 


Cleaning your rangehood 


The grease filter 


Maintenance 


Removing and cleaning the grease filter  


Changing a light bulb 


Fitting the carbon filter 


Installation   


Electrical connection 


10 

Before beginning installation 


11 

Installing your rangehood   


12 

Fitting the chimney   


13 

Connecting to external ducting  


15 

Completing the installation  


17 

Packing List   


17 

 
Extraction mode or recirculation mode? 


18 


Troubleshooting   


19 


Summary of Contents for CLRH90GLSS

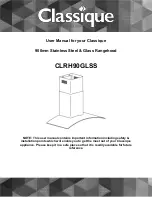
Page 1: ...gehood CLRH90GLSS NOTE This user manual contains important information including safety installation points which will enable you to get the most out of your Classique appliance Please keep it in a sa...

Page 2: ...grease filter 7 Maintenance Removing and cleaning the grease filter 8 Changing a light bulb 8 Fitting the carbon filter 9 Installation Electrical connection 10 Before beginning installation 11 Instal...

Page 3: ...ise be caused by inappropriate waste handling of this product The symbol on the product or on the documents accompanying the product indicates that this appliance may not be treated as household waste...

Page 4: ...gas appliance then the provision for ventilation must be in accordance with the Gas Installations standard AS NZS 5601 1 2 2013 the Gas Safety and Measurement Regulations 2010 and the Building Specif...

Page 5: ...e ducting for the extractor function has the same diameter as the outlet hole all the way through o Keep young children from using playing with or tampering with the rangehood o Your rangehood is for...

Page 6: ...rom a gas burner or heat from electric hob zones without a pan on them o Do not attempt to use the rangehood if it is damaged in any way Never attempt to use it without the grease filters fitted or if...

Page 7: ...n LED lighting 2 lamps o Easy reach electronic button controls o 3 speed fan o Stainless steel and glass finish o 2 aluminium filters o 60dB noise level o Easy bracket installation o 150mm diameter du...

Page 8: ...nutes before you start to cook or at the very least when you begin cooking You should also run your rangehood for ten minutes after you have finished cooking 1 Make sure it has been properly installed...

Page 9: ...carbon filters at the recommended interval see section on Fitting the carbon filter on page 9 A build up of grease could cause a fire hazard o Never attempt to clean the area above the grease filter T...

Page 10: ...o use your rangehood without the grease filter in place Changing a light bulb Part number SYKL10 LED LIGHT o IMPORTANT Always ensure the rangehood has been switched off before carrying out any work in...

Page 11: ...odours caused by cooking IMPORTANT Before attempting to fit or remove the carbon filters you must ensure the rangehood is switched off first 1 Press the handle of the metal grease filter towards the...

Page 12: ...power cable must be fitted upstream from the electrical connection using an omni polar switch with a contact distance of at least 3mm WARNING THIS APPLIANCE MUST BE EARTHED We recommend that the appl...

Page 13: ...ilters should be removed o Check inside the product and ensure that there is no transit packaging or any other materials such as packets of screws guarantees etc These should be removed and kept for f...

Page 14: ...talled o IMPORTANT If the recirculation vents are obstructed then the efficiency of the extraction will be affected and could damage the motor IMPORTANT YOUR RANGEHOOD SHOULD BE CONNECTED TO YOUR MAIN...

Page 15: ...ion is fixed secure the unit with two safety screws through the 6mm holes in the back casing Fitting the chimney 9 Take the two chimney sections C and D o Rest the bottom of chimney section C on the t...

Page 16: ...ney section D 11 Take the flat bracket E and place it between the two pencil marks that you made in step 9 o Keeping the bracket in contact with the wall use a pencil to mark on the wall the anchoring...

Page 17: ...mney section C Then secure the L shaped bracket to the wall using the same method as you have just used to secure the lower bracket 13 Lift chimney section D up to the ceiling and secure it to the L s...

Page 18: ...y a further metre o Before fixing the rangehood into the kitchen unit you should connect the other end of the ducting hose to the coupling in the top of the cooker hood Attaching the glass Remove the...

Page 19: ...electrical supply See page 10 for detailed information on the electrical connection Refit the grease filter and then switch on the mains supply to the appliance Check that the appliance is operating c...

Page 20: ...e filter and passed through a charcoal filter for purification The air then re enters the kitchen via an opening in the rangehood For optimum performance we recommend that the rangehood is used in ext...

Page 21: ...he rangehood is set up for recirculation mode check that the carbon filter does not need to be replaced o If the rangehood is set up for extraction mode check that the ducting hose and discharge outle...

Page 22: ...cessible for the Technician to perform any necessary repair If your appliance is installed in such a way that an engineer is concerned that damage will be caused to the appliance or your kitchen then...

Page 23: ......

Page 24: ...Imported by Applico Ltd Private Bag 92900 Onehunga Auckland 1061 New Zealand Website www classique co nz Phone 0800 M10 HLP or 0800 610 457...

Reviews: