Summary of Contents for Arolla Spot MP

Page 1: ...DEX ENGLISH Page Contents 2 1 Safety information 3 2 Unpacking and preparation 4 3 Installation and start up 4 3 1 Installing the fixture 5 3 2 Connecting to manis supply 5 3 3 Connecting the control...

Page 2: ...n bez glich dieses Produkts genau zu lesen und aufzubewahren Sie sind in Digitalversion immer unter folgendem Link auffindbar www claypaky com Ref FIS025 Safety Information Arolla Spot Profile MP INFO...

Page 3: ...anism Lock and Release every 90 Fig 2 TILT Mechanism Lock and Release every 45 Fig 3 Packing contents Fig 1 90 9 0 9 0 9 0 UNLOCKED LOCKED 4 5 4 5 45 4 5 45 4 5 4 5 LOCKED UNLOCKED 2 x 183102 805 2 UN...

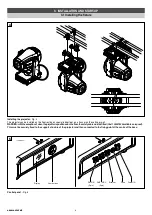
Page 4: ...NG with the exception of when the projector is positioned on the floor the safety cable must be fitted Cod 105041 003 available on request This must be securely fixed to the support structure of the p...

Page 5: ...cable or other cable with characteristics differing from those specified The end connections must be made using XLR type 5 pin male female connectors A terminating plug must be inserted into the last...

Page 6: ...scrolls on the display Model Firmware Dmx Address xxx Arolla Version X X X Spot MP Date Hour On conclusion of resetting in case of absence of the dmx signal Pan and Tilt move to the Home position Pan...

Page 7: ...ions Option Option Menu To set the operating options Informations Informations Menu To read the counters software version and other information Manual Control Manual control Menu To trigger the test a...

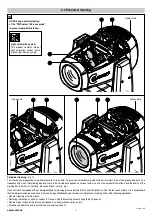
Page 8: ...leasing Pan and Tilt movements Refer to the instructions in the UNPACKING AND PREPARATION section Opening the head covers Fig 11 Closing the head covers Fig 12 1 1 4 Turn 2 1 2 1 4 Turn 3 11 12 4 MAIN...

Page 9: ...from the reflectors from the lenses and filters It is recommended that the projector undergoes an annual service by a qualified technician for special maintenance involving at least the following ope...

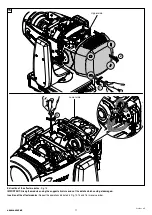
Page 10: ...ffect modules Fig 14 IMPORTANT Grasp the modules using the support structure and not the details which could get damaged Insertion of the effect modules Repeat the operations indicated in Fig 14 15 an...

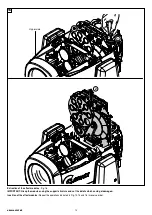
Page 11: ...xtraction of the effect modules Fig 15 IMPORTANT Grasp the modules using the support structure and not the details which could get damaged Insertion of the effect modules Repeat the operations indicat...

Page 12: ...ction of the effect modules Fig 16 IMPORTANT Grasp the modules using the support structure and not the details which could get damaged Insertion of the effect modules Repeat the operations indicated i...

Page 13: ...13 AROLLA SPOT MP 3 1 2 3 4 17 Cleaning of the grids Fig 17 Continue...

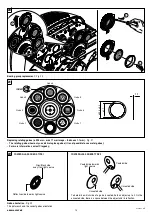
Page 14: ...o 6 INDEX Gobo 7 19 Replacing rotating gobos 22 9 mm max 17 mm image thickness 1 1 mm Fig 19 The rotating gobo wheel only use dichroic glass gobos it is not possible to use metal gobos For more inform...

Page 15: ...p replacement Fig 20 20 Continue Gobo orientation Fig 22 The pictures shown the correct gobos orientation GOBO DI VETRO DICROICI TIPO 1 GOBO DI VETRO DICROICI TIPO 2 22 To determine which side of a go...

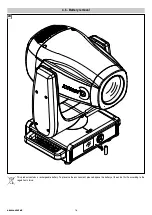
Page 16: ...16 AROLLA SPOT MP This product contains a rechargeable battery To preserve the environment please dispose the battery at the end of its life according to the regulation in force 23 4 5 Battery removal...

Page 17: ...ND REMEDIES No mains supply Light source exhausted or defective Signal transmission cable faulty or disconnected Incorrect addressing Fault in the electronic circuits Lenses broken Dust or grease depo...

Page 18: ...18 AROLLA SPOT MP...

Page 19: ...19 AROLLA SPOT MP...

Page 20: ...IST02D 001 EN PRELIMINARY 04 2021 CLAYPAKY S p A Via Pastrengo 3 b 24068 Seriate BG Italy Tel 39 035 654311 www claypaky com...

Reviews: