background image

CLF


Laminar crossflow-cabinet 

                                               Clean Air Techniek B.V. 


UM-CLF-XX-EN05.doc


42

8


Small maintenance and testing 

BE CAREFUL!!


Before starting service with the cabinet a written declaration “that the cabinet is decontaminated” 

must be present. The responsible person (laboratory supervisor) will decide if the cabinet has to 

be decontaminated so that when servicing the installation and the HEPA-filters there is no danger 

for the service engineer, labour personnel, the laboratory and the surroundings of the cabinet. 

8.1


Periodic maintenance 

A periodic maintenance has to take place regularly. To a certain extent, this depends on the 
frequency of use of the cabinet. Contact your service organization for advice. 
Guideline for testing and maintenance given Clean Air Techniek B.V. is every 12 months at least. 
 

̇


Validate the system on safety; 

̇


Check for correct functioning of the electrical system; 

̇


Check the HEPA filter for efficiency and leakage; 

̇


Verification/calibration of the assembled air speed sensor(s); 

̇


Check and adjust the alarm system. 

8.2


Replacement of the pre-filter 

(See 4.6 Pre-filter

 on page 

13) 

Supplies needed

:


̇


Plastic bag (minimum measurement 75x50 [cm] with closure); 

̇


Two pair of gloves; 

̇


Tape. 

Procedure

:


̇


Switch off the installation; 

̇


Put on the gloves; 

̇


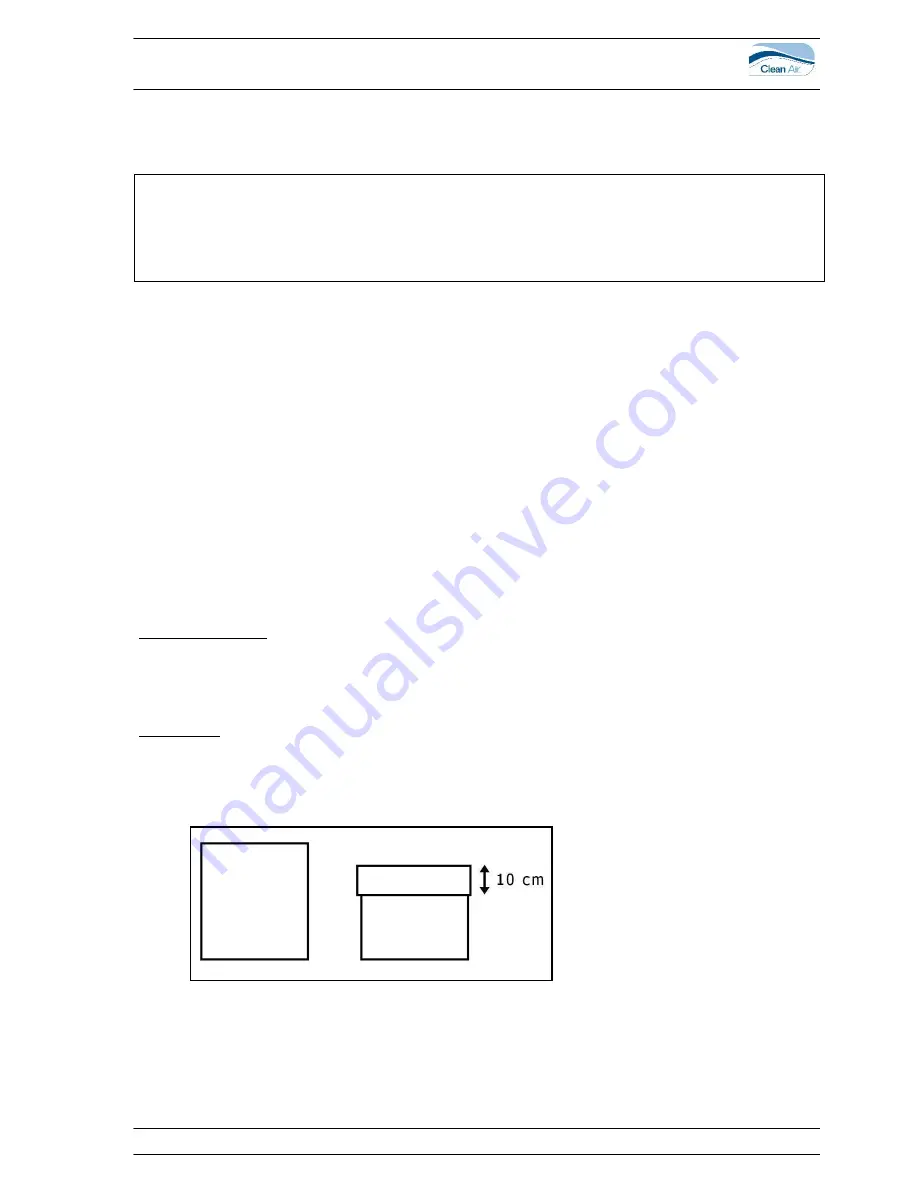
Fold the edge of the plastic bag 

±

10 cm; 


̇


Figure 10 Folding the edge of the bag 

±

10 cm 


Summary of Contents for CLF 475

Page 1: ...CLF 675 Offers protection for product Before using the cabinet please read this manual carefully The required instructions have to be carried out first Clean Air Techniek B V Kuipersweg 37 3449 JA Woerden The Netherlands Phone 31 0 348 41 11 14 Fax 31 0 348 42 26 84 E mail info cleanair eu Internet www cleanair eu ...

Page 2: ... effective HEPA filter area to obtain a laminar flow Side windows of safety glass for a good overview Furthermore the CLF is a service friendly cabinet produced in The Netherlands We thank you for buying this cabinet and wish you good times working with this cabinet Clean Air Techniek B V Version table Vers 5 0 25 11 09 MPE Document structure updated Version Date From serial number By Check Change...

Page 3: ...__________________________________________________13 4 7 Support frame optional ________________________________________________13 4 8 Main power connection _________________________________________________14 4 9 Electronics ___________________________________________________________14 4 10 Operating panel_______________________________________________________15 4 11 FL lighting __________________...

Page 4: ...Appendix II Replacement of the HEPA filters ________________________ 50 1 When does a HEPA filter need to be replaced ______________________________50 2 replacing the HEPA filter ________________________________________________50 Appendix III Efficiency test of the HEPA filters_______________________ 52 Requirements ______________________________________________________________52 Appendix IV Measu...

Page 5: ...CLF Laminar crossflow cabinet Clean Air Techniek B V UM CLF XX EN05 doc 5 Index________________________________________________________ 68 ...

Page 6: ... dust free or aseptic The cabinet therefore offers a product protection Short description of the CLF At the top of the cabinet the inflow air is drawn through a pre filter by a fan This fan blows the air in the correct proportion to the crossflow HEPA filter Because the crossflow air passed through a HEPA filter High Efficiency Particulate Air the working surface is free of particles The airflow i...

Page 7: ... no longer covered by the warranty Clean Air Techniek B V cannot be held liable for the consequences of the modifications and the dangers which might possibly occur as a result The modifications mentioned here include the connection of the cabinet to an exhaust system 2 3 Authorized persons Operating the cabinet The cabinet shall only be used by personnel which is familiar with the content regulat...

Page 8: ...ed covered to prevent that dust particles etc from the room can get into the cabinet 3 Always try to limit the amount of equipment in the workroom Each object in the workroom will disturb the pattern of the airflow and a large number of equipment may lead to serious disruptions 4 It s is important that the cabinets will be kept clean Even the smallest contamination which is not visible will be eas...

Page 9: ...ir Techniek B V UM CLF XX EN05 doc 9 2 5 Explanation user safety symbols GENERAL DANGER You can harm yourself and others seriously if you do not follow the procedures carefully HIGH VOLTAGE DANGER OF EXPLOSION DANGER BY INDUSTRIAL VEHICLE ...

Page 10: ...upplies an optional support frame which is designed for this purpose When the cabinet is purchased without a support frame it is advised to discuss the installation with the supplier 3 1 Assembly instruction The cabinet has to be placed on the support frame recommended by the supplier The assembly needs to be done as specified in instruction underneath Assembly support frame Optional Build the sup...

Page 11: ... easy accessible In case of maintenance the cabinet must be completely free of voltage This means that the connector in the socket must be easy to reach otherwise a main switch must be mounted between the cabinet and the power supply so that the cabinet can be cut off of the power circuit 3 2 Transport instructions Before moving the cabinet make sure the power cable is disconnected of the power su...

Page 12: ... I O board 5 HEPA filter 6 Lighting 7 Worktop 4 1 Type plate On type plate right upper side there are instructions that are important for the connection of the cabinet 4 2 Front panel Behind the front panel Figure 2 Pos 4 a number of electrical components are mounted Operating panel operating board Interface board including fan control To check one of these components you need to open the front pa...

Page 13: ...ng each filter will be tested separately Through the service panel on the back the crossflow filter can be reached High Efficiency Particulate Air filter 4 6 Pre filter The pre filter Figure 2 Pos 1 is a filter in the class G3 accordance with EN779 Furthermore the pre filter will enhance the life span of the HEPA filter significantly 4 7 Support frame optional For a stable positioning of the cabin...

Page 14: ...sts of Operational print positioned in the top hood behind the front panel Control print positioned behind the front panel including o Fuse holders see 9 2 on page 46 for fuse numbers o Fan control The control is free adjustable in the range between 0 and 100 o An Air velocity compensating microprocessor regulates the fan speed to compensate for main power fluctuations and filter pollution o Indep...

Page 15: ...ight unit HIGH VOLTAGE 4 12 Fan The electric driven double suction fan Figure 2 Pos 2 is maintenance free 4 13 Optional features Gas connection This connection is assembled together with a gas tap Normally both the inlet and outlet gas connections are hose connections suitable for hoses with an inner diameter of 10 mm All connections on the gas supply have to be done with a certified gas hose Afte...

Page 16: ...ocated inside the installation is standard assembled in combination with a tap in the worksurface The connection that is located outside the installation is standard assembled in the bottom of the installation UV Radiator The UV radiator is meant for disinfecting the working surface of the cabinet When the UV radiator is on the TL lighting will be switched off The UV radiator may only be switched ...

Page 17: ...switched on the UV hour counter counts the lighting period UV lamps have depending on fabricate and type a limit in effective running hours Replace the lamp frequently For more info see Appendix XII TUV Low Pressure Mercury Lamps Optional on page 65 Sockets The sockets are mounted in the working area They can be operated at the control panel See Technical specifications on page 45 for electrical d...

Page 18: ... grounded socket that is easy accessible 5 2 Display interface Figure 4 Display Interface The operating panel Figure 3 and Figure 4 consists of 1 Display 2 Function keys 4x 3 Fixed keys 4x 4 Signals Display The display has 4 lines the lowest line gives the description of the function key underneath I II III IV Cabinet switched off not safe Monday 11 06 33 MENU Socket Off Fixed keys Lighting ON OFF...

Page 19: ...larm indicator light is red Connect the power cable Cabinet switched off not safe Monday 11 06 33 MENU Socket Off 2 The fan starts Cabinet is in start up mode The alarm indicator light is red There is an acoustic alarm Push button To acknowledge this alarm push button Starting to work mode not safe Monday 11 06 33 MENU Socket Off 3 If the cabinet is secured with a user code this code has to be ent...

Page 20: ...g function is activated 1 The cabinet will lock its functions after being 5 minutes in work position When within these 5 minutes an arbitrary button is pushed e g lighting the timer starts counting again 2 From this moment the fan buttons are not available anymore The user code has to be entered to make the functions available again See Appendix IX User code on page 62 Cabinet in work mode Safe Mo...

Page 21: ...rflow to low MENU Socket Off 2 Switch off procedure With the next push on the power save button the cabinet enters the switch off procedure Cabinet switched off Not Safe Monday 11 06 33 MENU Socket Off 3 Work mode Push button Cabinet in work mode Safe Monday 11 06 33 MENU Socket Off 5 6 Turn off Remove all materials en accessories from the working area Remove all spilled liquids and other parts in...

Page 22: ... on MENU Socket Off UV On Switching UV off 3 The UV will switch off The display shows UV Off Push button UV On Cabinet switched off Not Safe UV switched off MENU Socket Off UV Off FL Fluoresced lamp Lighting and UV cannot be switched on both at the same time As a safety precaution one of them will automatically switch off 5 8 Control sockets Optional The sockets can always be switched on and off I...

Page 23: ...ns From the main menu you can go to 5 10 General information 5 11 Information about the status of the cabinet and 5 12 information about the settings 5 10 General Information In general information more details are given about Hour counter information and reset FL UV Timer Set up 7 days clock UV Set up socket 7 days clock Set up cabinet 7 days clock Set Actual time Hour counter information and res...

Page 24: ...s see 5a 5b and 5c 5a Reset all timer and clock adjustments Push button Push button Reset Push 2x button Esc for starting menu Reset hour counter and clock Reset Esc 5b Reset FL counter Push button reset A Push button Reset Push 2x button Esc for starting menu 5c Reset UV counter Push button reset B Push button Reset Push 2x button Esc for starting menu Set up 7 days clock UV 1 Cabinet in work mod...

Page 25: ...sh button Timer to set up the timer Push button Change to change the time The value can be changed by pushing button or Acknowledge the setting with button Push 2x button Esc for starting menu Clock 7 days clock 2b With the clock function for each day of the week you can set a variable period for the UV to be switched on Keep in mind you have to set the starting hour and starting minute for each d...

Page 26: ... time but also an ending time for every programmed day Otherwise the UV will stay on until 00 00 h and only then turn off See also the Example on page 26 Example Programming the 7 days clock UV will be given as an example Switch on the UV Tuesday evening 22 00 and switch off the UV Wednesday morning 06 00 See 5 9 Hour counter information and reset FL UV Timer point 5a on page 23 for deleting all H...

Page 27: ...ble Esc 2 Set up the UV 7 days clock Push button Clock for setting up the UV 7 days clock Push button Change for changing the start and end time The value can be changed by pushing button or Saturday UV on 00 00 UV off 00 00 A Enter Change Esc Saturday UV on 00 00 UV off 00 00 A Enter Esc 3 Set up UV starting time Tuesday evening 22 00 Change start day Change start hour 22 00 Change start min 22 0...

Page 28: ...hen button Change Tuesday has to be changed into Wednesday UV starting time at midnight 00 00 and UV off at 06 00 The display shows Acknowledge the setting with button Push 2x button Esc for starting menu Hour counter information A Enter Esc Wednesday UV on 00 00 UV off 06 00 A Enter Esc Hour counter information A Enter Esc 5 Check of programmed UV Clock Push 3x button Menu Push button Push button...

Page 29: ... days clock 1 Cabinet in work mode See 5 3 Starting up the cabinet on page 19 Set up display for socket 7 days clock shows Push button Menu Push button A Push 2x button Acknowledge the setting with button Cabinet in work mode Safe Monday 11 06 33 MENU Socket Off A Hour counter information B Status cabinet C Settings A B C Esc Hour counter information A Enter Esc Set up socket 7 days clock Function...

Page 30: ...e cabinet It is however not possible to switch off the cabinet itself automatically 1 Cabinet in work mode See 5 3 Starting up the cabinet on page 19 Push 5x button 1x Menu 1 x A and 3x Acknowledge the setting with button Cabinet in work mode Safe Monday 11 06 33 MENU Socket Off Setting cabinet 7 days clock Function disabled A Enter Esc Tuesday Cabinet to work mode at 0 00 Disable Change Esc 2 Dis...

Page 31: ...ter Esc 6 Acknowledge the setting Acknowledge the setting with button Push 2x button Esc for starting menu For more days hours minutes walk again through the menu and confirm each time Set up actual time 1 Cabinet in work mode See 5 3 Starting up the cabinet on page 19 Cabinet in work mode Safe Monday 11 06 33 MENU Socket Off 2 Set up actual time Set up display the actual day shows Push 6x button ...

Page 32: ...ettings of the cabinet can be checked to inform service personnel In information status more details are given about Actual velocities alarm setting and fan settings Information about the installed options Sockets UV Information about Options relays Information about Analog inputs only visible when option is activated 1 Cabinet in work mode See 5 3 Starting up the cabinet on page 19 Push button Me...

Page 33: ...0 Power save 350 Work mode 520 Actual 537 Esc Information about the installed options The display only shows when the options are installed 1 Cabinet in work mode See 5 3 Starting up the cabinet on page 19 Push button Menu Push button B Cabinet in work mode Safe Monday 11 06 33 MENU Socket Off A Hour counter information B Status cabinet C Settings A B C Esc 2 Information about the installed option...

Page 34: ... 3b Options Screen II Starting up from Step 2 Installed options display shows Push button For explanation codes see Appendix VIII Information installed options on page 52 Push button Esc for starting menu Installed Options 1 Socket present UV inst 1 flowsens Option Esc Installed Options Relays A1 Relays B1 Esc 3c Options Screen III Display only appears when analogue options are installed Starting ...

Page 35: ...9 Switch off the cabinet with button Push button Menu Push button C Push button Cabinet in work mode Safe Monday 11 06 33 MENU Socket Off A Hour counter information B Status cabinet C Settings A B C Esc 2 Push button Esc to leave the disinfection Preparations for disinfection 0000 Enter code A Enter Esc Activating the user code See Appendix IX User code on page 61 Factory adjustments 1 Cabinet in ...

Page 36: ... Esc Factory adjustments Version X X xxxxxx IO VX XX OPT VX X A Enter Esc Testing of alarms For service purposes only More information given in Appendix VI Alarm test procedureon page 55 1 Cabinet in work mode See 5 3 Starting up the cabinet on page 19 Cabinet in work mode Safe Monday 11 06 33 MENU Socket Off 2 Testing of alarms display shows Push button and C Push 3x button Push button Enter serv...

Page 37: ...t beeps will sound The cabinet will be switched on automatically 1 Cabinet in work mode See 5 3 Starting up the cabinet on page 19 Cabinet in work mode Safe Monday 11 06 33 MENU Socket Off 2 Change the language Push button Menu Push button C Push 5x button Push button Conditions The fan has to be switched off push and sockets and FL light must be switched off Push button Change to change the langu...

Page 38: ...nutes as long as the alarm situation continues The buzzer has a SPL sound pressure level of at least 10 dB A more than the sound pressure of the working cabinet See Appendix X Required specifications on page 63 GENERAL DANGER Make sure that there are no alarm situations during the use of the cabinet Never work with a cabinet with activated alarm signals The different types of alarm signals will be...

Page 39: ...e is broken Replace it with a new one If the alarm is still there contact your service organization To reset this alarm you must disconnect the power plug from the main voltage Communication error Communication error Figure 9 Contact your service organization Overview possible alarms No alarm Flow too low Flow too high Product protection Yes No Yes Table 1 Alarm situations in work position Procedu...

Page 40: ...inet Clean Air Techniek B V UM CLF XX EN05 doc 40 Read the alarms from the display Contact your service organization Working with the cabinet is not possible anymore Cabinet in work mode Not Safe Monday 11 06 33 MENU Socket Off ...

Page 41: ... in demineralised water could be applied for cleaning Remove the waste and place it in an appropriate container Literature See Mallinckrodt J T Baker data sheet SDS is MSDS number No S3670 Mallinckrodt Baker Inc 222 Red School Lane Phillipsburg NJ 08865 Procedure for cleaning the installation Never clean a used installation without precaution for instance disinfection Switch the installation in th...

Page 42: ...take place regularly To a certain extent this depends on the frequency of use of the cabinet Contact your service organization for advice Guideline for testing and maintenance given Clean Air Techniek B V is every 12 months at least Validate the system on safety Check for correct functioning of the electrical system Check the HEPA filter for efficiency and leakage Verification calibration of the a...

Page 43: ...astic bag and place it in an appropriate container Put on new gloves Place a new pre filter towel Remove the gloves and put them in the appropriate container 8 3 Replacing the fluorescent light FL light When an FL light needs to be changed switch off the power of the installation The upper front panel needs to be opened Unscrew the nuts of the coverplate The transparent light plate needs to be rem...

Page 44: ... button Factory Adjustments Version X X xxxxx I O VXXXX OPT VX X Esc 8 5 Service contract For information and orders concerning service or service contracts please contact Clean Air Techniek B V 8 6 Testing Recommended tests for first installation or after changing the HEPA filters are Velocity tests see Appendix IV Measuring method air velocities on page 53 Filter Integrity tests see Appendix III...

Page 45: ...out support frame lxhxd mm 1290 x 1350 x 890 1595 x 1350 x 890 1900 x 1350 x 890 Height including Support frame 810 mm mm 2082 2082 2082 Interior dimensions lxhxd mm 1190 x 730 x 580 1495 x 730 x 580 1805 x 730 x 580 Working area lxd mm 1190 x 540 1495 x 540 1800 x 540 Mass kg 225 270 325 Filter CLF 475 CLF 575 CLF 675 Pre filter EN 779 mm G3 G3 G3 Crossflow filter mm HEPA 12P7 HEPA 15P7 HEPA 18P7...

Page 46: ...um power socket Pnom J s W Inom A 708 3 08 805 3 5 1000 4 35 Power consumption in work mode with light switched on incl maximum power socket Pnom J s W Inom A 1433 6 23 1530 6 6 1725 7 5 Power consumption in max mode fan with light switched on excl maximum power socket P max J s W Imax A 980 4 26 1383 6 0 1427 6 2 Power consumption in max mode fan with light switched on incl maximum power socket P...

Page 47: ...LF 675 Type UV C UV C UV C Power W 30 30 30 Length UV wave nm 253 253 253 Diameter mm Ø 28 Ø 28 Ø 28 Length mm 892 892 892 Bunsen burner CLF 475 CLF 575 CLF 675 Voltage V DC 9 9 9 Power W 2 2 2 See also Appendix X Required specifications on page 63 and Appendix XI Recommended spare parts list on page 64 ...

Page 48: ...uipment is not installed x UV button is not visible on display Option UV is not programmed UV option has to be programmed please contact your service organization Contacts of the FL are not locking in the power connections Turn the FL light slightly FL light is not working UV light is on Switch of the UV light Cabinet is locked User code must be entered Enter the user code or de activate the user ...

Page 49: ...ar crossflow cabinet Clean Air Techniek B V UM CLF XX EN05 doc 49 Appendix I Support frame CLF For every type of cabinet from CLF series a specific support frame is available Figure 13 Example of a support frame ...

Page 50: ...EPA filter Make sure that the cabinet has been properly decontaminated so as to ensure that no danger exists for the service engineer the laboratory personnel and the environment If the customer has a special procedure for the disposal of contaminated material then this should be followed In case the service engineer does not think that this is sufficient then proper precautions should be made in ...

Page 51: ...ored on a safe place Put Vaseline on the seal of the HEPA filter both sides Position the HEPA filter take care for possible damage of the sealings Place the new HEPA filter Put the cabinet together in the reverse way as described above Put of your gloves and put these in an appropriate bag Do an efficiency test according to the procedure described in Appendix III The valid procedures for the dispo...

Page 52: ...A filter must have an efficiency of 99 99 A local measured value must be 0 01 When a HEPA filter does not meet the EN1822 it is allowed to repair it The surface of the reparation must not be more that 5 of the total surface of the HEPA filter When this does not have sufficient effect the HEPA filter must be replaced as described in Appendix II Replacement of the HEPA filters on page 50 Test aeroso...

Page 53: ...as described in chapter 9 on page 45 Air velocities crossflow Switch on the cabinet Measure the airspeeds in a rectangular grid with a distance between each measurement point of no greater than 300 x 300 mm The rectangular grid must be 150 mm away from each side that encloses the filter Measure with an anemometer in a verticall plane at 150 mm from the HEPA filter This measurement must be done for...

Page 54: ...CLF Laminar crossflow cabinet Clean Air Techniek B V UM CLF XX EN05 doc 54 Appendix V Lay out boards Interface board Figure 14 Interface board Control board Figure 15 Control board E010001 rev F ...

Page 55: ...he fan returns to its work mode Alarm test procedure 1 Cabinet in work mode See 5 3 Starting up the cabinet on page 19 Push button Menu Push button C Cabinet in work mode Safe Monday 11 06 33 MENU Socket Off A Hour counter information B Status cabinet C Settings A B C Esc 2 Alarm test Push 3x button Push button Enter the test code 7733 Push button Testing of alarms A Enter Esc Testing Alarms 0000 ...

Page 56: ...rspeed indicators which are changeable with the use of the buttons and First and last values are the set up alarm borders for example Data of Crossflow DF lowest level is 0 36 m s highest level is 0 54 m s and the actual value for crossflow velocity is 0 45 m s The fan speed is shown in tenths of percents 0 min and 1000 max ...

Page 57: ...n Air Techniek B V UM CLF XX EN05 doc 57 Appendix VII Stickers 1 Sticker cabinet type This sticker can be found on the outside on top of the cabinet For an example of the sticker see the picture underneath 2 Sticker I O board 3 Electro ...

Page 58: ...the microprocessor Start up in Menu Display Push button Menu Push button B Push button for screen I Push button for screen II Push button for screen III Screen I Installed options Option Options No Electrical window E 0 Esc Figure 16 Example of screen I Explanation of the codes from the menu E0 no electrical window E1 electrical window no functionality for fan only available for EF S series E2 wor...

Page 59: ... Functions are factory adjustments and cannot be changed by the user Overview functions of relay K3 B1 B5 Alarm B1 B5 relay switching K3 on output J22 at the IO print B1 the K3 relay is activated if the main fan is switched on working mode saving mode B2 the K3 relay is activated if the main fan is on half speed mode saving mode B3 the K3 relay is activated if the main fan is in the working mode B...

Page 60: ...rt beeps with intervals To install alarm limits start from the menu as described in 5 11 Information status cabinet on page 32 The display only shows when the options are installed 1 Starting from screen III Push button Analog inputs AD1 5 0 C AD2 1 0 µM A Enter Esc 2 Settings for High and Low Alarm Push button Choose the required limits L Low H High for AD1 and AD2 using button and Push button Es...

Page 61: ...a special code to break the unknown or forgotten user code In that case enter code 2882 and the original pre installed code 0001 is valid again 1 Cabinet in work mode See 5 3 Starting up the cabinet on page 19 Push button Menu Push button C Push button User code mode appears Push button The information for the user code shows The user code can be activated or deactivated Enter the user code using ...

Page 62: ...code Push button Menu and C Push 4x button Push button Enter actual user code Push button Enter the new valid user code Push button User code 0000 Enter code A Enter Esc Input user code New code 0000 Old code 0001 A Enter Esc The pre installed valid user code is 0001 In case of emergency there is a special code to break the unknown or forgotten user code In that case enter code 2882 and the origin...

Page 63: ...ection agents and resistant to general use of cabinet Manufacturer specifications Side walls Safety glass or UV resistant safety plastics Manufacturer specifications Side walls Conform to EN 12100 1 2003 and 12100 2 2003 EN 12100 1 2003 and 12100 2 2003 Electrical safety Conform to EN 61010 EN 61010 Gas supply optional safety Conform to EN 12100 1 2003 and 12100 2 2003 EN 12100 1 2003 and 12100 2 ...

Page 64: ...001 FL Holder CLF 675 1460001 Component Type specific Art no Air velocity sensor crossflow All 1330023 Starter FL All 2040001 Mains filter All 6400010 Optional All Gas vacuum tap All 2800002 2800004 Bunsenburner All Misc UV tube All 1440008 UV holder All 2030003 UV starter All 2040001 Ballast UV All 1240003 Nightdoor for UV protection CLF 475 S402001 Nightdoor for UV protection CLF 575 S404001 Nig...

Page 65: ...CLF Laminar crossflow cabinet Clean Air Techniek B V UM CLF XX EN05 doc 65 Appendix XII TUV Low Pressure Mercury Lamps Optional ...

Page 66: ...at Type _______________________ Project number _______________________ Serial number _______________________ is in compliance with the following directives Machine Directive 2006 42 EC Low Voltage Directive 2006 95 EC Electromagnetic Compatibility Directive 2004 108 EC And declares furthermore that the following national technical standards and specifications are used NEN EN 1822 High efficiency p...

Page 67: ...CLF Laminar crossflow cabinet Clean Air Techniek B V UM CLF XX EN05 doc 67 Appendix XIV Memo ...

Page 68: ... 33 58 60 Interface board 54 ISO 11201 63 ISO 14644 1 63 ISO 14644 3 63 ISO 14738 63 Lay out boards 54 Menu functions 23 Night mode 21 Part list critical components 64 Periodic maintenance 42 Placing the cabinet 11 Power save mode 21 Procedure in case of alarms 39 Replacement of the pre filter 42 Replacing the Fluorescent light 43 Replacing the HEPA filter 50 Screen I 34 58 Screen II 34 59 Screen ...

Reviews: