


1)
This scrubber is designed for wet
cleaning on waterproof surfaces inside
buildings. All other usage is improper.
2)
The manufacturer takes no responsibil-
ity for damage due to improper use of the
scrubber. The user takes the entire risk
for damage due to improper use.
3)
Following the operating, maintenance
and repair instructions are required.
4)
The appropriate accident prevention
rules, as well as other known regulations
for health and safety in operation must be
followed.
5)
Any changes to the scrubber will void
the warranty. Any damage that may occur
as a result of those changes will be the
sole responsibility of the owner.
6)
Check the suitability of the floor surface
before using the scrubber.
7)
Check that the wheels and brushes will
not damage any surface to be cleaned,
especially gymnasium floors.
8)
If the scrubber is misused, the manu-
facturer will not be responsible for any
form of warranty.
Operation Safety
1) DO NOT
run the brushes when the
scrubber is stationary as it may cause
damage to the surface being cleaned.
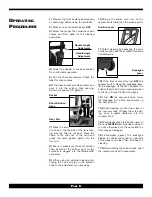
2)
Tilt scrubber back when moving, espe-
cially over thresholds or sills to prevent
damage to the brushes.
3)
When transporting in elevators, there
safety regulations and precautions are to
be respected as well as maximum load
capacity of the elevator.
Chemicals
1)
Always consult correct use and safety
precautions as detailed on manufacturers
label. If required, wear appropriate recom-
mended clothing and safety glasses.
2)
Only use low foaming and non-flamma-
ble chemicals which do not include haz-
ardous components.
3) DO NOT
use flammable, poisonous,
hazardous or explosive chemicals.
O
PERATION OF
S
CRUBBER
S
AFETY
&
C
HEMICAL
I
NFORMATION
Type Of Cleaning
Chemicals
Scrub Brushes/Pads
Daily or weekly cleaning on water-
Floor cleaner, degreaser, maintenance
Nylon brushes, red, green or white
proof surfaces.
cleaner, scented cleaner depending
pads depending on condition of floor.
upon the degree of dirt on surface.
Note:
Maximum water and chemical temperature is 72° F
W
HAT
T
O
U
SE
W
ITH
S
CRUBBER
If you maintain this scrubber properly it will
stay in working order for a long period of
time. Check the unit regularly for any wear
and tear.
1)
Check rubber squeegee blades.
2) DO NOT
clean scrubber with pressure
washer.
3)
When servicing or making repairs use
only genuine original equipment parts.
4)
Repairs and service should only be
made by an authorized service center or
the factory.
5)
Monthly Maintenance: Check all gas-
kets, tighten loose nuts and bolts.
6)
Every (6) months check vacuum motor
carbon brushes, if worn to
3
/
8
” length or
less replace.
R
OUTINE
M
AINTENANCE
P
AGE
4


