

P
AGE
7
D
AILY
M
AINTENANCE
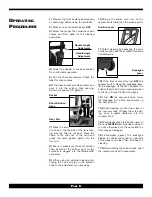
1)
Remove dome cover from the tank and
set it down behind the scrubber.
2)
Lift tank by the grip and carry it to a
floor drain or sink.
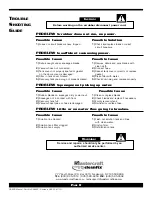
Drain Plug
3)
Remove the drain plug from recovery
tank and empty the tank.
4)
Remove solution bladder from tank by
pulling tab on the bladder upwards gently.
5)
Once the edge of the bladder comes
over tank rim opening, push the entire
bladder into the tank and remove bladder
through the large opening of the recovery
tank.
6)
Empty the solution bladder and rinse
with clean water.
7)
Hang up the solution bladder to dry.
8)
Flush out the recovery tank with clean
water to remove dirty solution. Drain tank.
9)
When replacing the bladder make sure
it fits properly into the recovery tank.
10)
The bladder tab must be fitted on the
left side of solution tank opening seen
from the rear operators position.
11)
Clean the dome, cover, vacuum hose
and solution hose thoroughly. Make sure
that the solution hose filter is also
cleaned.
12)
Clean the scrubber and squeegee
with a damp cloth.
13)
Store squeegee in the raised position
to prevent damaging the blades.
14)
Rinse brushes or pads with clean
water. To remove brushes or pads, tilt
scrubber back and slightly pull them down-
ward. When replacing make sure they
lock into the grooves.
DO NOT leave solution in the bladder.
After each use thoroughly wash out the bladder.
This will help extend the bladder’s life.
I
MPORTANT
:


